How to Fix a Dripping Tap in Bathroom Sink
A dripping tap in a bathroom sink is more than just an annoyance; it represents a constant waste of water and, consequently, money. Beyond the financial implications, the persistent drip can be disruptive and can contribute to mineral buildup and staining in the sink basin. Addressing a dripping tap promptly is crucial. This article provides a comprehensive guide to diagnosing the cause of a dripping tap and offers step-by-step instructions for various repair methods.
Before attempting any repairs, safety is paramount. The first step is to shut off the water supply to the tap. Typically, shut-off valves are located under the sink. There will be separate valves for both the hot and cold water lines. Turn the valves clockwise until they are completely closed. Once the water is shut off, turn on the tap to relieve any remaining pressure in the lines. This will prevent water from spraying when the tap is disassembled.
Following the water shut-off, gather the necessary tools. The specific tools required will depend on the type of tap, but a basic toolkit should include adjustable wrenches, screwdrivers (both flathead and Phillips head), pliers, penetrating oil, a utility knife, and a replacement washer or cartridge (depending on the diagnosis). Having a rag or small container handy to catch any residual water is also advisable.
Identifying the Type of Tap
The repair process varies significantly depending on the type of tap installed. Identifying the tap type is therefore the essential first step in the repair process. Common tap types found in bathrooms include compression taps, ball taps, cartridge taps, and ceramic disc taps. Each type has a distinct internal mechanism, and understanding these differences is crucial for effective repair.
Compression Taps: Compression taps are the oldest and most basic type of tap. These taps rely on a rubber washer that is compressed against a valve seat to stop the flow of water. They are typically identified by having separate handles for hot and cold water, which require multiple turns to fully open or close the valve. Common issues with compression taps include worn-out washers and corroded valve seats.
Ball Taps: Ball taps, also known as single-handle taps, use a ball valve mechanism to control the water flow and temperature. A single handle rotates to control both the hot and cold water mix. These taps are characterized by a single handle mounted on top of a ball-shaped cartridge. Leaks in ball taps are often caused by worn-out O-rings, springs, or the ball valve itself.
Cartridge Taps: Cartridge taps are another type of single-handle tap but utilize a cylindrical cartridge instead of a ball valve. The handle moves up and down to control the water flow and rotates to adjust the water temperature. When cartridge taps leak, it's usually because the cartridge's O-rings or the cartridge itself has worn out. These are generally considered easier to repair than ball taps.
Ceramic Disc Taps: Ceramic disc taps are the most modern type of tap, known for their smooth operation and durability. They use two ceramic discs that slide against each other to control the water flow. The single handle moves to adjust both water flow and temperature. Leaks in ceramic disc taps are less common than in other types, but they can occur if the ceramic discs become damaged or if the seals around the discs fail. Repairing these taps often requires replacing the entire ceramic disc cartridge.
Repairing a Compression Tap
Compression taps are a common source of drips, especially in older homes. The primary cause of a dripping compression tap is a worn-out washer. The constant pressure and friction of the washer against the valve seat cause it to deteriorate over time, creating gaps that allow water to leak through.
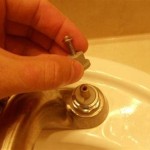
To repair a compression tap, begin by removing the decorative cap on top of the handle. This cap usually snaps off or unscrews, revealing a screw that secures the handle to the valve stem. Unscrew this screw and carefully remove the handle. It may be necessary to use penetrating oil if the handle is stuck. Once the handle is removed, you will see a packing nut. Use an adjustable wrench to loosen and remove the packing nut. Underneath the packing nut, you will find the valve stem assembly. Carefully unscrew and remove the valve stem assembly.
At the bottom of the valve stem assembly, you will see the washer held in place by a screw. Remove the screw and take out the old washer. Examine the valve seat for any signs of corrosion or damage. If the valve seat is corroded, it may need to be resurfaced using a valve seat grinding tool. Clean the valve seat thoroughly before installing the new washer. Place the new washer onto the valve stem assembly and secure it with the screw. Ensure the washer is properly seated and the screw is tightened securely.
Reassemble the tap by reversing the disassembly process. Insert the valve stem assembly back into the tap body and tighten the packing nut. Replace the handle and secure it with the screw. Finally, snap or screw the decorative cap back onto the handle. Turn the water supply back on slowly and check for leaks. If the tap is still dripping, double-check the washer installation and, if necessary, resurface the valve seat.
Repairing a Cartridge Tap
Cartridge taps are characterized by their single-handle operation and utilize a cartridge to control water flow and temperature. When a cartridge tap drips, the issue often lies with the cartridge's O-rings or with the cartridge itself. Replacing the cartridge is a straightforward repair that can effectively stop the drip.
Start by turning off the water supply to the tap. Next, locate and remove the handle. The method for removing the handle varies depending on the tap model. Some handles have a set screw hidden underneath a decorative cap, while others simply pull off. Consult the manufacturer's instructions or a repair manual for specific guidance. Once the handle is removed, you will typically find a retaining clip or nut that holds the cartridge in place. Remove the retaining clip or nut using pliers or a wrench.
With the retaining clip or nut removed, you should be able to pull the old cartridge straight out of the tap body. It may be necessary to wiggle the cartridge gently to loosen it. Before inserting the new cartridge, examine the inside of the tap body for any debris or mineral buildup. Clean the interior thoroughly using a cloth or brush. Apply a thin layer of plumbing grease to the new cartridge's O-rings to ensure smooth installation and a proper seal.
Insert the new cartridge into the tap body, aligning it correctly with the tap's internal mechanism. Secure the cartridge with the retaining clip or nut. Replace the handle and secure it according to the manufacturer's instructions. Turn the water supply back on slowly and check for leaks. If the tap continues to drip, double-check the cartridge installation and ensure that the retaining clip or nut is properly secured.
After any type of tap repair, it is crucial to monitor the tap for a few days to ensure the leak has been completely resolved. Sometimes, minor adjustments may be needed to fully eliminate the drip. Regular maintenance, such as cleaning the tap and checking for signs of wear, can help prevent future drips and extend the life of the tap.

How To Fix A Dripping Tap Living By Homeserve

How To Fix A Dripping Tap

How To Fix A Leaky Faucet True Value

Properly Fixing A Leaky Sink Faucet Wallside Windows

How To Fix A Dripping Bathroom Faucet

5 Reasons Your Faucet Is Dripping Water How To Fix It

Part 1 Of 2 How To Fix A Dripping Faucet

How To Fix A Leaking Tap Find Out More In This Guide

5 Reasons Your Faucet Is Dripping Water How To Fix It

How To Fix A Dripping Tap With Bigbathroom Bathroom Basin Taps Sink Mixer Shower Faucet Repair
Related Posts


