How To Fix a Bathroom Shower Faucet
A malfunctioning shower faucet can range from a minor annoyance to a significant source of wasted water and potential property damage. Understanding the common causes of shower faucet problems and possessing the knowledge to address them is a valuable skill for any homeowner. This article provides a comprehensive guide to diagnosing and repairing various shower faucet issues, empowering individuals to undertake these tasks safely and effectively.
Identifying the Problem
Before attempting any repairs, a thorough assessment of the shower faucet's behavior is crucial. Common symptoms include dripping, low water pressure, difficulty controlling water temperature, and unusual noises. Each of these issues can point to specific underlying causes, guiding the troubleshooting process.
Dripping Faucet: A persistent drip, even when the faucet is turned off, is often indicative of a worn or damaged washer, O-ring, or cartridge. Mineral buildup can also contribute to leaks by preventing a tight seal. Determining the exact location of the drip (e.g., from the faucet spout or around the handle) can help narrow down the potential culprits. In some rarer cases, the valve seat may be corroded or damaged.
Low Water Pressure: Reduced water flow from the showerhead can stem from several factors. Mineral deposits accumulating in the showerhead itself are a frequent cause, restricting the passage of water. Partially closed shut-off valves or problems with the home's overall water pressure can also contribute. A more complex issue could involve a blockage in the water supply pipes leading to the shower faucet.
Difficulty Controlling Water Temperature: Fluctuations in water temperature, or an inability to achieve the desired temperature, often suggest problems with the mixing valve. This valve blends hot and cold water to achieve the user-selected temperature. Faulty temperature limit stops, which restrict the maximum hot water temperature, can also cause issues.
Unusual Noises: Squealing, whistling, or banging sounds originating from the shower faucet can indicate loose components, high water pressure, or problems with the plumbing within the walls. The specific nature of the noise can sometimes help pinpoint the source of the problem. Water hammer, a loud banging sound caused by sudden changes in water flow, can be addressed by installing water hammer arrestors.
Gathering Necessary Tools and Materials
Having the right tools and materials on hand before beginning any repairs is essential for a smooth and efficient process. The specific tools required will depend on the type of faucet being serviced, but some common necessities include:
Screwdrivers: A set of both Phillips-head and flat-head screwdrivers in various sizes is indispensable for removing handles and accessing internal components.
Adjustable Wrench: An adjustable wrench is needed for loosening and tightening nuts and fittings of different sizes. A pipe wrench may also be required for larger plumbing connections.
Pliers: Regular and needle-nose pliers are useful for gripping small parts and reaching into tight spaces.
Allen Wrenches: Some faucet handles are secured with Allen screws, requiring a set of Allen wrenches in various sizes.
Penetrating Oil: Applying penetrating oil to corroded or stuck screws and fittings can make them easier to remove without damage.
Plumber's Tape: Also known as Teflon tape, plumber's tape is used to create a watertight seal on threaded connections.
Replacement Parts: Before disassembling the faucet, identify the type of faucet and purchase the necessary replacement parts, such as washers, O-rings, cartridges, and valve seats. Having these parts on hand prevents delays and ensures the repair can be completed promptly.
Basin Wrench: This tool is useful for reaching nuts and bolts in tight spaces underneath the sink or within the shower wall.
Cleaning Supplies: Abrasive pads, vinegar, and other cleaning solutions can be used to remove mineral deposits from faucet components.
Repairing Common Shower Faucet Issues
Once the problem has been identified and the necessary tools and materials have been gathered, the repair process can begin. The following sections outline the steps involved in addressing some of the most common shower faucet issues.
Repairing a Dripping Faucet (Washer/O-Ring Replacement):
1. Shut off the water supply to the shower faucet. This is typically achieved by turning off the shut-off valves located near the faucet or, in some cases, by turning off the main water supply to the house.
2. Protect the shower surface by laying down a towel or drop cloth to prevent scratches or damage.
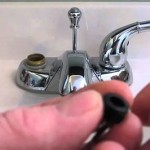
3. Remove the faucet handle. This usually involves loosening a screw located on the handle itself or underneath a decorative cap. In some cases, the handle may simply pull off after loosening a set screw with an Allen wrench.
4. Disassemble the faucet stem or cartridge. The stem is the internal component that controls the flow of water. The specific disassembly process will vary depending on the type of faucet, but typically involves loosening a nut or retaining clip.
5. Inspect the washer, O-rings, and valve seat for wear or damage. Replace any worn or damaged components with new ones that match the original specifications.
6. Clean the valve seat to remove any mineral deposits or corrosion. A valve seat wrench can be used to remove the seat for easier cleaning or replacement if necessary.
7. Reassemble the faucet stem or cartridge, ensuring that all components are properly aligned and securely fastened.
8. Reattach the faucet handle and turn on the water supply. Check for leaks and make any necessary adjustments.
Addressing Low Water Pressure (Showerhead Cleaning):
1. Detach the showerhead from the shower arm. This typically involves unscrewing the showerhead by hand or using an adjustable wrench.
2. Disassemble the showerhead. Some showerheads have removable restrictors that can be cleaned or removed entirely to increase water flow. Note the direction of the restrictor for reassembly.
3. Soak the showerhead components in vinegar or a descaling solution to dissolve mineral deposits. Stubborn deposits can be scrubbed with a brush or toothpick.
4. Rinse the showerhead components thoroughly with clean water to remove any remaining cleaning solution and debris.
5. Reassemble the showerhead and reattach it to the shower arm. Use plumber's tape on the threads to create a watertight seal.
6. Turn on the water supply and check the water pressure. If the problem persists, consider checking the shut-off valves and the overall water pressure in the house.
Adjusting Water Temperature (Temperature Limit Stop Adjustment):
1. Locate the temperature limit stop. This is usually located under the faucet handle or behind a decorative plate. The exact location will vary depending on the faucet model.
2. Adjust the temperature limit stop. Most temperature limit stops can be adjusted by rotating a dial or moving a pin to control the maximum hot water temperature. Refer to the faucet manufacturer's instructions for specific adjustment procedures.
3. Test the water temperature after making adjustments. Use a thermometer to measure the water temperature and ensure that it is within the desired range. Continue adjusting the temperature limit stop until the desired temperature is achieved.
4. Reassemble the faucet handle and decorative plate. Ensure that all components are securely fastened.
Safety Precautions
Prioritizing safety is paramount when undertaking any plumbing repairs. Adhering to the following precautions can help prevent accidents and injuries:
Turn off the water supply: Always shut off the water supply to the fixture being worked on before starting any repairs. This prevents flooding and potential water damage. Double-check that the water is completely shut off by opening the faucet and verifying that no water flows.
Protect your eyes: Wear safety glasses to protect your eyes from debris and splashes.
Avoid electrical hazards: If the shower faucet is located near electrical outlets or wiring, exercise extreme caution to avoid electrical shock. Turn off the power to the circuit breaker that supplies electricity to the bathroom before working near any electrical components.
Use appropriate tools: Using the correct tools for the job can prevent damage to the faucet and reduce the risk of injury. Avoid using excessive force when tightening or loosening connections.
Consult a professional: If the repair is beyond one's skill level or if any concerns arise, it is always best to consult a qualified plumber. Attempting complex repairs without the necessary expertise can lead to further damage and potentially dangerous situations.
Lead Precautions: If working on older plumbing, be aware of the possibility of lead. Wear a respirator and thoroughly wash hands after working with older pipes and solder. Consider having the water tested for lead content after completing the repair.
By following these guidelines, homeowners can effectively troubleshoot and repair common shower faucet problems, saving money and ensuring the proper functionality of their plumbing systems. Remember, if the repair is complex or beyond your capabilities, contacting a qualified plumber is always the safest and most reliable option.

How To Fix A Leaky Tub Shower Faucet

How To Fix A Leaking Bathtub Faucet Diy Family Handyman

Bathroom Repair How To Fix A Leaking Shower Faucet

How To Fix A Shower Diverter Mr Rooter Plumbing

How To Fix A Leaky Single Handle Tub Shower Faucet Danco

Shower Tub Faucet Repair Maplewood Plumbing

Tub And Shower Faucet Trim Replacement Armchair Builder Blog Build Renovate Repair Your Own Home Save Money As An Owner

How To Fix A Leaky Shower Faucet Diy Family Handyman

How To Fix A Leaking Bathtub Faucet The Home Depot

Tub Faucet Spout Diverter Pull Lever Broke Off Diy Fix
Related Posts


