How to Fix Up an Old Bathroom Vanity Top
Many homeowners face the challenge of dealing with an aging bathroom vanity top. Whether it's stained, scratched, chipped, or simply outdated, an old vanity top can significantly detract from the overall aesthetic of a bathroom. Fortunately, there are several effective methods to rejuvenate a worn vanity top, ranging from simple cleaning and repair techniques to more involved refinishing processes. This article explores various approaches to fixing up an old bathroom vanity top, offering guidance on how to assess the damage, choose the appropriate repair method, and execute the work to achieve a refreshed and visually appealing result.
Before embarking on any repair or refurbishment project, it is crucial to accurately assess the condition of the vanity top. Different materials require different approaches, and understanding the extent of the damage will guide the selection of the most suitable restoration method. Common materials used for bathroom vanity tops include laminate, ceramic tile, solid surface (such as Corian), cultured marble, and natural stone (like granite or marble). Each material has its own vulnerabilities and requires specific cleaning and repair techniques.
The initial assessment should focus on identifying the types of damage present. Scratches, stains, chips, cracks, water damage, and discoloration are common issues. Determining the severity of the damage is equally important. Superficial scratches and stains may be addressed with simple cleaning or polishing, while deeper scratches, chips, or cracks may necessitate more extensive repairs. Water damage, especially in laminate or wood-based vanities, may indicate more significant structural issues that require replacement rather than repair.
Cleaning and Stain Removal
The first step in fixing up an old bathroom vanity top often involves a thorough cleaning. Over time, soap scum, hard water stains, and general grime can accumulate, making the vanity top appear dull and aged. A simple cleaning can sometimes dramatically improve the appearance. Start with a mild cleaning solution such as dish soap and warm water. Use a non-abrasive sponge or cloth to gently scrub the surface, paying attention to areas with visible staining or buildup.
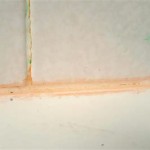
For more stubborn stains, consider using specialized cleaning products designed for the specific vanity top material. For instance, a grout cleaner can effectively remove stains from tile grout. Mildew stains can be addressed with a solution of bleach and water, used with caution and proper ventilation. Hard water stains may respond to vinegar-based cleaners. Always test the cleaning solution in an inconspicuous area first to ensure it does not damage or discolor the vanity top.
Once the vanity top has been thoroughly cleaned, rinse it with clean water and dry it with a soft cloth. This step is crucial to prevent water spots and ensure that the cleaning solution does not leave a residue. If the vanity top still appears dull or stained after cleaning, proceed to more advanced repair or refinishing techniques.
Repairing Scratches and Chips
Scratches and chips are common types of damage that can detract from the appearance of a bathroom vanity top. The repair method depends on the material of the vanity top and the severity of the damage. For laminate vanity tops, scratch repair kits are available that contain colored fillers designed to match the existing laminate. These kits typically involve applying the filler to the scratch, leveling it with a putty knife, and then wiping away the excess. Deeper scratches may require multiple applications of filler to achieve a smooth and even surface.
For solid surface vanity tops, such as Corian, scratches can often be buffed out using fine-grit sandpaper or a specialized polishing compound. Start with a coarser grit sandpaper to remove the scratch and then gradually move to finer grits to smooth out the surface. Polishing compounds can further enhance the appearance and restore the shine. Chips in solid surface vanity tops can be repaired using a two-part epoxy resin that is tinted to match the color of the vanity top. The epoxy is applied to the chip, allowed to cure, and then sanded and polished to blend seamlessly with the surrounding surface.
For cultured marble vanity tops, scratch and chip repair kits are also available. These kits typically contain a resin-based filler and a color-matching system. The filler is applied to the damaged area, allowed to cure, and then sanded and polished to a smooth finish. Matching the color of the filler to the existing cultured marble can be challenging, so it is important to carefully follow the instructions provided with the repair kit.
When repairing chips or cracks, it is crucial to thoroughly clean the damaged area before applying any filler or epoxy. Remove any loose debris and ensure that the surface is dry. This will help to ensure a strong and durable bond between the filler and the vanity top material.
Refinishing and Resurfacing Options
When the damage to an old bathroom vanity top is extensive, or when a homeowner simply wants to update the appearance, refinishing or resurfacing may be the best option. Refinishing involves applying a new coating to the existing vanity top, while resurfacing involves applying a completely new surface layer. The choice between refinishing and resurfacing depends on the material of the vanity top and the desired outcome.
For laminate vanity tops, refinishing is often the more practical option. Laminate can be painted with specialized paints designed for use on laminate surfaces. Before painting, the laminate should be thoroughly cleaned and sanded to create a slightly rough surface for the paint to adhere to. A primer specifically designed for laminate surfaces should be applied before the topcoat of paint. Multiple coats of paint may be required to achieve full coverage and a smooth finish. Consider using a durable, water-resistant paint designed for use in bathrooms.
Another option for laminate vanity tops is to resurface them with a new sheet of laminate. This involves removing the old laminate (if possible) and then applying a new sheet of laminate using contact cement. This process requires careful measurement and cutting to ensure a precise fit. It also requires skill in working with contact cement to avoid bubbles and wrinkles.
For solid surface vanity tops, refinishing can involve sanding and polishing the surface to remove scratches and stains and restore the shine. This process requires specialized equipment and expertise. Another option is to apply a clear coating to the solid surface to protect it from future damage. This coating can also enhance the appearance of the vanity top.
For cultured marble vanity tops, refinishing can involve applying a new gel coat to the surface. This process requires careful preparation of the surface and the application of multiple coats of gel coat. The gel coat provides a durable and water-resistant finish. It can also be tinted to change the color of the vanity top.
Refinishing and resurfacing projects often involve the use of chemicals and tools that can be harmful if not used properly. Always follow the manufacturer's instructions carefully and wear appropriate safety gear, such as gloves, masks, and eye protection. It is also important to work in a well-ventilated area to avoid inhaling harmful fumes.
In conclusion, fixing up an old bathroom vanity top requires careful assessment, appropriate repair techniques, and attention to detail. By following the methods outlined in this article, homeowners can rejuvenate their worn vanity tops and achieve a refreshed and visually appealing bathroom.

Replace Vanity Top And Faucet Diy Network

Paint Bathroom Vanity Countertop Sink So Easy A Piece Of Rainbow

Paint Bathroom Vanity Countertop Sink So Easy A Piece Of Rainbow
:max_bytes(150000):strip_icc()/7_remove-vanity-top-56a4a26d3df78cf772835b2d.jpg?strip=all)
How To Remove A Bathroom Vanity Cabinet

How To Remove Replace A Vanity Top Easy Bathroom Sink Remodel

Paint Bathroom Vanity Countertop Sink So Easy A Piece Of Rainbow

Diy Vanity Tops For Your Bathroom

How To Replace A Vanity Top And Save Craving Some Creativity
:max_bytes(150000):strip_icc()/8_remove-sink-base-cabinet-56a4a26d3df78cf772835b30.jpg?strip=all)
How To Remove A Bathroom Vanity Cabinet

Paint Bathroom Vanity Countertop Sink So Easy A Piece Of Rainbow
Related Posts


