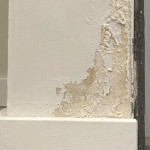
How To Get Mildew Out Of Your Bathroom Ceiling
Mildew, a common household nuisance, thrives in damp and poorly ventilated areas, making bathroom ceilings prime real estate for its growth. Addressing mildew promptly is crucial, not only for aesthetic reasons but also to prevent potential health problems and structural damage. This article provides a comprehensive guide on how to effectively remove mildew from a bathroom ceiling, preventing its return and maintaining a healthy bathroom environment.
Before embarking on the cleaning process, it is important to understand the difference between mildew and mold. While often used interchangeably, they are distinct organisms. Mildew typically appears as a surface fungus, initially white or gray, often turning black over time. Mold, on the other hand, can penetrate deeper into surfaces and comes in a wider range of colors, including green, black, and brown. Mildew is generally easier to remove than mold; however, if you suspect a significant mold problem or if the mildew infestation is extensive and deeply embedded, professional remediation is highly recommended.
Preparation is key to a successful mildew removal project. Gather the necessary supplies and prioritize personal safety before beginning.
Preparing for Mildew Removal
Prior to initiating the cleaning process, adequate preparation will ensure both safety and efficiency. This involves gathering the appropriate cleaning supplies, taking necessary safety precautions, and ensuring proper ventilation.
Gathering Supplies: The following materials are typically required for mildew removal from a bathroom ceiling:
- Cleaning Solution: Several options are available, including a bleach solution (1 part bleach to 10 parts water), a vinegar solution (equal parts white vinegar and water), or a commercial mildew remover specifically designed for bathroom use. Always read and follow the manufacturer's instructions for commercial products.
- Spray Bottle: For even application of the cleaning solution.
- Scrub Brush or Sponge: Choose a brush with stiff bristles or a durable sponge for effective scrubbing.
- Gloves: To protect hands from cleaning solutions and potential irritants.
- Eye Protection: Goggles or safety glasses to shield eyes from splashes.
- Mask or Respirator: To prevent inhalation of cleaning fumes or mildew spores.
- Ladder or Step Stool: To safely reach the ceiling. Ensure it is stable and placed on a level surface.
- Drop Cloth or Plastic Sheeting: To protect the floor and surrounding fixtures from drips and spills.
- Clean Cloths or Rags: For wiping down the ceiling after cleaning.
- Bucket: For holding clean water for rinsing.
Safety Precautions: Safety should be the utmost priority when dealing with mildew and cleaning solutions. The following precautions should be adhered to:
Adequate Ventilation: Open windows and doors to provide ample airflow. If natural ventilation is insufficient, consider using a fan to circulate air. This helps to minimize the inhalation of fumes and prevents the build-up of moisture during the cleaning process.
Protective Gear: Wear gloves, eye protection, and a mask or respirator. These will protect your skin, eyes, and respiratory system from potential irritation or allergic reactions caused by cleaning solutions or mildew spores.
Testing the Cleaning Solution: Before applying the cleaning solution to the entire ceiling, test it on an inconspicuous area to ensure it does not damage or discolor the surface. This is especially important for painted ceilings.
Protecting the Bathroom: Cover the floor and surrounding fixtures with a drop cloth or plastic sheeting to prevent spills and splatters. This will save time and effort on cleanup later.
Cleaning the Mildew from the Bathroom Ceiling
With the necessary preparations complete, the focus shifts to the actual cleaning process. This involves applying the chosen cleaning solution, scrubbing the affected area, and thoroughly rinsing the ceiling.
Applying the Cleaning Solution: Using the spray bottle, apply the chosen cleaning solution evenly to the affected areas of the ceiling. Avoid over-saturating the surface, as excessive moisture can exacerbate the problem. Allow the cleaning solution to sit on the mildewed areas for approximately 10-15 minutes. This allows the solution to penetrate the mildew and loosen its grip on the surface.
Scrubbing the Ceiling: After the cleaning solution has had time to work, use the scrub brush or sponge to gently scrub the mildewed areas. Apply moderate pressure, working in small sections at a time. Avoid excessive scrubbing, which can damage the ceiling paint or surface. For stubborn mildew stains, reapply the cleaning solution and allow it to sit for a longer period before scrubbing again.
Rinsing the Ceiling: Once the mildew has been removed, rinse the ceiling thoroughly with clean water. Use a clean cloth or sponge to wipe away any remaining cleaning solution. Ensure all traces of the cleaning solution are removed, as residue can attract dirt and moisture, potentially leading to future mildew growth. Change the water frequently to maintain its cleanliness.
Drying the Ceiling: After rinsing, allow the ceiling to air dry completely. This may take several hours or even overnight, depending on the humidity level in the bathroom. To expedite the drying process, open windows and doors to improve ventilation. Alternatively, use a fan to circulate air around the ceiling. Ensure the ceiling is completely dry before proceeding to any further steps, such as repainting.
Preventing Future Mildew Growth
Removing existing mildew is only half the battle. Implementing preventative measures is essential to avoid its recurrence. This involves addressing the underlying causes of mildew growth, such as excessive moisture and poor ventilation.
Improving Ventilation: Adequate ventilation is paramount in preventing mildew growth. Ensure the bathroom is well-ventilated by:
Using the Exhaust Fan: Always use the exhaust fan during and after showers or baths to remove excess moisture from the air. Allow the fan to run for at least 20-30 minutes after showering to ensure the bathroom is thoroughly ventilated.
Opening Windows and Doors: Whenever possible, open windows and doors to allow fresh air to circulate. This helps to reduce humidity levels and promote air flow.
Addressing Leaks: Identify and repair any leaks in the bathroom, such as dripping faucets, leaky showerheads, or plumbing leaks. Leaks provide a constant source of moisture, which fuels mildew growth. Regularly inspect plumbing fixtures and address any issues promptly.
Reducing Moisture: Taking steps to reduce moisture levels in the bathroom will significantly inhibit mildew growth:
Wiping Down Surfaces: After showering or bathing, wipe down wet surfaces, such as shower walls, doors, and countertops. This helps to prevent water from pooling and creating a breeding ground for mildew.
Using a Squeegee: Use a squeegee to remove water from shower walls and doors after each use. This is an effective way to minimize moisture build-up. Encourage all household members to adopt this practice.
Washing Bath Mats and Towels Regularly: Wash bath mats and towels frequently to remove moisture and prevent mildew from growing on them. Ensure they are thoroughly dried before reuse.
Using Mold-Resistant Paint: Consider using mold-resistant paint on the bathroom ceiling and walls. These paints contain additives that inhibit the growth of mold and mildew. When repainting, thoroughly clean the surface beforehand to remove any existing mildew spores.
Regular Cleaning: Implementing a regular cleaning schedule will help to prevent mildew from taking hold. Clean the bathroom regularly, paying particular attention to areas prone to moisture, such as the ceiling, shower walls, and grout lines. Use a mild disinfectant cleaner to kill any mildew spores that may be present.
By following these steps diligently, homeowners can effectively remove mildew from their bathroom ceilings and prevent its future recurrence, contributing to a healthier and more pleasant bathroom environment.

Bathroom Ceiling Mold Removal When To Clean Call Branch Environmental

Ceiling Mold Growth Learn The Cause And How To Prevent It Environix

Mold On Bathroom Ceiling How To Clean Off

Ceiling Mold Growth Learn The Cause And How To Prevent It Environix

Mold On Bathroom Ceiling How To Remove From

Bathroom Mold How To Identify And Get Rid Of In Environix

How To Remove Black Mold From A Bathroom Ceiling

Mold On Bathroom Ceiling How To Clean Off

I Tried Out Mrs Hinch Fans 29p Mould Removing And These Were The Results Express Co

How To Get Rid Of Mold On Your Bathroom Ceiling Aqa
Related Posts

