How To Get Rid Of Mould From Bathroom Tiles
Mould growth on bathroom tiles is a common household problem, primarily due to the consistently damp and humid environment. Bathrooms, by their very nature, are exposed to high levels of moisture from showers, baths, and sinks. This moisture, combined with poor ventilation, creates an ideal breeding ground for various types of mould. Addressing mould growth promptly is crucial for maintaining a healthy and aesthetically pleasing bathroom environment. Ignoring mould can lead to further structural damage, persistent odours, and potential health concerns for occupants.
The presence of mould is not merely a cosmetic issue; it can indicate underlying problems within the bathroom's infrastructure. Leaking pipes concealed behind walls, insufficient waterproofing, and inadequate ventilation are all potential contributors to excessive moisture buildup. Identifying and rectifying these underlying issues is essential for preventing recurrent mould growth, even after thorough cleaning. This article will explore effective methods for removing mould from bathroom tiles and address preventative measures to minimize the likelihood of its return.
Identifying Mould and Assessing the Severity
Accurate identification of the substance growing on bathroom tiles is the first step in effective mould removal. Mould typically appears as black, green, brown, or white patches on surfaces. It can be fuzzy, slimy, or powdery in texture. While some surface discoloration may simply be mildew, a type of surface mould, true mould penetrates deeper into porous materials and requires more aggressive treatment. Differences between mildew and more established mould can be subtle, therefore, erring on the side of caution and treating all discoloration as potential mould is advisable.
Assessing the extent of the mould growth is equally important. Small, localized patches may be manageable with readily available household cleaning solutions. However, extensive mould coverage, particularly if accompanied by musty odours or signs of structural damage, may necessitate professional remediation. Areas larger than 10 square feet often warrant the involvement of a qualified mould removal specialist. Professionals possess the expertise, equipment, and protective gear to safely and effectively address significant mould infestations, minimizing the risk of further contamination and health hazards.
Furthermore, individuals with pre-existing respiratory conditions, allergies, or compromised immune systems should exercise caution when dealing with mould. Even minor exposure can trigger adverse reactions. In such cases, it is strongly recommended to enlist the services of a professional mould removal company to ensure a safe and thorough remediation process.
Effective Cleaning Solutions and Techniques
Several cleaning solutions can effectively remove mould from bathroom tiles. The choice of solution depends on the severity of the mould growth, the type of tile, and personal preferences regarding chemical exposure. It is always prudent to test any cleaning solution on an inconspicuous area first to ensure it does not damage or discolor the tile.
Bleach Solution: A solution of one part bleach to ten parts water is a commonly used and effective mould killer. Bleach is a strong oxidizing agent that can effectively kill mould spores. However, it should be used with caution, as it can be corrosive and irritating to the skin and respiratory system. Proper ventilation is essential when using bleach, and protective gear such as gloves, eye protection, and a mask are highly recommended. Apply the bleach solution to the affected areas, allow it to sit for 10-15 minutes, and then scrub thoroughly with a stiff-bristled brush. Rinse the tiles with clean water and dry them completely.
Vinegar: White vinegar is a natural and less harsh alternative to bleach. Its acidic properties make it effective at killing mould. Pour undiluted white vinegar into a spray bottle, spray it onto the mouldy tiles, and let it sit for an hour. Then, scrub the tiles with a brush and rinse with water. Vinegar has a distinct odour, but it dissipates quickly and is generally considered safe for household use.
Baking Soda: Baking soda is another natural and non-toxic option. It is a mild abrasive that can help to scrub away mould and absorb moisture. Mix baking soda with water to form a paste, apply it to the affected areas, and let it sit for a few minutes. Then, scrub with a brush and rinse with water. Baking soda is also effective at deodorizing and can help to prevent the recurrence of mould.
Hydrogen Peroxide: A 3% hydrogen peroxide solution can also be used to kill mould. Pour the solution into a spray bottle, spray it onto the mouldy tiles, and let it sit for 10-15 minutes. Then, scrub the tiles with a brush and rinse with water. Hydrogen peroxide is a mild bleaching agent and can help to lighten stains caused by mould.
Commercial Mould Removers: Numerous commercial mould removers are available. It is essential to carefully read and follow the manufacturer's instructions. These products typically contain stronger chemicals and require proper ventilation and protective gear.
Regardless of the cleaning solution used, thorough scrubbing is crucial for removing mould. A stiff-bristled brush, such as a grout brush or toothbrush, is ideal for reaching into the grout lines where mould often accumulates. For stubborn mould stains, a grout scraper may be necessary. After scrubbing, rinse the tiles thoroughly with clean water and dry them completely with a clean cloth or towel. Ensure the bathroom is well-ventilated to prevent moisture buildup.
Preventing Future Mould Growth
Preventing future mould growth is paramount to maintaining a healthy and mould-free bathroom. Addressing the underlying causes of moisture buildup is the most effective long-term strategy. Several preventative measures can be implemented to reduce humidity and discourage mould growth.
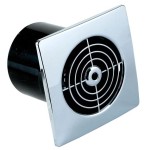
Improve Ventilation: Adequate ventilation is crucial for removing moisture from the bathroom. Ensure the bathroom exhaust fan is functioning correctly and use it during and after showers and baths. If the bathroom does not have an exhaust fan, consider installing one. Opening a window after showering can also help to ventilate the room.
Repair Leaks Promptly: Leaking pipes, faucets, or showerheads can contribute to excessive moisture. Repair any leaks as soon as they are detected to prevent water from accumulating and creating a breeding ground for mould.
Dry Surfaces: After showering or bathing, wipe down wet surfaces, such as tiles, shower doors, and countertops, with a clean towel. This helps to remove excess moisture and prevent mould from growing.
Clean Regularly: Regular cleaning of the bathroom, including tiles and grout, can help to prevent mould from accumulating. Use a mild detergent and water to clean the surfaces, paying particular attention to areas prone to moisture buildup.
Use Mould-Resistant Products: When renovating or remodeling the bathroom, consider using mould-resistant materials, such as mould-resistant paint, grout, and caulk. These products contain additives that inhibit mould growth.
Seal Grout: Grout is porous and can absorb moisture, providing a breeding ground for mould. Sealing grout with a grout sealer can help to prevent water from penetrating and reduce the likelihood of mould growth. Reapply grout sealer periodically as needed.
Dehumidifiers: In particularly humid climates or in bathrooms with poor ventilation, using a dehumidifier can help to remove excess moisture from the air and prevent mould growth.
Maintain Proper Airflow: Avoid blocking air vents or placing items too close to walls, as this can restrict airflow and create pockets of stagnant air where moisture can accumulate. Ensure there is adequate space for air to circulate freely.
By implementing these preventative measures, you can significantly reduce the risk of mould growth in the bathroom and maintain a healthier and more comfortable environment. These steps require consistent effort and vigilance but are crucial for long-term mould control. Regularly inspecting the bathroom for signs of water damage or mould growth and addressing any issues promptly can prevent minor problems from escalating into more significant infestations.
The combination of effective cleaning techniques and preventative measures creates a multi-faceted approach to managing mould in the bathroom. While cleaning removes existing mould, prevention focuses on eliminating the conditions that promote its growth. This proactive strategy ensures a healthier and more aesthetically pleasing bathroom environment.

How Do I Remove Black Mould From Shower Floor

Black Mold In The Shower How To Clean It Kitchen With Matt

How To Clean Mold In Shower Grout Tips And Tricks Certified Care

Black Mold In The Shower How To Clean It Kitchen With Matt

The Top 4 Causes Of Bathroom Mould How To Get Rid It

Cleaning Mrs Hinch Fans Share Easy Ways To Clean Tile Grout Express Co

How To Remove Mold From Shower Caulk Or Tile Grout Fabulously Clean

Kill Bathroom Mould Without Bleach Electrodry Blogs

What Do About Black Mold In The Bathroom Bob Vila

How To Get Rid Of Pink Mold In Your Shower
Related Posts


