How to Increase Water Pressure in Your Bathroom Sink
Low water pressure in a bathroom sink can be a frustrating inconvenience. Simple tasks like washing hands, brushing teeth, or filling a container become time-consuming and less effective. Understanding the potential causes of low water pressure and implementing appropriate solutions is crucial for restoring optimal functionality to the sink.
Diagnosing the root of the problem is the first step. Low water pressure can stem from a variety of factors, ranging from problems localized to the sink itself to issues affecting the entire plumbing system. This article will outline several common causes and provide practical steps to troubleshoot and improve water pressure specifically within the bathroom sink.
Identifying Contributing Factors
Before embarking on any repairs, it is essential to determine whether the low water pressure is isolated to the bathroom sink or a more widespread issue. Check other fixtures in the house, such as showers and other faucets. If the water pressure is consistently low throughout the house, the problem likely lies with the main water supply or a building-wide plumbing issue. Contacting the municipal water authority or engaging a professional plumber may be necessary in such instances.
If the low water pressure is confined to the bathroom sink, the causes are likely more localized and manageable. Potential culprits include:
- Clogged aerator
- Partially closed shut-off valves
- Kinked or damaged supply lines
- Internal faucet issues
- Accumulated sediment in the plumbing
Addressing each of these potential problems systematically can help pinpoint the source of the low water pressure and guide the appropriate corrective action.
Cleaning or Replacing the Aerator
The aerator is a small mesh screen located at the tip of the faucet. Its purpose is to mix air with the water stream to create a smoother, splash-free flow. However, aerators are prone to collecting mineral deposits, sediment, and other debris over time, which can significantly restrict water flow and reduce pressure.
To clean the aerator, first, shut off the water supply to the faucet using the shut-off valves located beneath the sink. These valves typically have a small handle that needs to be turned clockwise to stop the water flow. Once the water is shut off, carefully unscrew the aerator from the faucet spout. Some aerators can be unscrewed by hand, while others may require pliers or a wrench. Exercise caution to avoid damaging the aerator or the faucet finish.
Once the aerator is removed, inspect it for any visible signs of blockage. Rinse the aerator under running water to remove any loose debris. For more stubborn deposits, soak the aerator in a solution of white vinegar and water for several hours or overnight. The vinegar will help dissolve mineral buildup. After soaking, scrub the aerator with a small brush, such as an old toothbrush, to remove any remaining debris. Rinse thoroughly before reassembling.
If the aerator is severely corroded or damaged, it may be more cost-effective to replace it altogether. Aerators are readily available at most hardware stores and are relatively inexpensive. When purchasing a replacement aerator, ensure that it is compatible with the faucet model. Install the new aerator by screwing it onto the faucet spout, tightening it securely but without overtightening. Restore the water supply by opening the shut-off valves and check the water pressure.
Inspecting and Opening Shut-off Valves
The shut-off valves located beneath the sink control the water supply to the faucet. These valves are typically used to turn off the water supply during repairs or maintenance. It is possible that one or both of these valves are not fully open, which can restrict water flow and reduce pressure at the faucet.
Locate the shut-off valves beneath the sink. There will typically be one for hot water and one for cold water. Ensure that both valves are fully open. The handle of the valve should be turned counterclockwise as far as it will go without forcing it. If the valves are stiff or difficult to turn, lubricating them with a small amount of penetrating oil may help. Allow the oil to soak in for a few minutes before attempting to turn the valves again.
If the valves are corroded or damaged, they may need to be replaced. Replacing shut-off valves is a relatively straightforward plumbing task that can be performed by a homeowner with basic plumbing skills. However, if unsure, it is always best to consult with a qualified plumber.
After ensuring that the shut-off valves are fully open, check the water pressure at the faucet. If the water pressure has improved, the problem was likely due to partially closed valves. If the water pressure remains low, further investigation is necessary.
Examining Supply Lines for Kinks or Damage
The supply lines are the flexible tubes that connect the shut-off valves to the faucet. These lines can sometimes become kinked, bent, or damaged, which can restrict water flow and reduce pressure. Inspect the supply lines carefully for any visible signs of damage, such as kinks, bends, or cracks.
If a supply line is kinked, try to straighten it out. In some cases, the kink may be permanent, and the supply line will need to be replaced. If a supply line is cracked or damaged, it must be replaced immediately to prevent leaks. Turn off the water supply to the faucet using the shut-off valves before replacing the supply lines.
Supply lines are available in various lengths and materials, such as braided stainless steel or flexible plastic. When purchasing replacement supply lines, ensure that they are the correct length and compatible with the faucet and shut-off valves. Install the new supply lines by connecting them to the faucet and shut-off valves, tightening the connections securely but without overtightening. Restore the water supply by opening the shut-off valves and check for leaks.
Braided stainless steel supply lines are generally more durable and resistant to kinking than flexible plastic lines. They are also less likely to burst or leak, making them a worthwhile investment.
Addressing Internal Faucet Issues
If the above steps do not resolve the low water pressure issue, the problem may lie within the faucet itself. Faucets contain internal components, such as cartridges, valves, and waterways, which can become clogged with sediment or mineral deposits over time. These blockages can restrict water flow and reduce pressure.
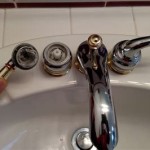
Disassembling a faucet can be complex and requires some plumbing knowledge. It is essential to consult the faucet's manufacturer's instructions or a repair manual before attempting to disassemble it. Typically, the process involves removing the faucet handle, spout, and internal components. Inspect each component for signs of blockage or damage. Clean any clogged components with a solution of white vinegar and water, scrubbing with a small brush to remove any debris.
If any faucet components are damaged or worn, they should be replaced. Replacement parts are often available from the faucet manufacturer or at hardware stores. When reassembling the faucet, ensure that all components are properly aligned and tightened. Restore the water supply and check the water pressure. If the water pressure remains low after reassembling the faucet, it may be necessary to replace the entire faucet.
Identifying the specific type of faucet (e.g., compression, cartridge, ball, or ceramic disc) is critical for proper disassembly and repair. Each type has a unique internal design and requires different tools and techniques.
Flushing the Plumbing System
In some cases, low water pressure can be caused by accumulated sediment or mineral deposits in the plumbing pipes themselves. This is more likely to occur in older homes with galvanized steel pipes, which are prone to corrosion and mineral buildup. Flushing the plumbing system can help remove these deposits and improve water flow.
To flush the plumbing system, start by turning off the water heater. Open all the faucets and showers in the house, starting with the lowest fixtures and working your way up to the highest. Allow the water to run for several minutes to flush out any sediment or debris. After flushing each fixture, turn it off. Once all the fixtures have been flushed, turn the water heater back on.
In cases of severe sediment buildup, professional plumbing services may be required to perform a more thorough flushing of the plumbing system. This may involve using specialized equipment to force water through the pipes at high pressure.
Regularly flushing the plumbing system, especially in older homes, can help prevent the buildup of sediment and maintain optimal water pressure throughout the house.

Low Water Pressure In Bathroom Sink 4 Reasons And 8 Fixes Bargain

How To Fix Low Water Pressure In Faucet

Low Water Pressure In Bathroom Sink 4 Reasons And 8 Fixes Bargain

How To Fix Low Water Pressure In A Bathroom Sink Worst Room

Faucet Has Low Water Pressure After Repair Fix

4 Common Reasons Your Bathroom Water Pressure Is Low Reichelt Plumbing

How To Fix Low Water Pressure In Faucet

How To Get Better Water Pressure From Your Bathroom Kitchen Sink

How To Increase Water Pressure On A Well Boost

Fix Low Flow Faucet Plumbing Clip
Related Posts


