How to Install a Bathroom Faucet Cartridge
Replacing a bathroom faucet cartridge is a common plumbing repair that can often be handled by homeowners with basic tools and a bit of patience. A faulty cartridge is typically the culprit behind a dripping faucet or inconsistent water temperature. Instead of replacing the entire faucet, replacing the cartridge can restore proper function at a significantly lower cost. This article provides a step-by-step guide on how to install a bathroom faucet cartridge, ensuring a successful repair.
Before beginning any plumbing project, it is crucial to prioritize safety and preparation. Turning off the water supply to the faucet is the most important initial step. This prevents water from flooding the work area and causing damage. Gather all necessary tools and the correct replacement cartridge. Understanding the faucet type and the existing cartridge model is essential for selecting the appropriate replacement part. Failure to do so will result in incompatibility and a futile repair attempt.
Key Point 1: Preparation and Identification
The initial stage of replacing a bathroom faucet cartridge involves meticulous preparation and accurate identification of the required components. This ensures a smooth and efficient repair process.
Begin by shutting off the water supply to the faucet. Typically, shut-off valves are located under the sink, one for hot water and one for cold water. Turn both valves clockwise until they are completely closed. To confirm the water is off, turn on the faucet. If water continues to flow, double-check that the shut-off valves are fully closed. If the shut-off valves are malfunctioning, locate the main water shut-off valve for the entire house and turn it off. This is usually located in the basement, garage, or near the water meter. After turning off the main supply, open the faucet to relieve any remaining pressure in the lines.
Next, protect the sink basin. Place a towel or cloth in the sink to prevent scratches and protect dropped tools. This simple precaution can save the sink from unsightly damage during the repair. Gather the necessary tools. These generally include: a screwdriver set (both Phillips and flathead), an adjustable wrench, a pair of pliers, a utility knife, a small container to hold small parts, penetrating oil (such as WD-40), and the new replacement cartridge.
The most critical step in preparation is identifying the correct replacement cartridge. The easiest way to do this is to identify the faucet manufacturer and model number. The model number is often printed on the faucet body, under the sink, or in the original product documentation. Once the manufacturer and model number are known, search online or consult a plumbing supply store to find the corresponding cartridge. An alternative method is to remove the old cartridge and take it to a local plumbing supply store for identification. Comparing the old cartridge with the new one before installation is essential to ensure compatibility. Check the size, shape, and any specific markings or features of the cartridge. A mismatch, even a slight one, can prevent the faucet from functioning correctly or even damage the faucet body.
Key Point 2: Cartridge Removal
Removing the old cartridge requires patience and careful handling to avoid damaging the faucet body or surrounding components.
Start by removing the decorative handle cap. This cap typically covers a screw that secures the faucet handle. Use a small flathead screwdriver or a utility knife to gently pry off the cap. Be careful not to scratch the faucet finish. Once the cap is removed, use a screwdriver to remove the handle screw. Some screws may be hidden beneath a decorative button or plate. After removing the screw, carefully pull off the faucet handle. It might be necessary to gently wiggle the handle back and forth to loosen it. If the handle is stuck, apply a small amount of penetrating oil around the base of the handle and allow it to soak for a few minutes.
With the handle removed, the cartridge retaining clip or nut will be visible. The retaining clip is usually a small, horseshoe-shaped piece of metal that holds the cartridge in place. Use pliers or a screwdriver to carefully remove the clip. If it's a retaining nut, use an adjustable wrench to loosen and remove the nut. Note the orientation of the clip or nut as it is removed, as it will need to be reinstalled in the same way.
Now, attempt to remove the old cartridge. Grip the cartridge firmly with pliers and gently wiggle it back and forth while pulling upward. If the cartridge is stuck, apply penetrating oil around the base of the cartridge and let it soak for several minutes. Avoid using excessive force, as this could break the cartridge inside the faucet body, making removal even more difficult. If the cartridge breaks, use needle-nose pliers or a specialized cartridge removal tool to extract the remaining pieces. Clean the inside of the faucet body with a cloth to remove any mineral deposits or debris that may interfere with the new cartridge.
Key Point 3: Cartridge Installation and Reassembly
The final stage involves installing the new cartridge and reassembling the faucet, ensuring proper function and leak-free operation.
Before installing the new cartridge, inspect it for any defects or damage. Ensure that all O-rings and seals are in place and properly seated. Apply a thin layer of plumber's grease to the O-rings to ensure a smooth installation and prevent leaks. Align the new cartridge with the faucet body. There is usually a specific orientation for the cartridge, often indicated by markings on the cartridge or faucet body. Push the cartridge firmly into place until it is fully seated. Make sure it is flush with the top of the faucet body.
Reinstall the cartridge retaining clip or nut. If it's a clip, ensure it is securely snapped into place. If it's a nut, tighten it securely with an adjustable wrench, but avoid over-tightening, as this could damage the cartridge or faucet body. Reinstall the faucet handle. Align the handle with the cartridge stem and push it into place. Secure the handle with the handle screw and cover the screw with the decorative handle cap. Ensure the handle operates smoothly and without excessive play.
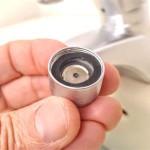
Turn the water supply back on slowly, starting with the cold water and then the hot water. Check for leaks around the base of the faucet, the handle, and the spout. If leaks are present, turn off the water supply and inspect the cartridge installation. Ensure that all connections are tight and that the cartridge is properly seated. It may be necessary to remove the cartridge and reapply plumber's grease to the O-rings. Once the faucet is leak-free, test the water temperature and flow. Ensure that the hot and cold water mix properly and that the water flows smoothly from the spout. If the water flow is restricted, check for debris in the aerator at the end of the spout and clean it if necessary.
Following these steps carefully will guide the user through the process of installing a bathroom faucet cartridge effectively, addressing common issues and ensuring proper functionality of the faucet. While most cartridge replacements are straightforward, some faucets may have unique designs or require specialized tools. If encountering difficulties or uncertainties, consulting a qualified plumber is recommended to avoid further damage or complications.
Regular maintenance, such as cleaning the aerator and checking for leaks, can extend the life of the faucet and prevent the need for frequent cartridge replacements. Periodically inspecting the faucet and addressing minor issues promptly can save a significant amount of time and money in the long run. Furthermore, consider the water quality in the area. Hard water can accelerate the wear and tear on faucet components, including the cartridge. Installing a water softener can help mitigate the effects of hard water and prolong the lifespan of the faucet.
In conclusion, replacing a bathroom faucet cartridge is a manageable task for many homeowners. By following the outlined steps, individuals can effectively repair a dripping faucet, restore proper water temperature control, and avoid the expense of replacing the entire faucet fixture. Proper preparation, careful removal of the old cartridge, and precise installation of the new cartridge are crucial for a successful outcome. Always prioritize safety and consult a professional if needed to ensure the longevity and functionality of the repaired faucet.

Fixing Faucets How To Replace A Difficult Tub Faucet Cartridge

Quickly Replace A Leaky Faucet Cartridge Diy Family Handyman

Bathroom Faucet Cartridge Replacement
Gerber How To Install A Cartridge

Bathroom Faucet Cartridge Replacement
Replacing A Faucet Cartridge Elkay S Step By Guide

How To Replace Leaky Cartridges In A Bathroom Faucet Repair

How To Replace The Cartridge On A Glacier Bay Leaky Faucet

Replace Bathroom Faucet Cartridge Doityourself Com Community Forums

How To Install A Delta Widespread Bathroom Faucet
Related Posts


