How to Install a Bathroom Vent Fan Without Attic Access
Installing a bathroom vent fan is crucial for maintaining a healthy and comfortable bathroom environment. It removes moisture and odors, preventing mold growth and improving air quality. However, accessing the attic for installation is not always possible, especially in houses with limited attic space or those with a flat roof. This article outlines a step-by-step guide on how to install a bathroom vent fan without attic access, providing an alternative solution for those facing these limitations.
1. Choose the Right Fan and Location
The first step is to select the appropriate vent fan for your bathroom's size and ventilation requirements. Consider the fan's CFM (cubic feet per minute) rating, which indicates the amount of air it can move. A higher CFM rating is ideal for larger bathrooms or those with high humidity levels.
Next, determine the best location for the fan. Ideally, it should be positioned above the shower or bathtub to effectively remove moisture and steam. If there are existing plumbing vents or electrical conduits, ensure the fan installation doesn't interfere with them.
Before purchasing the fan, check for any local building codes or regulations regarding vent fan installation, such as required CFM ratings and minimum distances from fixtures.
2. Prepare the Installation Area
Once the fan and location are chosen, prepare the installation area by removing any existing fixtures or obstructions. This may involve dismantling old light fixtures or removing items that obstruct access to the ceiling.
Mark the desired location for the fan on the ceiling using a pencil or marker. Ensure the markings are accurate and centered to ensure the fan sits correctly.
Inspect the area for electrical wiring and other utilities that may need to be adjusted or relocated to avoid interference with the fan installation.
3. Cut the Ceiling Opening
Using a drywall saw, cut an opening in the ceiling according to the fan's installation instructions. The size of the opening should accommodate the fan's housing and any supporting brackets or components.
Take care not to damage the ceiling or any electrical wiring while cutting the opening. If working with plaster ceilings, use a sharp utility knife and a chisel to create the opening.
Clean the edges of the opening to prevent any debris from entering the fan or obstructing the installation.
4. Install the Fan Housing
Attach the vent fan's housing to the ceiling using the provided mounting brackets or screws. Ensure the housing is securely fastened and level. If your fan comes with a pre-installed backdraft damper, make sure it is properly positioned and functioning.
Carefully connect the fan's electrical wiring to the existing ceiling fixture wiring. Use wire nuts to secure the connections and ensure proper insulation.
5. Install the Vent Ductwork
The most challenging aspect of installing a bathroom vent fan without attic access is routing the vent ductwork. There are several options for this:
- Exterior Wall Vent: Drill a hole through the exterior wall to connect the vent ductwork to an outside vent termination. This option requires careful sealing to prevent drafts and water infiltration.
- Through the Roof: If you have access to the roof, you can route the vent duct through the roof and install a vent cap. This option requires proper sealing to prevent water damage and potential noise from wind.
- Chase Wall Vent: If your house has a chase wall, you can route the vent duct through the chase wall to the exterior. This option is ideal if you have an existing chase wall that can accommodate the vent ductwork.
- Existing Vent: If your house has an existing vent system, you can connect the new fan to the existing ductwork. This is the most straightforward option, but it may require modifications to the existing system.
Choose the most feasible option based on your home's structure and limitations. Ensure proper sealing around the vent ductwork to prevent air leaks and moisture buildup.
6. Connect the Fan to the Power Supply
After the fan is installed and connected to the vent ductwork, connect it to the power supply by attaching the wires to the correct terminals in the junction box. Check the fan's installation instructions for specific wiring diagrams and requirements.
Once the wiring is complete, turn on the circuit breaker to test the fan's operation. Ensure the fan is running smoothly and the vent ductwork is properly connected.
7. Final Touches
After testing the fan, apply sealant around the vent housing and the ceiling opening to prevent air leaks and moisture buildup. This step is crucial for maintaining optimal ventilation and preventing damage to the ceiling.
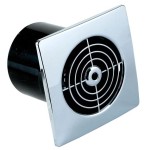
Install the vent fan's cover plate or grille, ensuring it is securely attached and aligned with the surrounding ceiling.
Clean up any mess or debris resulting from the installation process.
Finally, check the operation of the fan once again to confirm it is working properly. Regular maintenance, such as cleaning the fan and vent ductwork, will ensure the fan continues to function efficiently and effectively.
Install A Bathroom Fan 5 Steps Instructables
Install A Bathroom Fan 5 Steps Instructables
Does A Bathroom Extractor Fan Have To Run The Outside
Broan Invent Series 0 7 Sone 80 Cfm White Bathroom Fan Energy Star In The Fans Heaters Department At Com
Utilitech 2 Sone 70 Cfm White Bathroom Fan Energy Star In The Fans Heaters Department At Com
Air Sealing Bathroom And Kitchen Exhaust Fans Building America Solution Center
Premium 1 300 Cfm Gable Mount Power Attic Ventilator In Red Maxx Air
Are Powered Attic Ventilators Ever A Good Idea Greenbuildingadvisor
Can Bathroom Exhaust Fans Discharge Into Attics Waypoint Inspection
Broan 80 Cfm Ventilation Fan 1 2 Sones Energy Star Ae80b Réno Dépôt
Related Posts


