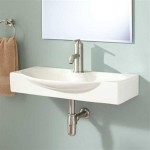
How To Install A Floating Bathroom Sink In Kitchen
Installing a floating bathroom sink in a kitchen can present a unique and stylish alternative to traditional sink setups. While typically found in bathrooms, a floating sink can be adapted for kitchen use, offering a modern, minimalist aesthetic and space-saving benefits. This article provides a comprehensive guide to installing a floating bathroom sink in a kitchen, covering key considerations, necessary tools, and step-by-step instructions.
Before embarking on this project, it's crucial to assess the suitability of the kitchen space. Floating sinks require a strong wall to support their weight, especially when filled with water and items. Understanding the wall's construction, plumbing requirements, and adhering to local building codes are paramount for a safe and successful installation.
Assessing Wall Structure and Plumbing
The first and perhaps most critical step involves evaluating the wall where the floating sink will be mounted. Standard drywall over wood studs might not be sufficient. Ideally, the wall should be reinforced, potentially with concrete blocks or a stud configuration designed to bear significant weight. Locate the studs using a stud finder and determine their spacing.
If the wall is not structurally sound, consider adding horizontal bracing between the studs to distribute the weight more evenly. Alternatively, consult with a structural engineer or experienced contractor to assess the necessary reinforcements. Ignoring this step can lead to the sink detaching from the wall, causing significant damage and potential injury.
Plumbing considerations are equally important. The existing water supply lines (both hot and cold) and drainpipe need to be accessible and potentially relocated to align with the sink's connections. Measure the distance from the existing plumbing to the desired sink location. If the existing plumbing is not in the correct location, it will need to be extended or re-routed. This typically involves cutting into the existing pipes and adding new sections using appropriate fittings. Ensure that all plumbing work complies with local codes.
Prior to any plumbing modifications, shut off the main water supply to the house. Turn off both the hot and cold water valves. Then, drain the existing pipes to prevent leaks. Use a pipe cutter to cut the existing pipes. Deburr the cut edges of the pipes with a deburring tool. Apply flux to the cut edges and the inside of the fittings. Solder the fittings to the pipes using a torch. Allow the soldered joints to cool. Then, turn the water supply back on slowly and check for leaks.
Consider the drain's P-trap configuration. A P-trap is essential to prevent sewer gases from entering the kitchen. Ensure that there is sufficient space behind the sink to accommodate the P-trap and any necessary extensions to connect it to the main drain line. The drain tailpiece from the sink will connect to the P-trap, which in turn connects to the drainpipe in the wall. The height of the drainpipe in the wall needs to be correct for the P-trap to function properly. If the drainpipe is too low, the P-trap will be too low and might not have enough drop to drain properly. If the drainpipe is too high, the P-trap may interfere with the sink. Consult with a plumber if unsure about the plumbing adjustments.
Gathering Tools and Materials
A successful installation requires having the right tools and materials readily available. This section outlines the essential items needed for the project.
Tools:
- Stud finder: For locating wall studs.
- Level: To ensure the sink is mounted straight.
- Drill with various drill bits: For drilling pilot holes and mounting bolts.
- Wrench set and pipe wrench: For plumbing connections.
- Pipe cutter: For cutting copper or PVC pipes.
- Soldering torch and solder (if working with copper pipes): For soldering plumbing connections.
- Pencil: For marking measurements and drilling points.
- Measuring tape: For accurate measurements.
- Safety glasses and gloves: For personal protection.
Materials:
- Floating bathroom sink: Select a sink appropriate for kitchen use, considering size, depth, and material.
- Mounting brackets: Choose heavy-duty brackets designed to support the weight of the sink. These brackets typically come with the sink or available separately.
- Mounting hardware: Includes bolts, screws, and anchors suitable for the wall type.
- Plumbing fittings: Such as P-trap, drain tailpiece, supply lines, and shut-off valves. Ensure these are compatible with the existing plumbing.
- Plumber’s tape and pipe joint compound: For sealing plumbing connections to prevent leaks.
- Caulk: For sealing the sink to the wall to prevent water damage.
It's advisable to purchase high-quality materials to ensure the longevity and safety of the installation. Skimping on materials can lead to future problems, such as leaks or structural failure.
Step-by-Step Installation Process
With the wall prepared and tools and materials gathered, the actual installation can begin. Follow these steps carefully for a secure and properly functioning floating sink.
1.
Marking the Mounting Points:
Use the level and measuring tape to determine the exact location for the sink. Consider the desired height and alignment with other kitchen features. Mark the stud locations with a pencil. Use the mounting brackets as a template to mark the drill holes on the wall. Ensure the mounting points align with the studs or reinforced areas of the wall.2.
Drilling Pilot Holes:
Use a drill with an appropriately sized drill bit to drill pilot holes at the marked locations. If drilling into concrete or masonry, use a masonry drill bit. Ensure the pilot holes are deep enough to accommodate the mounting hardware.3.
Attaching the Mounting Brackets:
Secure the mounting brackets to the wall using the appropriate mounting hardware. For wood studs, use lag screws. For concrete or masonry, use anchor bolts. Ensure the brackets are level and securely fastened to the wall. This step is crucial for supporting the weight of the sink.4.
Mounting the Sink:
Carefully lift the sink and align it with the mounting brackets. Slide the sink onto the brackets and secure it according to the manufacturer's instructions. Some sinks might have a locking mechanism or require additional screws to secure them to the brackets. Double-check that the sink is level and stable.5.
Connecting the Plumbing:
Connect the drain tailpiece to the sink drain. Attach the P-trap to the drain tailpiece and connect it to the drainpipe in the wall. Use plumber’s tape or pipe joint compound on the threaded connections to prevent leaks. Connect the hot and cold water supply lines to the sink's faucet connections. Install shut-off valves on the supply lines for future maintenance.6.
Testing for Leaks:
Turn on the water supply valves slowly and check for leaks at all plumbing connections. Tighten any loose connections as needed. Run water in the sink to ensure proper drainage. Inspect the P-trap for leaks. Observe the plumbing for several minutes to ensure there are no slow leaks.7.
Sealing the Sink:
Apply a bead of caulk around the perimeter of the sink where it meets the wall. This will prevent water from seeping behind the sink and causing damage. Smooth the caulk with a wet finger for a neat finish. Allow the caulk to dry completely before using the sink.8.
Final Inspection:
Once the installation is complete, conduct a final inspection. Ensure the sink is level, stable, and securely mounted. Verify that all plumbing connections are leak-free. Clean up any debris or tools from the work area.By following these steps carefully, a floating bathroom sink can be successfully installed in a kitchen, adding a touch of modern elegance and functionality to the space. Remember, if uncertain about any aspect of the installation, consult with a qualified plumber or contractor.
How To Install A Wall Mount Sink In 6 Steps Signature Hardware

Diy Floating Bathroom Vanity Remodelando La Casa
How To Install A Wall Mount Sink In 6 Steps Signature Hardware

Install A Floating Vanity

Diy Floating Bathroom Vanity Remodelando La Casa

How To Install A Wall Mount Sink And Plumb It Too
How To Install A Floating Vanity In 4 Steps

Bathroom Sink Plumbing Installation
How To Install A Wall Mount Sink In 6 Steps Signature Hardware

Diy Bathroom Floating Vanity With Drawers Hydrangea Treehouse
Related Posts


