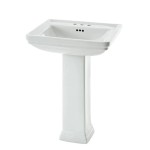
How To Install A New Faucet in Your Bathroom
Replacing a bathroom faucet is a relatively straightforward DIY project that can significantly enhance the look and functionality of your bathroom. With the right tools and a bit of patience, you can easily install a new faucet and enjoy a fresh, modern update. This guide outlines the steps involved in the process, providing clear instructions and helpful tips to ensure a successful installation.
Step 1: Gather the Necessary Tools and Materials
Before embarking on the installation, it's crucial to have all the necessary tools and materials on hand. This will make the process smoother and prevent interruptions. Here's a list of essential items:
- New bathroom faucet
- Adjustable wrench
- Channel-lock pliers
- Phillips screwdriver
- Flat-head screwdriver
- Plumber's tape (Teflon tape)
- Basin wrench (optional, but highly recommended)
- Pipe wrench (optional, for stubborn nuts)
- Bucket
- Rag or sponge
- Safety glasses
- Gloves (optional)
It's also advisable to have a replacement cartridge for the faucet, in case the old one is damaged or worn out. You can purchase these cartridges separately or as part of a faucet kit.
Step 2: Turn Off the Water Supply
Safety is paramount, so the first step is to shut off the water supply to the bathroom sink. Locate the shut-off valve for the sink, typically positioned under the sink or on the wall behind it. Turn the valve clockwise until it stops, ensuring the water flow is completely cut off.
To confirm that the water is off, open the faucet handles and allow any remaining water to drain. Once the water has stopped dripping, you can proceed to the next step.
Step 3: Disconnect the Old Faucet
With the water turned off, you can now disconnect the old faucet. This involves removing the supply lines, the drain assembly, and the faucet itself. Begin by loosening the nuts connecting the supply lines to the faucet using adjustable wrenches. Wrap the wrenches with a rag or cloth for a better grip and to prevent damage to the fittings.
Once the supply lines are disconnected, use a basin wrench to remove the nuts connecting the faucet to the sink basin. If the nuts are stubborn, you can use a pipe wrench, but be cautious to avoid damaging the sink. After the nuts are removed, lift the faucet from the sink and set it aside.
Step 4: Prepare the Sink for the New Faucet
Before installing the new faucet, you need to ensure that the sink is ready to receive it. Inspect the existing holes in the sink and ensure they match the mounting holes on the new faucet. If there are any discrepancies, use a drill and appropriate drill bits to adjust the existing holes or create new ones.
Once the holes are ready, clean the sink surface thoroughly using a damp cloth and mild detergent. Remove any debris, dirt, or old sealant that might interfere with the installation process.
Step 5: Install the New Faucet
With the sink prepared, you can begin installing the new faucet. Start by attaching the supply lines to the faucet using adjustable wrenches. Wrap the threaded connections with plumber's tape (Teflon tape) for a secure seal. Tighten the nuts firmly, but avoid overtightening, which could damage the fittings.
Next, insert the faucet through the holes in the sink and align the mounting holes. Secure the faucet to the sink using the provided mounting nuts or screws, while ensuring that the faucet is level and centered. Make sure to tighten the nuts firmly to prevent leaks.
Step 6: Connect the Drain Assembly
Once the faucet itself is installed, connect the drain assembly. This usually involves attaching the pop-up drain assembly to the faucet and then securing it to the sink with a locking nut. Follow the manufacturer's instructions for the specific drain assembly you are using.
Step 7: Test for Leaks
After installing the new faucet, turn the water supply back on and check for leaks. Inspect all connections, including the supply lines, the drain assembly, and the faucet itself. Tighten any loose connections, and if you find any leaks, address them promptly.
If you encounter persistent leaks after tightening all connections, you may need to replace the faucet cartridge or consult a professional plumber.

Diy How To Replace A Bathroom Sink Faucet Remove Install

How To Replace A Bathroom Faucet Moen Single Handle Install

How To Replace A Bathroom Faucet Tinged Blue

Step By Tutorial How To Install A New Bathroom Sink Faucet Maggie Mcgaugh

How To Remove And Install A Bathroom Faucet

Replacing A Bathroom Faucet Fine Homebuilding

How To Replace A Bathroom Faucet Tinged Blue

Bathroom Faucet Replacement For Beginners Making Maanita

How To Install A New Bathroom Faucet In Pedestal Sink Moendiyer Simply Designing With Ashley

How To Install A Widespread Faucet The Home Depot
Related Posts


