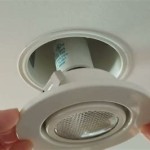
How to Install Bathroom Vent Pipe
A bathroom vent pipe is an essential part of any bathroom, as it helps to remove moisture and odours from the air, preventing mold and mildew growth. Installing a bathroom vent pipe is a relatively simple DIY project that can be accomplished with a few basic tools and materials. This article will guide you through the steps of installing a bathroom vent pipe, ensuring a safe and efficient ventilation system for your bathroom.
Step 1: Determine the Vent Pipe Size and Route
Before starting the installation, determine the right size and route for the vent pipe. The vent pipe size should be determined based on the bathroom's size and the ventilation fan's airflow capacity, which should be at least 50 cubic feet per minute (cfm). The vent pipe should be routed directly from the bathroom fan to the exterior wall, avoiding sharp bends and long runs.
Consider the following factors:
- Available space: Ensure enough space is available for the vent pipe to pass through walls and ceilings.
- Existing plumbing: Take note of existing plumbing and electrical lines to avoid obstructions and ensure a safe installation.
- Local building codes: Always check the local building codes to ensure compliance with regulations regarding vent pipe sizes, materials, and routing.
Step 2: Lay the Vent Pipe Route
Once the vent pipe route is determined, you need to lay out the pipe. You can use a pencil or chalk to mark the route on the ceiling and walls where the vent pipe will run. Remember to account for any necessary offsets or bends in the pipe to accommodate obstacles.
Step 3: Cut and Install the Vent Pipe
Next, cut the vent pipe sections to fit the marked route. Use a handsaw or a pipe cutter to cut the PVC pipe to the desired length. Install the vent pipe sections, connecting them with PVC glue. Make sure the connection is secure and prevents leakage.
Step 4: Install the Vent Pipe Through the Roof
After installing the vent pipe through the ceiling and walls, you need to install it through the roof. This will require cutting a hole in the roof that is the same size as the vent pipe. To ensure the vent pipe is properly sealed and waterproof, use a flashing kit. Flashing kits typically include a metal flashing that covers the vent pipe opening, sealing it against the roof.
Step 5: Install the Vent Fan
The final step is to install the vent fan in the bathroom. Install the vent fan according to the manufacturer's instructions. Ensure the fan is securely attached to the vent pipe and is wired correctly.
Step 6: Test the System
After installing the vent fan, test the system by running the fan. Ensure the fan is properly exhausting air from the bathroom. Listen for any unusual noises or vibrations that might indicate a problem.
In addition to the above steps, there are some safety precautions to consider when installing a bathroom vent pipe:
- Protective Gear: Always wear safety gear, including gloves and eye protection, when handling tools and cutting materials.
- Proper Ventilation: Ensure adequate ventilation during the installation process, especially when working with PVC glue, which emits fumes.
- Electrical Safety: Disconnect the electrical power to the bathroom before working on the vent fan installation.
By following these steps, you can successfully install a bathroom vent pipe. Remember to always consult a professional if you encounter any difficulties or have concerns about the installation process.

Venting A Bath Fan In Cold Climate Fine Homebuilding

Installing A Bathroom Fan Fine Homebuilding

Blog

Bathroom Exhaust Fans Building America Solution Center

Install A New Bathroom Vent Fan Light

How To Use An In Line Exhaust Fan Vent Two Bathrooms Diy Family Handyman

How To Install A Bathroom Fan Diy Family Handyman

Bathroom Exhaust Fans Building America Solution Center

Bathroom Vent Piping To Near Exterior Inspecting Hvac Systems Internachi Forum

How To Replace And Install A Bathroom Exhaust Fan From Start Finish For Beginners Easy Diy
Related Posts


