How To Install Ducting For Bathroom Extractor Fan
Proper ventilation is crucial for any bathroom to prevent moisture buildup, which can lead to mold, mildew, and structural damage. A correctly installed bathroom extractor fan, coupled with effective ducting, is the most effective way to achieve this. This article will guide you through the process of installing ducting for your bathroom extractor fan.
Planning and Preparation
Before beginning any installation, careful planning is essential for a smooth and efficient process. This includes selecting the correct materials and understanding the route the ducting will take.
- Choose the Right Ducting: Select smooth-walled rigid ducting, preferably made of PVC or metal, for optimal airflow. Flexible ducting should be avoided where possible as it creates more resistance and can trap moisture.
- Determine the Ducting Route: The shortest and straightest route to the outside is ideal. Avoid sharp bends and long runs as they restrict airflow and reduce the fan's efficiency. Plan the route to minimize the number of bends required.
- Measure Accurately: Measure the distance from the extractor fan to the exterior vent. Add extra length to account for any bends and connections. Accurate measurements will minimize waste and ensure you have enough ducting.
- Gather Necessary Tools and Materials: Assemble all required tools, including a drill, screwdriver, measuring tape, duct cutter, sealant, and appropriate fixings before starting the installation.
Installing the Ducting
With the planning phase complete, the next step is the physical installation of the ducting. Precision and proper technique will ensure a secure and efficient system.
- Connect to the Extractor Fan: Attach the first section of ducting to the outlet of the extractor fan using the appropriate connector and sealant to create an airtight seal. Ensure the connection is secure and won't come loose due to vibrations.
- Run the Ducting: Following the planned route, carefully run the ducting towards the exterior vent. Secure the ducting at regular intervals using appropriate clips or straps to prevent sagging and noise.
- Create Bends: Where bends are necessary, use manufactured elbows rather than bending the ducting itself. This maintains the smooth internal surface and minimizes airflow restriction. Seal all joints with appropriate sealant.
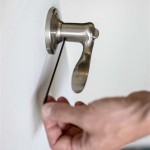
- Install the Exterior Vent: Install the exterior vent (wall vent or roof vent) according to the manufacturer's instructions. Ensure a tight seal around the vent to prevent drafts and water ingress.
- Connect to the Exterior Vent: Attach the final section of ducting to the exterior vent, again ensuring a secure and airtight connection. Seal all joints meticulously.
Testing and Finishing
After installation, testing the system and applying finishing touches ensures optimal performance and a professional-looking result.
- Test the Fan: Turn on the extractor fan and check for proper airflow at the exterior vent. Listen for any unusual noises that may indicate leaks or obstructions.
- Seal Any Gaps: Inspect all joints and connections for any gaps or leaks. Seal any identified gaps with sealant to ensure airtightness.
- Insulate the Ducting (Optional but Recommended): Insulating the ducting can help reduce condensation and noise. Wrap insulation around the ducting and secure it with tape.
Safety Precautions
Safety should always be a priority during any DIY project. Taking appropriate precautions will help prevent accidents and ensure a safe installation.
- Electrical Safety: Always isolate the power supply to the extractor fan before starting any electrical work.
- Working at Heights: If working at height, use appropriate safety equipment such as ladders and scaffolding.
- Sharp Objects: Exercise caution when using sharp tools like duct cutters and drills. Wear appropriate safety gloves and eye protection.
- Building Regulations: Ensure the installation complies with all local building regulations and codes.
Choosing the Right Exterior Vent
Selecting the correct exterior vent is essential for optimal performance and weatherproofing.
- Wall Vents: Suitable for installations where the ducting runs through an exterior wall. Choose a vent with a backdraft damper to prevent cold air and pests from entering the ductwork.
- Roof Vents: Ideal for installations where the ducting runs through the roof. Ensure the vent is compatible with the roof type and provides adequate weather protection.
- Grille Selection: Consider the aesthetic appearance of the grille and choose one that complements the exterior of the building.
By following these steps and taking necessary precautions, you can successfully install ducting for your bathroom extractor fan, creating a well-ventilated and healthy bathroom environment.

Venting A Bath Fan In Cold Climate Fine Homebuilding

Installing A Bathroom Fan Fine Homebuilding

Bathroom Extractor Fan Install Using Rigid Plastic Duct

Domestic Fan Installation Compliance Checker Vent Axia

How To Use An In Line Exhaust Fan Vent Two Bathrooms Diy Family Handyman

What Parts Do I Need To Install An Inline Fan In My Bathroom

Installing A Condensation Trap

Air Sealing Bathroom And Kitchen Exhaust Fans Building America Solution Center

Addvent

Quick Tip 23 Fixing A Drip At The Bathroom Fan Misterfix It Com
Related Posts