```html
How To Make A Bathroom Linen Cupboard
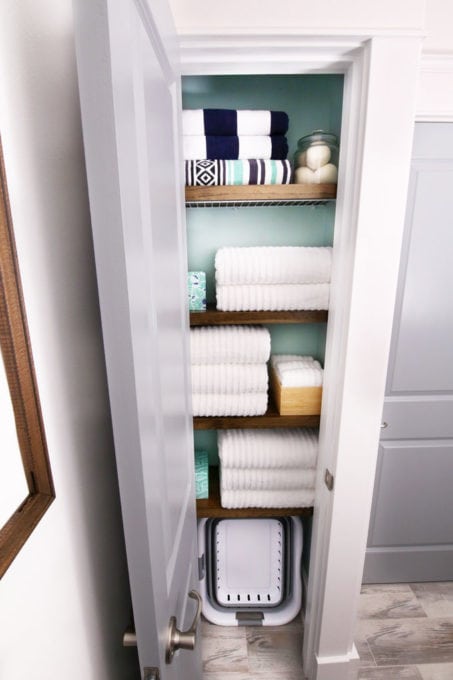
Creating a dedicated linen cupboard within a bathroom can significantly enhance organization and storage capacity. A well-designed and constructed linen cupboard provides a convenient and aesthetically pleasing solution for housing towels, toiletries, and other bathroom essentials. This article outlines the process of building a bathroom linen cupboard, encompassing planning, construction, and finishing.
Planning and Design Considerations
Before commencing any physical construction, a thorough planning phase is essential. This phase involves assessing the available space, determining storage requirements, and selecting appropriate materials. Careful planning ensures that the finished cupboard meets the specific needs of the homeowner and integrates seamlessly into the existing bathroom design.
Space Assessment: The initial step involves a comprehensive evaluation of the bathroom space. Identify a suitable location for the linen cupboard, considering factors such as wall dimensions, proximity to plumbing fixtures, and accessibility. Measure the available width, height, and depth to determine the maximum dimensions of the cupboard. It is crucial to account for door swing clearance and ensure that the cupboard does not obstruct pathways or interfere with other bathroom features.
Storage Requirements: Determine the types and quantities of items that will be stored in the cupboard. This includes towels of various sizes, toiletries, cleaning supplies, and potentially extra linens. Based on these storage needs, plan the number of shelves, their spacing, and any additional storage features, such as drawers or adjustable shelves.
Design Style: The design of the linen cupboard should complement the overall aesthetic of the bathroom. Consider the existing cabinetry, fixtures, and color scheme. Choose a style that integrates seamlessly with the bathroom design, whether it be modern, traditional, or contemporary. Options include recessed cupboards, freestanding cupboards, or built-in designs that are flush with the wall. The choice of door style, hardware, and finish will further contribute to the overall aesthetic.
Material Selection: Selecting appropriate materials is crucial for the durability and longevity of the linen cupboard. Consider moisture resistance, ease of maintenance, and aesthetic appeal. Common materials include:
- Plywood: Plywood is a versatile and cost-effective option for the cupboard frame and shelves. Opt for moisture-resistant plywood to withstand the humid bathroom environment.
- Medium-Density Fiberboard (MDF): MDF is a smooth and stable material that is well-suited for painted surfaces. It is less moisture-resistant than plywood and should be sealed properly.
- Solid Wood: Solid wood provides a durable and aesthetically pleasing option, but it is more expensive and requires careful selection of moisture-resistant species, such as cedar or redwood.
- Hardware: Select high-quality hinges, handles, and drawer slides that are designed for bathroom use. Choose finishes that complement the overall design.
Detailed Plans: Based on the space assessment, storage requirements, design style, and material selection, create detailed plans for the linen cupboard. These plans should include dimensions, material lists, and construction details. Consider using design software or consulting with a professional carpenter to ensure accurate and comprehensive plans.
Construction Process
Once the planning phase is complete, the construction process can begin. This involves assembling the frame, installing shelves, and adding doors and hardware. Accurate measurements, careful execution, and attention to detail are crucial for a successful outcome.
Framing: The frame provides the structural support for the linen cupboard. Cut the plywood or solid wood to the required dimensions based on the plans. Assemble the frame using screws, nails, or wood glue. Ensure that the frame is square and level. If the cupboard is to be recessed into the wall, ensure that the frame is properly sized to fit the opening.
Shelving Installation: Install shelving within the frame to provide storage space. Cut the shelves to the appropriate dimensions and secure them to the frame using shelf supports, screws, or dowels. Consider adjustable shelving to allow for flexibility in storage configurations. Ensure that the shelves are level and properly spaced to accommodate the items to be stored.
Door Installation: Install doors to enclose the linen cupboard and protect the contents from dust and moisture. Select doors that match the desired style and dimensions. Install hinges to attach the doors to the frame. Ensure that the doors swing smoothly and align properly. Consider installing magnetic catches or latches to keep the doors closed securely.
Drawer Construction (Optional): If the design includes drawers, construct them separately and install them within the frame. Cut the drawer components to the appropriate dimensions and assemble them using joinery techniques, such as dovetail joints or rabbet joints. Install drawer slides to allow the drawers to open and close smoothly.
Finishing and Installation
The finishing and installation phase involves preparing the surface for painting or staining, applying the chosen finish, and installing the cupboard in its designated location. This phase is crucial for achieving a professional-looking and durable linen cupboard.
Surface Preparation: Prepare the surface of the cupboard for finishing by sanding it smooth. Remove any imperfections, such as scratches or dents. Fill any nail holes or screw holes with wood filler. Sand the filler smooth and remove any dust or debris.
Painting or Staining: Apply the chosen finish to the cupboard. Choose a paint or stain that is suitable for bathroom environments and resistant to moisture. Apply multiple coats of finish, allowing each coat to dry completely before applying the next. Sand lightly between coats to ensure a smooth finish.
Hardware Installation: Install the chosen hardware, such as handles, knobs, and drawer pulls. Position the hardware according to the design plans and secure it using screws or bolts. Ensure that the hardware is aligned properly and functions smoothly.
Installation: Install the linen cupboard in its designated location. If the cupboard is freestanding, ensure that it is level and stable. If the cupboard is recessed, carefully slide it into the opening and secure it to the wall studs using screws. If the cupboard is built-in, attach it to the surrounding cabinetry or walls using screws and brackets.
Sealing and Caulking: Seal any gaps or cracks around the cupboard with caulk to prevent moisture from entering. Apply caulk along the edges of the cupboard where it meets the wall or floor. Smooth the caulk with a wet finger to create a clean and professional finish.
Final Inspection: Once the linen cupboard is installed and finished, conduct a final inspection to ensure that everything is functioning properly. Check the doors, drawers, and shelves to ensure that they are aligned and operate smoothly. Address any issues or imperfections before using the cupboard.
By following these steps, a custom-built bathroom linen cupboard can be successfully created, enhancing the functionality and organization of the bathroom space. Careful planning, precise construction, and meticulous finishing are keys to achieving a durable and aesthetically pleasing result.
```
Built In Linen Cabinet Sawdust Girl

Diy Furniture Plans To Build A Bathroom Linen Tower Designs By Studio C Easy Furn Bedroom Cabinets

Modern Master Bath Remodel Part 5 Built In Linen Closet Pneumatic Addict

Easy Bathroom Linen Closet Organization

Diy Linen Tower

How To Organize A Small Linen Closet Abby Organizes

A Quick And Easy Linen Closet Refresh Willow Bloom Home

How To Diy A Built In Linen Cabinet The Playbook

Bathroom Linen Closet Organization Ideas That Totally Work Bless Er House
:strip_icc()/66056130_180763819595848_2208593435073357382_n-7ead8b3c61314164ace7a6714b15dfed.jpg?strip=all)
16 Linen Storage Ideas When You Don T Have A Closet


