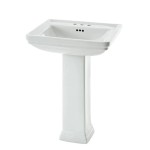
How to Make a Skirt for Your Bathroom Sink and Toilet
Adding a skirt to your bathroom sink or toilet can instantly elevate the room's aesthetic. This project offers a relatively simple way to conceal plumbing and storage while introducing a touch of personalized style. This article will guide you through the process of creating these skirts, offering options for different skill levels and design preferences.
Gathering Materials and Tools
Before beginning, assemble the necessary materials and tools. Proper preparation streamlines the construction process and ensures a smooth workflow.
- Fabric: Choose a fabric that complements your bathroom décor. Consider durability and water resistance, especially for a sink skirt. Good options include cotton canvas, linen, or home décor weight fabrics.
- Measuring Tape: Accurate measurements are crucial for a well-fitting skirt.
- Scissors: Sharp fabric scissors ensure clean cuts.
- Sewing Machine (Optional): While a sewing machine simplifies the process, hand-sewing is feasible.
- Thread: Select a thread that matches your chosen fabric.
- Pins: Pins help secure the fabric during cutting and sewing.
- Iron and Ironing Board: Pressing seams provides a professional finish.
- Velcro or Snaps: These fasteners allow for easy removal and cleaning of the skirt.
- No-Sew Fabric Adhesive (Optional): A suitable alternative to traditional sewing.
Measuring and Cutting the Fabric
Accurate measurements are essential for a properly fitted skirt. Take your time during this stage to ensure a polished final product.
- Sink Skirt: Measure the distance from the edge of the sink to the floor. Add a few inches for hemming and seam allowance. Measure the circumference of the sink and add a few inches for overlap and ease.
- Toilet Skirt: Measure from the top of the toilet tank to the floor. Add extra inches for hemming and seam allowance. Measure the circumference of the toilet tank, adding inches for overlap and ease.
- Cutting: Using the measurements obtained, cut the fabric for both the sink and toilet skirts. Ensure square edges for a professional look.
Creating the Sink Skirt
Creating the sink skirt involves several steps, from simple hemming to attaching the closure mechanism. Choose the method that best suits your skillset.
- Hemming: Fold and press the bottom edge of the fabric to create a hem. Sew or use fabric adhesive to secure the hem.
- Side Seam: Fold the fabric in half lengthwise, right sides together. Stitch or glue the long edge to create a tube.
- Finishing the Top Edge: Fold the top edge of the fabric over and create a casing for a ribbon or elastic. Alternatively, attach Velcro or snaps along the top edge to secure the skirt to the underside of the sink.
Creating the Toilet Skirt
The process for the toilet skirt is similar to the sink skirt, with slight modifications to accommodate the tank shape.
- Hemming: Hem the bottom edge of the fabric as described for the sink skirt.
- Creating the Opening for the Tank: On the top edge of the fabric, mark and cut an opening that comfortably fits around the toilet tank. Finish the raw edges of this opening with bias tape or a similar finishing method.
- Side Seam: Create a side seam as described for the sink skirt.
- Attaching the Skirt: Attach Velcro or snaps along the top edge of the skirt, corresponding to the placement around the toilet tank.
No-Sew Method
For those who prefer a no-sew approach, fabric adhesive offers a viable alternative.
- Hemming: Use fabric adhesive to create hems and seams, following the same principles as the sewing method.
- Attaching Velcro or Snaps: Fabric adhesive can be used to securely attach Velcro or snap fasteners.
- Reinforcement: Consider reinforcing glued seams and stress points with extra adhesive for increased durability.
Customization and Finishing Touches
Personalized touches can elevate your bathroom décor and create a unique style.
- Embellishments: Add decorative elements such as ribbon, lace, or appliqués.
- Contrasting Fabrics: Combine different fabrics or patterns for a layered or patchwork effect.
- Functional Additions: Incorporate pockets into the skirt for storing small bathroom essentials.
Care and Maintenance
Proper care ensures the longevity of your handmade bathroom skirts.
- Cleaning: Remove the skirts and launder them according to the fabric care instructions.
- Spot Cleaning: Address spills and stains promptly to prevent them from setting.
- Air Drying: Air drying is generally recommended to prevent shrinkage or damage to the fabric.

How To Make A Sink Curtain Skirt Easy Diy Tutorial Bumblebee Linens

Powder Room Makeover At Home With Ashley

How To Make A Sink Curtain Skirt Easy Diy Tutorial Bumblebee Linens

Sink Skirt Bathroom Organization Diy Custom

Powder Room Makeover At Home With Ashley

How To Make A Sink Curtain Skirt Easy Diy Tutorial Bumblebee Linens

Curtain Skirt Sink Bathroom Sewing Idea With Velcro And Fabric If You Have A Like This Woul Cortinas Para Cozinha Pia Do Banheiro Pias De

How To Make A Sink Skirt

Vintage Style When Why And How To Use A Sink Skirt

Vintage Style When Why And How To Use A Sink Skirt
Related Posts


