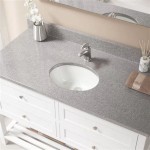
How To Make Concrete Bathroom Countertops
Concrete countertops are a popular choice for bathrooms due to their durability, versatility, and affordability. They can be customized to match any style and are resistant to scratches, heat, and stains. Making concrete countertops is a DIY project that can be completed with patience and the right tools and materials. This article will guide you through the steps of creating your own concrete bathroom countertops.
1. Planning and Preparation
Before starting the project, it is essential to plan and prepare carefully. The first step is to determine the size and shape of the countertop. Measure the existing countertop or draw a blueprint of the desired dimensions. Consider the sink size and location, as well as any other features you want to incorporate, such as a backsplash or integrated storage. Once you have a plan, you can start gathering the necessary materials and tools.
Preparing the area is crucial. Clear the workspace and cover the floor with drop cloths to protect it from spills. If you are working with an existing countertop, you need to remove it and dispose of it properly. This is also a good opportunity to repair any imperfections in the underlying surface before installing the new countertop.
2. Creating the Mold
The mold is the foundation of your concrete countertop. It determines its shape and size, and its construction requires careful attention. The most common mold materials are plywood and melamine-coated MDF boards, which are readily available at hardware stores. Ensure the chosen material is durable, water-resistant, and free from warping.
Cut the boards to the desired dimensions and assemble them into the desired shape. You can use wood glue, screws, or a combination of both to secure the pieces. If you are creating a complex shape, consider using templates or a CNC router for precise cuts. Once the mold is assembled, seal the inside with a release agent like wax or silicone to prevent the concrete from sticking. Allow the release agent to dry completely before proceeding.
3. Mixing and Pouring the Concrete
The type of concrete mix is crucial for countertop construction. Consider using a pre-mixed concrete mix specifically designed for countertops, as it often contains additives that enhance its strength, durability, and workability. Alternatively, you can mix your own concrete using Portland cement, aggregate, and water, adjusting the proportions according to the desired level of strength and finish.
Carefully mix the concrete according to the manufacturer's instructions. Ensure the consistency is thick enough to hold its shape but not too dry, which can lead to cracking. Once the concrete is mixed, pour it into the mold, spreading it evenly and eliminating air pockets. Use a trowel or a concrete vibrator to compact the concrete and remove air bubbles. You can also use a level to ensure the countertop is level and smooth. The final thickness of the countertop should be at least 1.5 inches for adequate strength.
4. Finishing and Curing
After pouring the concrete, allow it to set for the recommended time, typically 24 to 48 hours. Once the concrete has hardened slightly, you can begin finishing the surface. This can include smoothing the surface, adding color, or creating patterns. For a smooth finish, use a trowel or a concrete float to level and smooth the surface. You can also apply a sealant to protect the concrete and enhance its durability.
Curing is an essential part of the process, as it allows the concrete to gain strength and durability. The recommended curing time is at least 28 days, during which the concrete needs to remain moist. You can use a wet cloth or plastic sheeting to cover the countertop and keep it humid. Avoid direct sunlight during the curing process, as it can dry the concrete too quickly and lead to cracking.
5. Installation and Sealing
Once the concrete countertop has cured completely, you can install it. This requires precise measurements and careful handling to avoid damage. The countertop should be placed on a stable base, and you can use construction adhesive or silicone sealant to secure it.
After installation, you can apply a sealant to protect the concrete from stains and moisture. Choose a sealant specifically designed for concrete countertops, as it will provide a durable and long-lasting barrier. Apply the sealant in thin coats, allowing each coat to dry completely before applying the next.
After the sealant has dried, you can install the sink and any other fixtures you have planned. You can then enjoy your new concrete bathroom countertop, adding a unique and durable touch to your bathroom space.

Vanity Build Part 2 The Concrete Countertop Hamilton Park Home

Diy Concrete Countertops Your Complete Guide How We Do

How S It Holding Up Diy Concrete Vanity Update

Diy Concrete Countertops In A Beautiful Master Bathroom Renovation Remodelaholic

Concrete Sink Tutorial Countertop Experts

Bathroom Countertops Concrete Designs For Counters And Sinks Network

Diy Concrete Counter Overlay Vanity Makeover

Diy Concrete Countertops Frequently Asked Questions The Palette Muse

Bathroom Countertops Concrete Designs For Counters And Sinks Network

How To Make A Concrete Countertop Or Vanity With Integral Sink Do It Yourself Fun Ideas
Related Posts


