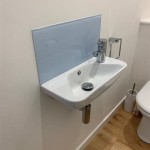
How to Paint Over Plastic Bathroom Tiles
Painting over plastic bathroom tiles is a popular and cost-effective way to refresh the look of a bathroom without the hassle and expense of replacing the tiles entirely. This technique can transform outdated or dull tiles into a fresh and modern space. However, proper preparation is key to achieving a successful and long-lasting finish. This article will guide you through the steps involved in painting plastic bathroom tiles, ensuring a smooth and appealing outcome.
1. Prepare the Surface
The success of any paint job hinges on proper surface preparation. Plastic bathroom tiles pose unique challenges due to their smooth, non-porous surface. To ensure the paint adheres well, follow these steps:
- Clean the tiles thoroughly: Use a mild detergent and warm water to remove any dirt, grime, soap scum, or mold. Rinse the tiles well and allow them to dry completely.
- Remove existing sealant: If the tiles have a sealant, it must be removed. Use a sealant remover specifically designed for bathroom surfaces and follow the manufacturer's instructions carefully.
- Sand the tiles: Lightly sand the tiles using fine-grit sandpaper. This will create a slightly rough surface for the paint to adhere to.
- Prime the tiles: After sanding, apply a bonding primer specifically formulated for plastic surfaces. This primer will help the paint bond properly and prevent peeling.
- Durability: Opt for a high-quality acrylic latex paint designed for bathroom use. These paints are moisture-resistant and mildew-resistant, making them suitable for humid environments.
- Finish: Choose a satin or semi-gloss finish for easier cleaning and a more durable surface. Matte finishes can be more prone to dirt and grime buildup.
- Color: Consider the existing decor of your bathroom and choose a color that complements the overall style.
- Stir the paint well: Ensure the paint is evenly mixed before application.
- Use a high-quality paintbrush: A brush with synthetic bristles designed for acrylic latex paints is ideal for achieving a smooth finish.
- Apply thin coats: Apply the paint in thin, even coats, allowing each coat to dry completely before applying the next.
- Pay attention to edges and corners: Use a small brush to carefully paint around the edges and corners of the tiles for a clean and professional look.
- Clean up immediately: Clean any spills or paint drips immediately with a damp cloth.
2. Choose the Right Paint
Selecting the right paint is crucial for a successful paint job. Consider these factors:
3. Apply the Paint
Once the surface is prepared and the paint selected, follow these steps for application:
4. Seal the Painted Finish
After the paint has completely cured, sealing the painted surface is essential to protect it from moisture and wear. Apply a clear, water-based sealant specifically designed for bathroom use. This sealant will create a protective barrier, enhancing the durability and longevity of the paint job.
Painting over plastic bathroom tiles can be a rewarding project that transforms the look and feel of a bathroom space. However, careful preparation and the use of the right materials are essential for achieving a successful and lasting result. By following these steps, you can create a fresh and modern bathroom that meets your individual style and needs.
How Do I Paint Plastic Bathroom Tile Hometalk
How Do I Paint Plastic Bathroom Tile Hometalk
How Do I Paint Plastic Bathroom Tile Hometalk
How To Paint Barker Board Harbour Breeze Home
Use Bonding Primer To Paint Dated Plastic Tile For An Instant Bathroom Makeover Painting Diy
How To Refinish Outdated Tile Yes I Painted My Shower Wildfire Interiors
Nitpicky 6 Month Painted Tile Update House Mix
How To Paint Bathroom Tile Floor Shower Backsplash House Mix
How To Paint Your Bathroom Tiles Naomi Findlay
How To Paint Barker Board Harbour Breeze Home
Related Posts