How to Redo a Bathroom with Tile: A Comprehensive Guide
Redoing a bathroom with tile can drastically transform the space, enhancing its aesthetics, functionality, and value. This extensive guide provides a detailed overview of the process, encompassing planning, preparation, tile selection, installation, and finishing touches. Careful consideration of each stage ensures a successful and durable result.
Key Point 1: Planning and Preparation
Thorough planning is essential before commencing any bathroom renovation. This phase involves assessing the existing bathroom layout, defining the desired changes, establishing a budget, and acquiring all necessary materials and tools. Ignoring this stage can lead to costly errors and delays.
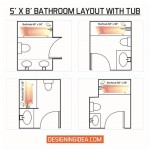
Begin by evaluating the existing bathroom space. Note the dimensions, the location of plumbing fixtures (toilet, sink, shower/tub), and electrical outlets. Consider what aspects of the current layout work well and what needs improvement. It’s prudent to document everything with photographs and detailed measurements. This information will be invaluable during the design and material selection phases.
Next, clearly define the desired changes. Are you simply replacing existing tile, or are you planning a more extensive renovation, such as relocating fixtures or adding new features? Consider your lifestyle and needs. A family bathroom will have different requirements than a guest bathroom. Think about storage, accessibility, and the overall aesthetic you wish to achieve.
Budgeting is a crucial aspect of the planning process. Determine how much you can realistically spend on the project. This will influence the choices you make regarding materials, labor (if you are hiring professionals), and scope of the renovation. Obtain quotes from contractors and suppliers to get an accurate estimate of the overall cost. Don’t forget to include a contingency fund for unexpected expenses that may arise during the project.
Once you have a clear idea of the design and budget, you can start selecting the materials. This includes tile (for floors, walls, and shower/tub surrounds), grout, thin-set mortar, backer board (if required), waterproofing membrane, and any necessary plumbing or electrical components. The choice of tile will significantly impact the overall look and feel of the bathroom. Consider factors such as style, color, texture, size, and durability. It is advisable to order slightly more tile than you need to account for cuts and breakage.
Finally, gather the necessary tools. Essential tools for tiling include a tile cutter (manual or wet saw), notched trowel, grout float, sponge, level, measuring tape, pencil, safety glasses, and gloves. Depending on the scope of the project, you may also need a hammer drill, demolition tools, and plumbing tools.
Key Point 2: Tile Installation
Proper tile installation is critical for achieving a durable and aesthetically pleasing result. This process involves removing existing fixtures and surfaces, preparing the substrate, applying mortar, setting the tile, and grouting.
Begin by carefully removing existing fixtures, such as the toilet, sink, and shower/tub. Turn off the water supply to these fixtures before disconnecting them. Protect the surrounding areas with drop cloths to prevent damage. If you are removing old tile, use demolition tools to carefully chip away the existing tile and mortar. Be sure to wear safety glasses and gloves during this process.
The substrate is the surface onto which the tile will be applied. It must be clean, level, and structurally sound. For floors, this typically involves installing cement backer board over the existing subfloor. For walls, you may need to repair or replace drywall or install backer board. Ensure that the substrate is properly fastened and secured to prevent movement or cracking.
Apply a waterproofing membrane to areas that will be exposed to moisture, such as the shower/tub surround and the floor. This will prevent water from penetrating the substrate and causing damage. Follow the manufacturer’s instructions for applying the waterproofing membrane.
Mix the thin-set mortar according to the manufacturer's instructions. Apply the mortar evenly to the substrate using a notched trowel. The size of the notch should be appropriate for the size and type of tile you are using. Press the tile firmly into the mortar, ensuring that it is level and aligned with the adjacent tiles. Use tile spacers to maintain consistent grout lines.
Allow the mortar to cure completely before grouting. This typically takes 24-48 hours. Once the mortar is dry, remove the tile spacers and clean the grout lines.
Mix the grout according to the manufacturer's instructions. Apply the grout to the tile surface using a grout float, working it into the grout lines. Remove excess grout with a damp sponge. Allow the grout to dry slightly before polishing the tile surface with a clean cloth.
Key Point 3: Finishing Touches and Maintenance
Completing the renovation involves resealing fixtures, applying caulk, and thoroughly cleaning the area. Regular maintenance is crucial for extending the life of the tile installation and preserving its appearance.
Once the grout has cured completely, reinstall the fixtures, such as the toilet, sink, and shower/tub. Ensure that all plumbing connections are tight and leak-free. Apply a bead of caulk around the perimeter of the fixtures to create a watertight seal. Also, apply caulk where the tile meets other surfaces, such as the countertop or the floor.
Thoroughly clean the entire bathroom, removing any dust, debris, or grout haze. Use a mild detergent and a soft cloth to clean the tile surface. Avoid using abrasive cleaners that can scratch or damage the tile.
Apply a sealant to the grout lines to protect them from stains and water damage. Grout is porous and can easily absorb spills and moisture. Sealant will help to prevent this and make the grout easier to clean.
Regular maintenance is essential for keeping the tile installation looking its best. Clean the tile regularly with a mild detergent and water. Avoid using harsh chemicals or abrasive cleaners. Wipe up spills promptly to prevent staining. Check the grout lines periodically for cracks or damage and repair them as needed. Reapply sealant to the grout lines every 1-2 years to maintain their protection.
By following these guidelines, homeowners can successfully redo a bathroom with tile, creating a beautiful and functional space that will last for years to come. Remember to prioritize proper planning, careful installation, and consistent maintenance.
Choosing the right tile is a significant decision. Consider the tile's material, its water resistance, and its slip resistance. Porcelain tile is generally considered a good choice for bathrooms due to its durability and water resistance. Ceramic tile is another option, but it may not be as durable as porcelain. Natural stone tiles, such as marble or granite, can add a luxurious touch, but they require more maintenance.
Lighting is also a critical element in bathroom design. Ensure that the bathroom is adequately lit with a combination of ambient, task, and accent lighting. Consider installing recessed lighting in the ceiling, vanity lighting around the mirror, and a decorative fixture above the shower or tub.
Ventilation is essential for preventing moisture buildup and mold growth in the bathroom. Ensure that the bathroom has a properly functioning exhaust fan that vents to the outside. Run the exhaust fan during and after showers or baths to remove excess moisture from the air.
Accessories can add the finishing touches to a bathroom renovation. Choose accessories that complement the tile and overall design of the space. Consider adding a stylish shower curtain, a decorative mirror, and coordinating towels and bath mats. Small details can make a big difference in the overall appearance of the bathroom.
Accessibility is an important consideration, especially for individuals with mobility issues. Consider installing grab bars in the shower or tub, a comfort-height toilet, and a walk-in shower. These features can make the bathroom safer and more accessible for people of all ages and abilities.

Bathroom Remodeling A Step By Guide Budget Dumpster

How To Upgrade Bathroom Tile Without Replacing

8 Ways To Update Your Vintage Tile Bathroom Building Bluebird

6 Walk In Shower Tile Ideas For Your Bathroom Remodel Dave Fox

6 Walk In Shower Tile Ideas For Your Bathroom Remodel Dave Fox

How To Renovate Bathroom Without Removing Tiles Multipanel

Top Things To Consider When Renovating Your Bathroom With Tile Belk

A Co Op Bathroom Renovation Shines With Sleek Tile Storage Sweeten

Bathroom Remodeling A Step By Guide Budget Dumpster

Diy Modern Master Bath Remodel Part 3 Custom Tile Shower Install Pneumatic Addict
Related Posts