How to Refinish a Bathroom Vanity Top
Refinishing a bathroom vanity top can significantly improve the aesthetic appeal of a bathroom without the expense and hassle of a complete replacement. Over time, vanity tops can become stained, scratched, chipped, or simply outdated. Refinishing offers a cost-effective solution to breathe new life into this essential bathroom element. This task, while requiring patience and attention to detail, is achievable by individuals with basic DIY skills.
Before embarking on the refinishing process, it's crucial to accurately assess the existing vanity top's material. Common vanity top materials include laminate, cultured marble, solid surface (such as Corian), tile, and wood. The appropriate refinishing techniques and materials will vary significantly depending on the material type. Misidentifying the material can lead to improper preparation, application, and ultimately, a less than satisfactory and potentially damaging result.
This article provides a detailed guide on how to refinish common types of bathroom vanity tops. Please note that while this article offers comprehensive instructions, it is highly recommended to consult with a professional if uncertainty arises at any point during the process, particularly when dealing with potentially hazardous materials or intricate repairs.
Key Point 1: Preparation is Paramount
The success of any refinishing project hinges on thorough preparation. This phase involves cleaning, repairing any damage, and properly preparing the surface to accept the new finish. Rushing or skipping steps in this phase can negatively impact the adhesion and longevity of the new finish.
Cleaning: Start by thoroughly cleaning the vanity top. Use a degreasing cleaner to remove any soap scum, grime, mildew, or other residues. Rinse thoroughly with clean water and allow the surface to dry completely. For stubborn stains, a mild abrasive cleaner may be necessary, but caution should be exercised to avoid scratching the surface. For laminate surfaces, avoid harsh abrasive cleaners and excessive moisture.
Repairing Damage: Next, inspect the vanity top for any damage such as chips, cracks, or scratches. The repair process will differ depending on the material.
- Laminate: Small chips can be filled with laminate repair paste that is color-matched to the existing surface. Apply the paste according to the manufacturer's instructions, typically involving overfilling the chip and then carefully shaving it flush with a razor blade once dry. For larger areas of damage, replacement of the entire laminate sheet may be necessary, often requiring professional assistance.
- Cultured Marble: Repair kits specifically designed for cultured marble are readily available. These kits typically include epoxy resin and hardener, along with color pigments to match the existing color. Follow the kit's instructions carefully to fill chips and cracks. Sand the repaired area smooth after the epoxy has fully cured.
- Solid Surface: Similar to cultured marble, solid surface repair kits are available. These kits often contain solid surface material in paste form, which can be applied to fill chips and cracks. Solid surface repairs can be seamlessly blended with the surrounding surface through careful sanding and polishing.
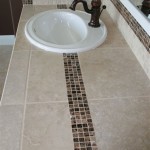
- Tile: Repair any cracked or chipped tiles. Remove the damaged tile and scrape away old grout and thin-set mortar. Apply fresh thin-set mortar to the back of the new tile, position it correctly, and then apply new grout. Allow the grout to cure completely before sealing it.
- Wood: Fill any dents or gouges with wood filler. Allow the filler to dry completely and then sand it smooth to match the surrounding surface. For larger imperfections, multiple applications of wood filler may be required, allowing each layer to dry before applying the next.
Surface Preparation: After cleaning and repairing, the surface needs to be properly prepared to ensure that the new finish adheres effectively. This typically involves sanding.
- Laminate: Lightly sand the laminate surface with fine-grit sandpaper (220-grit) to create a slightly roughened surface. This will provide better adhesion for the primer. Avoid sanding too aggressively, as this can damage the laminate.
- Cultured Marble: Sand the entire surface with progressively finer grits of sandpaper (starting with 180-grit and working up to 320-grit) to remove any imperfections and create a smooth surface. Pay particular attention to the repaired areas, ensuring they are blended seamlessly with the surrounding surface.
- Solid Surface: Similar to cultured marble, sand the solid surface with progressively finer grits of sandpaper. Solid surface is more forgiving than cultured marble and can withstand more aggressive sanding if needed.
- Tile: Thoroughly clean the tile and grout lines. If applying a solid coating over the tile, use a bonding primer designed for smooth, non-porous surfaces. If only refinishing the grout, clean and prepare the grout lines according to the refinishing product's instructions.
- Wood: Sand the wood surface to remove any existing finish and create a smooth, even surface. Start with a coarser grit sandpaper (80-grit) to remove the bulk of the old finish and then work your way up to finer grits (120-grit, then 220-grit) for a smooth finish.
After sanding, thoroughly clean the surface to remove any sanding dust. A tack cloth is particularly effective for this purpose. Mask off any areas that should not be refinished, such as the wall behind the vanity or the sink basin, using painter's tape and protective sheeting.
Key Point 2: Selecting the Right Refinishing Materials
The choice of refinishing materials is crucial and depends on the type of vanity top and the desired outcome. Consider factors such as durability, water resistance, ease of application, and aesthetics when selecting the appropriate products.
Primers: Primers are essential for promoting adhesion between the existing surface and the new finish. Use a primer specifically designed for the material you are refinishing. For example, use a bonding primer for laminate or tile and a stain-blocking primer for wood.
Paints and Coatings: A variety of paints and coatings are available for refinishing vanity tops.
- Epoxy Coatings: Epoxy coatings are highly durable and water-resistant, making them a good choice for bathroom vanity tops. They are available in a variety of colors and finishes. Epoxy coatings typically require a two-part mixing process and must be applied according to the manufacturer's instructions.
- Acrylic Urethane Paints: Acrylic urethane paints are another durable and water-resistant option. They are easier to apply than epoxy coatings and are available in a wider range of colors and finishes.
- Specialty Laminate Paints: Specially formulated paints are available for refinishing laminate surfaces. These paints are designed to adhere to the slick surface of laminate and provide a durable, water-resistant finish.
- Grout Refreshers or Colorants: For tile vanity tops where only the grout is being refinished, grout refreshers or colorants are available. These products are designed to penetrate the grout lines and restore their color.
Sealers: Sealers provide an additional layer of protection against water damage and stains. Apply a sealant specifically designed for the type of finish you have used. For example, use a polyurethane sealant over painted wood and a tile and grout sealer over tile.
Application Tools: The appropriate application tools will depend on the type of finish you are using. Use high-quality brushes, rollers, and spray equipment to achieve a smooth, even finish. Always clean your application tools thoroughly after each use.
Safety Equipment: Safety is paramount when working with refinishing materials. Wear appropriate safety gear, including a respirator, gloves, and eye protection. Work in a well-ventilated area to avoid inhaling harmful fumes.
Key Point 3: Application and Finishing Techniques
Proper application techniques are essential for achieving a professional-looking finish. Follow the manufacturer's instructions carefully for each product you use. Applying thin, even coats is generally preferred over applying thick coats, as thin coats tend to dry more evenly and are less prone to drips and runs.
Priming: Apply the primer in thin, even coats, following the grain of the wood (if applicable) or in a consistent direction for other materials. Allow the primer to dry completely according to the manufacturer's instructions before proceeding to the next step. Lightly sand the primed surface with fine-grit sandpaper (320-grit) to remove any imperfections and create a smooth surface for the paint or coating.
Painting/Coating: Apply the paint or coating in thin, even coats, using smooth, overlapping strokes. Allow each coat to dry completely before applying the next. Multiple thin coats are generally better than one thick coat. Sand lightly between coats with fine-grit sandpaper (400-grit) to remove any imperfections and create a smooth surface for the next coat.
Special Techniques: Consider using specialized techniques to enhance the appearance of the vanity top.
- Faux Finishes: Faux finishes, such as marbleizing or antiquing, can add visual interest and depth to the vanity top. These techniques typically involve layering different colors of paint or glaze and using specialized tools to create the desired effect.
- Stenciling: Stenciling can be used to add decorative patterns to the vanity top. Use adhesive stencils to prevent paint from bleeding underneath the stencil.
- Epoxy Resin Countertops: For a modern and durable finish, consider applying a thick layer of epoxy resin over the vanity top. This technique requires careful preparation and precise application to avoid bubbles and achieve a smooth, level surface.
Sealing: After the paint or coating has completely dried, apply a sealant to protect the finish. Apply the sealant in thin, even coats, following the manufacturer's instructions. Allow the sealant to dry completely before using the vanity top.
Curing Time: Allow the refinished vanity top to cure completely before placing items on it or exposing it to water. Curing times can vary depending on the type of finish used, but typically range from 24 to 72 hours. Avoid harsh cleaning products or abrasive cleaners during the curing period.
By carefully following these steps and paying attention to detail, individuals can successfully refinish their bathroom vanity top, transforming its appearance and extending its lifespan. Remember to always prioritize safety and consult with professionals when needed.

How To Refinish Bathroom Vanity Top With Diy Resin Thediyplan

How To Refinish Bathroom Countertops Domestic

Paint Bathroom Vanity Countertop Sink So Easy A Piece Of Rainbow

Paint Bathroom Vanity Countertop Sink So Easy A Piece Of Rainbow

How To Easily Spray Paint Bathroom Countertops My Homier Home

For High Quality Sink Refinishing Services Contact The Surface Doctors Today

Paint Bathroom Vanity Countertop Sink So Easy A Piece Of Rainbow

Bathroom Countertop Refinishing A Budget Friendly Update
:strip_icc()/101922779-2cbc45e123c34827afb4f601723b03ca.jpg?strip=all "How To Paint Bathroom Countertops")
How To Paint Bathroom Countertops

How To Resurface An Acrylic Bathroom Counter Top Hometalk
Related Posts