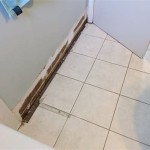
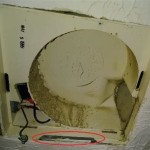
How To Remodel a Bathroom Shower with Tile Floors
Remodeling a bathroom shower, particularly when incorporating tile floors, can significantly enhance the aesthetic appeal and functionality of a home. This project requires careful planning, proper execution, and adherence to best practices to ensure a durable and visually pleasing outcome. This article outlines the essential steps involved in remodeling a bathroom shower with tile floors, providing a comprehensive guide for homeowners and contractors alike.
Prior to commencing any physical work, a thorough planning phase is crucial. This involves defining the scope of the project, setting a budget, and acquiring necessary permits. The scope encompasses determining the extent of the remodel – whether it's a simple cosmetic upgrade or a complete overhaul involving plumbing modifications. The budget should account for materials, tools, and potential professional labor costs. Permit requirements vary by locality, and it is imperative to verify and comply with the relevant building codes. Failing to obtain the required permits can lead to fines and delays.
Material selection plays a pivotal role in the longevity and appearance of the remodeled shower. Tile options abound, ranging from ceramic and porcelain to natural stone and glass. Ceramic tile is a cost-effective and durable choice, suitable for most shower applications. Porcelain tile, denser and less porous than ceramic, offers enhanced water resistance and is ideal for high-moisture environments. Natural stone tiles, such as marble and granite, provide a luxurious aesthetic but require meticulous sealing and maintenance. Glass tiles offer a modern look but can be more challenging to install. The choice of grout is equally important. Epoxy grout is highly resistant to stains and water damage, making it a preferred option for shower floors.
Tools are essential for successfully completing the remodeling project. Essential tools include a tile saw (wet saw recommended for precision), a notched trowel for applying mortar, a rubber grout float for applying grout, a grout sponge for cleaning grout haze, a level, a measuring tape, a pencil, safety glasses, gloves, and a dust mask. Optional but highly recommended tools include a tile nipper for making intricate cuts and a demolition hammer for removing existing tile.
Demolition and Preparation
The initial phase of the physical work involves demolishing the existing shower components. This includes removing old tiles, shower fixtures, and any damaged backer board. Safety precautions should be taken to avoid injury. Wearing safety glasses and gloves is critical during demolition. A dust mask is also essential to prevent inhalation of dust and debris. The demolition process should be methodical to minimize damage to underlying structures.
After demolition, the subfloor and wall studs should be inspected for any signs of water damage or rot. Any damaged sections must be repaired or replaced before proceeding. Repairing water damage can involve replacing sections of plywood subfloor or reinforcing weakened studs. Addressing these issues early on prevents future structural problems.
The next step involves installing cement backer board. Cement backer board provides a stable and water-resistant substrate for the tile. It should be cut to size and attached to the studs using cement board screws. The seams between the backer boards should be taped with fiberglass mesh tape and coated with thin-set mortar to create a waterproof seal. Ensuring a smooth and even surface is crucial for proper tile adhesion.
Plumbing adjustments may be necessary during the remodeling process. This could involve relocating showerheads, adding body sprays, or installing a new shower valve. It is advisable to consult with a licensed plumber to ensure that all plumbing work complies with local codes and regulations. Improper plumbing can lead to leaks and water damage.
Tile Installation
The installation of the tile floor is a critical step that requires precision and attention to detail. Before starting, it is essential to plan the layout of the tiles to minimize cuts and ensure a visually balanced appearance. A dry layout, where the tiles are placed without mortar, helps to visualize the final result and identify any potential issues.
Thin-set mortar is used to adhere the tiles to the backer board. The mortar should be mixed according to the manufacturer's instructions. A notched trowel is used to apply the mortar to the backer board, creating ridges that provide a strong bond with the tile. The size of the notch on the trowel depends on the size of the tile. Larger tiles require a larger notch.
Each tile should be pressed firmly into the mortar, ensuring that it is level and aligned with the adjacent tiles. Tile spacers are used to maintain uniform grout lines. Consistent grout lines contribute to a professional and aesthetically pleasing finish. Excess mortar should be removed from the tile surfaces immediately with a damp sponge. Allowing mortar to dry on the tile surface can be difficult to remove.
Cutting tiles to fit around corners, drains, and other obstructions requires the use of a tile saw. A wet saw is recommended for making clean and precise cuts. Safety glasses should be worn when using a tile saw. For intricate cuts, a tile nipper can be used to carefully shape the tile.
Once all the tiles are installed, allow the mortar to cure for at least 24 hours before proceeding to the next step. This allows the mortar to fully harden and ensures a strong bond between the tile and the backer board.
Grouting and Sealing
Grouting fills the spaces between the tiles, providing a waterproof seal and enhancing the overall appearance of the shower floor. Epoxy grout is often preferred for shower floors due to its superior water resistance and stain resistance. Cement-based grout is a more economical option, but it requires regular sealing to prevent water damage.
Before grouting, remove the tile spacers and clean the grout lines thoroughly. Any remaining mortar or debris can interfere with the grout adhesion. Mix the grout according to the manufacturer's instructions. A rubber grout float is used to apply the grout to the tile surface, forcing it into the grout lines. The float should be held at a 45-degree angle to the tile surface.
After the grout has been applied, use a damp sponge to clean the excess grout from the tile surfaces. Rinse the sponge frequently in clean water. It is important to remove the grout haze before it dries completely. Allow the grout to cure for the recommended time, typically 24 to 72 hours, before sealing.
Sealing the grout helps to prevent water penetration and staining. Apply a grout sealer according to the manufacturer's instructions. Multiple coats may be necessary for optimal protection. The choice of sealer depends on the type of grout used. Some sealers are specifically designed for epoxy grout, while others are formulated for cement-based grout.
Caulking is applied to the joints where the tile meets the shower walls, the shower pan, and any other fixtures. Caulk provides a flexible and waterproof seal that prevents water from seeping behind the tile. Use a high-quality mildew-resistant caulk specifically designed for bathrooms. Apply the caulk smoothly and evenly, removing any excess with a wet finger or a caulk smoothing tool.
Final Touches and Considerations
After the grouting and sealing are complete, reinstall the shower fixtures, such as the showerhead, faucet, and drain. Ensure that all connections are tight and leak-free. Test the shower thoroughly to check for any leaks or drainage problems.
Shower doors or curtains can enhance the functionality and aesthetics of the shower. Frameless glass shower doors offer a modern and minimalist look, while framed shower doors provide added structural support. Shower curtains are a more economical and versatile option. When selecting a shower door or curtain, consider the size and layout of the shower enclosure.
Proper ventilation is crucial for preventing mold and mildew growth in the shower. Ensure that the bathroom has adequate ventilation, either through a window or an exhaust fan. An exhaust fan should be sized appropriately for the size of the bathroom, and it should be vented to the outside. Regularly cleaning the shower with a mildew-resistant cleaner can also help to prevent mold and mildew growth.
Regular maintenance is essential for prolonging the life of the tiled shower floor. This includes cleaning the tile and grout regularly, resealing the grout as needed, and promptly repairing any cracks or chips in the tile. Using non-abrasive cleaning products can help to prevent damage to the tile and grout. Inspecting the caulk lines regularly and reapplying caulk when necessary can also help to prevent water damage.
Remodeling a bathroom shower with tile floors is a significant undertaking that requires careful planning, attention to detail, and adherence to best practices. By following these guidelines, homeowners and contractors can create a durable, visually appealing, and functional shower that will enhance the value and enjoyment of their home.

6 Walk In Shower Tile Ideas For Your Bathroom Remodel Dave Fox

6 Walk In Shower Tile Ideas For Your Bathroom Remodel Dave Fox

8 Bathroom Tile Ideas Utilizing Tiles In Diffe Ways Seapointe

6 Walk In Shower Tile Ideas For Your Bathroom Remodel Dave Fox

Bench Shower Tile Ideas Stephentortolacarpentry Bathroom Walls Remodel Renovation

Shower Floor Tile Walk In Ideas Www Westsidetile Com

How To Upgrade Bathroom Tile Without Replacing

Mixing Tiles In A Bathroom 3 Simple Steps Nina Hendrick

30 Small Bathroom Shower Tile Ideas Best Tips For 2024

The 7 Best Tile For Shower Walls And Floors
Related Posts


