How to Remove and Install a Bathroom Countertop
Replacing a bathroom countertop is a significant home improvement project that can dramatically enhance the aesthetic appeal and functionality of your bathroom. Whether you're tackling a complete bathroom renovation or simply updating an outdated countertop, understanding the removal and installation process is crucial for a successful outcome. This article will provide a comprehensive guide to removing and installing a bathroom countertop, outlining essential steps and considerations.
Step 1: Preparation and Safety
Before starting any demolition or installation work, it's imperative to prioritize safety and proper preparation. This involves gathering the necessary tools, materials, and protective gear. Safety glasses, gloves, and a dust mask should be worn throughout the project to minimize potential risks. Additionally, disconnect the water supply to the bathroom sink to prevent any leaks or water damage during the removal process. Ensure the area around the countertop is clear of any obstacles to provide ample space for working.
Next, determine the type of countertop you're dealing with. Some common materials include laminate, granite, marble, and quartz. Knowing the material will help you choose the appropriate tools and techniques for removal. If you are working with a laminate countertop, it may be necessary to use a utility knife to score the countertop along the seam lines before attempting to remove it. For other countertop materials, a reciprocating saw with a metal blade may be required.
Step 2: Removing the Existing Countertop
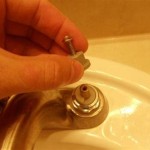
With the necessary safety precautions in place, you can begin the countertop removal process. The first step is to remove the sink and faucet assembly. This typically involves unscrewing the mounting nuts that secure the faucet from underneath the countertop. Be careful not to damage the sink or faucet during this process. Once the faucet is removed, locate and disconnect the plumbing supply lines connected to the sink.
Next, identify and remove any clips, brackets, or screws holding the countertop in place. These fasteners may be located along the edges, backsplash, or underneath the countertop. Carefully detach any adhesives or sealants that may be bonding the countertop to the cabinets or walls. Once all fasteners and adhesives have been removed, you can start lifting the countertop off the cabinets. If the countertop is heavy, enlist the help of a friend or assistant to avoid injury.
Once the countertop has been removed, inspect the underlying cabinets and surrounding walls for any damage or deterioration. This will help determine if any repairs or modifications need to be made before installing the new countertop. It may be necessary to clean and sanitize the area after removing the old countertop to eliminate any debris, dust, or contaminants.
Step 3: Installing the New Countertop
After removing the old countertop and preparing the surface, you can begin installing the new one. The installation process will vary depending on the type of countertop you've chosen. For laminate countertops, you may need to pre-cut the countertop to fit the specific dimensions of your bathroom vanity. Ensure you have the proper tools and techniques for accurate cutting to avoid any damage to the new countertop.
When installing a new countertop, you need to carefully consider the placement and alignment. Ensure the countertop is level and flush with the cabinets, using a level to check for accuracy. Once the countertop is positioned correctly, secure it to the cabinets by attaching clips, brackets, or screws. If adhesives or sealants are required, apply them according to the manufacturer's instructions.
After securing the countertop, reinstall the sink and faucet. Ensure the sink is properly centered and securely attached to the new countertop. Reattach the plumbing supply lines to the sink and test for leaks before proceeding.
When installing a new countertop, it's essential to have the proper tools and materials on hand, including:
- Measuring tape
- Level
- Utility knife or reciprocating saw
- Screwdriver
- Wrench
- Clamps
- Silicone sealant
- Safety glasses, gloves, and dust mask
If you lack the necessary experience or tools, it may be advisable to consult a qualified contractor or handyman for assistance. This will ensure the project is completed correctly and safely, avoiding potential issues or damage to your bathroom.
Replace Vanity Top And Faucet Diy Network
Replace Granite Countertops Transform Your Bathroom S Look
How To Replace A Bathroom Countertop Homeadvisor
How To Remove Replace A Vanity Top Easy Bathroom Sink Remodel
How To Remove A Countertop From Vanity Decor Adventures
Diy Replace Vanity Top
How To Install A Bathroom Vanity
How To Remove Replace A Vanity Top Easy Bathroom Sink Remodel
How To Remove A Countertop From Vanity Decor Adventures
Related Posts


