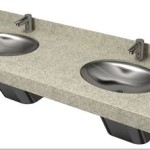
How to Remove and Replace an Undermount Bathroom Sink
Replacing an undermount bathroom sink is a DIY project that can be accomplished with the right tools and a bit of patience. Undermount sinks are a popular choice for modern bathroom designs, as they offer a sleek, seamless look. While the process might seem daunting, following these steps will guide you through the removal and installation of your new sink.
1. Gather Your Supplies and Tools
Before you begin, it’s essential to have all the necessary tools and supplies on hand. This will ensure a smooth and efficient process:
- Safety glasses and gloves
- A basin wrench or adjustable wrench
- A screwdriver set
- A utility knife
- A caulking gun
- Silicone sealant
- Plumber's putty
- A level
- A tape measure
- A bucket or container for water
- A sponge or cleaning cloth
- The new undermount sink
- The new faucet (if applicable)
- The new drain assembly (if applicable)
2. Turn Off the Water Supply and Drain the Sink
The first step is to shut off the water supply to the sink. Locate the water shutoff valves, typically found under the sink or on the wall behind it. Turn the valves clockwise until they stop, ensuring the water supply is completely cut off. Next, drain the sink by opening the drain plug. You can use a bucket to collect the water to avoid making a mess.
3. Disconnect the Faucet and Drain
Now, disconnect the faucet and drain. Using a basin wrench or adjustable wrench, loosen the nuts that secure the faucet to the sink. Be cautious not to overtighten or loosen the nuts too much, as this could damage the faucet or sink. Once the nuts are loosened, you can carefully remove the faucet from the sink. Follow a similar process to disconnect the drain assembly, loosening the nuts that secure the drain to the sink. You may need to use a screwdriver to remove any retaining clips or screws holding the drain in place.
4. Remove the Old Sink
With the faucet and drain disconnected, you can now remove the old sink. Begin by carefully removing any caulking or sealant around the perimeter of the sink. You can use a utility knife to cut through the sealant. Once the sealant is removed, you can carefully lift the sink off the countertop. Be mindful of the weight of the sink and ensure it’s supported as you lift it to avoid damage to the countertop or yourself.
5. Prepare the Countertop for the New Sink
After removing the old sink, you’ll need to prepare the countertop for the new sink. Inspect the countertop for any damage or debris that needs to be cleaned. If you’re replacing a sink with a different size, you might need to cut the countertop opening larger or smaller to fit the new sink.
6. Install the New Sink
With the countertop prepared, you can install the new sink. Place the sink into the countertop opening, making sure it’s centered and level. If the new sink has a drain assembly, install it according to the manufacturer's instructions. Next, apply a bead of silicone sealant around the perimeter of the sink to create a waterproof seal. Press the sink firmly against the countertop, ensuring the sealant is evenly distributed. Use a cleaning cloth to wipe away any excess sealant.
7. Install the Faucet and Drain
Now, reconnect the faucet and drain to the new sink. Align the faucet holes with the sink holes and tighten the nuts using a basin wrench or adjustable wrench. Be careful not to overtighten the nuts. Similarly, connect the drain assembly to the sink and tighten the nuts securely.
8. Test for Leaks
Once everything is connected, turn the water supply back on slowly. Check for any leaks at the faucet, drain, or the sealant around the sink. If you find any leaks, tighten the connections or reapply the sealant. If the leaks persist, you may need to consult a plumber for assistance.
Replacing an undermount bathroom sink can be a challenging task, but it’s a rewarding project that can enhance the look and functionality of your bathroom. By following these steps, you can complete this project with confidence.

How To Change A Bathroom Sink Undermount

Diy How To Replace Undermount Bathroom Sink Bowl

Diy How To Replace Undermount Bathroom Sink Bowl

Undermount Sink To Vessel

4 Ways To Replace A Bathroom Sink Wikihow

Diy How To Replace Undermount Bathroom Sink Bowl

How To Remove A Glued Undermount Bathroom Sink From Marble Hunker

How To Replace And Install A Bathroom Sink

How To Remove Replace A Vanity Top Easy Bathroom Sink Remodel

How To Fix A Leaky Bathroom Sink Nj Remodeling Renovation
Related Posts


