How to Remove a Bathroom Exhaust Vent Cover
Bathroom exhaust vent covers serve a crucial purpose in maintaining proper ventilation and preventing moisture buildup, which can lead to mold and mildew growth. Over time, these covers can accumulate dust, dirt, and grime, needing cleaning or replacement. Removing the cover is often necessary for these tasks or for accessing the vent itself for repairs or upgrades. This article will guide you through the process of removing a bathroom exhaust vent cover, providing clear instructions and tips for a successful removal.
Identifying the Type of Vent Cover
The first step in removing a bathroom exhaust vent cover is to identify the type of cover you have. Vent covers come in various designs and materials, each requiring a slightly different approach for removal. Common types include:
- Screw-on Covers: These covers typically have visible screws holding them in place.
- Snap-on Covers: These covers are held in place by clips or snaps around the perimeter.
- Magnetic Covers: These covers are held in place by magnets embedded in the cover and vent housing.
Knowing the type of cover will make the removal process easier and prevent damage to the cover or surrounding area.
Tools Needed
Before you begin, gather the necessary tools, which may vary depending on the vent cover type:
- Screwdriver: If your cover is screw-on, choose a screwdriver that matches the screw size and type.
- Pliers: Pliers can be helpful for gripping and releasing snap-on covers or removing stubborn screws.
- Flathead or Phillips Screwdriver: These are often useful for prying open snap-on covers or loosening stubborn screws.
- Gloves: Wearing gloves can protect your hands from dust, dirt, and grime.
Having these tools ready will ensure a smooth and efficient removal procedure.
Step-by-Step Removal Process
Here's a general guide to removing a bathroom exhaust vent cover:
1. Turn Off the Exhaust Fan
Always start by turning off the power to the exhaust fan. This will prevent any accidental shocks or injuries. Locate the fan switch on the wall and turn it off. If you have a circuit breaker box, you can also switch off the circuit breaker for added safety.
2. Remove the Vent Cover
Next, proceed to remove the vent cover. Follow these steps based on the cover type:
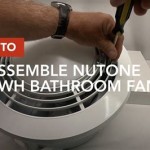
- Screw-on Covers: Locate the screws securing the cover to the vent housing. Use a screwdriver to gently loosen and remove the screws. Once all the screws are removed, the cover should come off easily.
- Snap-on Covers: Carefully locate the clips or snaps holding the cover in place. Use your fingers or pliers to gently press on the clips or snaps, releasing them one by one. Once all the clips or snaps are released, the cover should come off easily.
- Magnetic Covers: These covers are typically held by magnets embedded in the cover and vent housing. Gently pry the cover away from the vent housing, using your fingers or a flathead screwdriver.
Be careful not to force the cover, as this could damage the cover or the housing. If there is any resistance, double-check the type of cover and ensure you are using the correct removal method.
3. Clean or Replace the Cover
Once the vent cover is removed, you can clean or replace it. If cleaning, use a mild detergent and warm water to remove dust, dirt, and grime. Rinse the cover thoroughly and allow it to air dry completely before reinstallation. If replacing, make sure the new cover is compatible with the existing vent housing.
4. Reinstall the Vent Cover
After cleaning or replacing the cover, reinstall it in reverse order. Ensure the cover is properly aligned and the screws, clips, or magnets are securely in place. If you are replacing the cover, double-check that the new cover is compatible with the existing vent housing and follows all manufacturer instructions.
By following these steps, you can safely and effectively remove your bathroom exhaust vent cover for cleaning, replacement, or access to the vent for repairs or upgrades. Remember to prioritize safety by turning off the power to the exhaust fan before any work and to handle the vent cover with care to avoid damage.

Remove Install A Bathroom Fan Grille In 1 Min

How To Remove Clean Bathroom Ceiling Fan Nutone

Bathroom Vent Fan Remove Cover And Clean Dust

Not Sure How To Remove Old Bathroom Fan Install New One Doityourself Com Community Forums

Update An Existing Bathroom Exhaust Fan Cover Remodelaholic

How To Clean Replace Light Broan Model 678 Exhaust Fan

Update An Existing Bathroom Exhaust Fan Cover Remodelaholic

Tips For Installing Or Replacing A Bathroom Fan Forbes Home

Bathroom Exhaust Fan Lint Is A Fire Hazard Mini Mops House Cleaning

How To Replace And Install A Bathroom Exhaust Fan From Start Finish For Beginners Easy Diy
Related Posts


