How To Remove a Bathroom Faucet Lock Nut
Removing a bathroom faucet lock nut is a common task that can be done with the right tools and some basic knowledge. It's often necessary when replacing a faucet, repairing a leak, or simply cleaning the faucet. The lock nut secures the faucet stem to the faucet body, and it needs to be removed to access the stem for repairs or replacement.
This comprehensive guide will walk you through the step-by-step process of removing a bathroom faucet lock nut. We will cover the necessary tools, safety precautions, and techniques to ensure a successful and damage-free removal.
1. Gather the Necessary Tools
Before you begin, gather the following tools:
- Adjustable wrench: This is the most common tool for removing lock nuts.
- Channel-lock pliers: These can be used if the adjustable wrench doesn't fit.
- Basin wrench: A specialized tool designed for removing faucet lock nuts. It offers more leverage and control than adjustable wrenches or pliers.
- Pipe wrench: This can be used if the lock nut is particularly tight or stubborn. However, use caution as pipe wrenches can damage the finish of the faucet body.
- Rag or towel: For protecting the faucet finish and catching drips.
- Protective eyewear: To shield your eyes from debris.
2. Prepare the Faucet
Turn off the water supply to the faucet. This is crucial to prevent water damage during the removal process. You can typically find the shut-off valve under the sink or somewhere near the faucet. Once the water is turned off, open the faucet to drain any remaining water in the lines.
Next, remove any decorative covers or escutcheons around the faucet. These covers often conceal the lock nut and need to be removed before you can access it.
3. Remove the Lock Nut
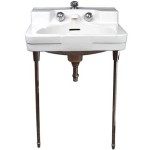
Locate the lock nut, which is usually a hexagonal or square nut below the faucet handle. The lock nut is typically made of brass or chrome and can be quite tight.
If using an adjustable wrench or channel-lock pliers, place the wrench or pliers on the lock nut and grip it firmly. Ensure the wrench is parallel to the faucet body to prevent damage. Slowly turn the lock nut counterclockwise to loosen it.
If using a basin wrench, insert the jaws of the wrench into the openings around the lock nut. Tighten the basin wrench by turning the handle clockwise. This will force the jaws to grip the lock nut, allowing you to loosen it by turning the handle counterclockwise.
If using a pipe wrench, use it with caution. Place the pipe wrench on the lock nut, making sure to secure it firmly. Then, turn the wrench counterclockwise to loosen the nut. Use only a moderate amount of force, as excessive force can damage the faucet body or the lock nut.
As you loosen the lock nut, it will start to come off the faucet stem. Keep turning the lock nut counterclockwise until it is completely removed.
4. Inspect the Faucet Stem
After removing the lock nut, inspect the faucet stem for any damage or wear. If you are replacing the faucet, you can discard the stem. If you are repairing the faucet, you may need to clean or replace the stem.
If the stem is damaged or worn, you should replace it with a new one of the same size and type. Check the manufacturer's specifications for the correct replacement part.
5. Reassemble the Faucet
To reassemble the faucet, carefully reverse the steps. Make sure the stem is properly seated in the faucet body. Then, tighten the lock nut securely, but don't overtighten it. Overtightening the lock nut can damage the faucet body or the stem.
Once the lock nut is tightened, turn the water supply back on and check for leaks. If there are any leaks, you may need to tighten the lock nut further or replace the stem.
6. Additional Tips
To prevent damage to the faucet finish, use a rag or towel to protect the faucet body while working. It's also advisable to use a lubricant like WD-40 on the lock nut before removing it. This will help to prevent the lock nut from sticking.
If you are struggling to remove the lock nut, you can try using a heat gun or a torch to heat the lock nut for a few minutes. This can help to loosen the nut and make it easier to remove. However, be sure to use caution when using heat as it can damage the faucet finish.
If you are not comfortable removing a bathroom faucet lock nut yourself, it is best to consult a plumber. They have the experience and tools to safely and efficiently remove the lock nut without damaging the faucet.

How To Replace A Bathroom Faucet Home Repair Tutor

Remove Plastic Faucet Nut Tips Diy Tool

How To Remove This Old Bathroom Faucet Or What Kind Of Nut Is Doityourself Com Community Forums

How To Remove Old Kitchen Faucet Nut Как открутить гайку кухонного крана

How To Replace A Bathroom Faucet Home Repair Tutor

Cool Tool Wrench For Removing Faucets Diy Family Handyman

Replacing A Bathroom Faucet Fine Homebuilding

How To Remove This Old Bathroom Faucet Or What Kind Of Nut Is Doityourself Com Community Forums

Remove Plastic Faucet Nut Tips Diy Tool

How To Replace A Bathroom Faucet Tinged Blue
Related Posts