How To Remove Moisture From Bathroom Walls
Bathrooms, by their very nature, are moisture-prone environments. Showers, baths, and even handwashing contribute to elevated humidity levels that can lead to various problems, including mold growth, peeling paint, and structural damage. Understanding how to effectively remove moisture from bathroom walls is crucial for maintaining a healthy and aesthetically pleasing living space. This article will provide a comprehensive guide to identifying moisture problems, addressing the underlying causes, and implementing practical solutions to keep bathroom walls dry and free from damage.
The first step in combating moisture issues is recognizing the telltale signs. High humidity manifests itself in several ways, some more obvious than others. Obvious indicators include condensation on mirrors and windows after a shower, dampness on walls, and visible mold or mildew growth. More subtle signs might include a musty odor, peeling paint or wallpaper, discoloration of grout, or even warping of wall panels. Regularly inspecting a bathroom for these indicators allows for early intervention and prevents minor problems from escalating into more significant, costly repairs.
Before attempting to remove existing moisture, it’s vital to identify and address the root cause of the problem. Simply wiping down walls or applying temporary solutions will only provide temporary relief if the source of the moisture remains unaddressed. Common causes include inadequate ventilation, leaking plumbing, and insufficient insulation. Each of these underlying issues requires a specific approach to remediation.
Improving Bathroom Ventilation
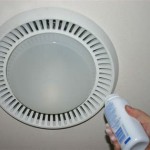
Poor ventilation is one of the most prevalent causes of moisture buildup in bathrooms. Without proper airflow, humid air lingers, saturating surfaces and creating a breeding ground for mold. The primary solution is to install or upgrade a bathroom exhaust fan. A functional exhaust fan effectively removes moist air from the bathroom and vents it outside, preventing it from condensing on walls and ceilings.
When selecting a bathroom exhaust fan, several factors should be considered. The fan's cubic feet per minute (CFM) rating is a crucial specification, determining its ability to move air effectively. A general guideline is to choose a fan with at least 1 CFM per square foot of bathroom area. For example, a 50 square foot bathroom would require a fan with a minimum CFM rating of 50. Bathrooms with high ceilings or frequent use may require even higher CFM ratings.
Proper installation is as important as the fan's CFM rating. The exhaust fan should be located near the shower or bathtub, the primary source of moisture. It should also be vented directly to the outside, not into the attic or another enclosed space. Venting into an enclosed space will only transfer the moisture to another area of the home, potentially causing problems elsewhere. Professional installation is recommended to ensure proper venting and electrical connections.
Even with a properly installed exhaust fan, its effectiveness depends on consistent use. It is crucial to turn on the fan before starting a shower or bath and to leave it running for at least 20 minutes after the water is turned off. This allows the fan to remove the accumulated moisture and prevent it from condensing on surfaces. Automated timers or humidity sensors can be installed to ensure the fan runs for the appropriate length of time, even if forgotten by the user.
In some cases, natural ventilation can supplement the exhaust fan. Opening a window after showering can help to circulate air and remove moisture. However, this is not always a practical option, especially in colder climates or during inclement weather. Therefore, relying solely on natural ventilation is generally insufficient for effectively managing bathroom moisture.
Addressing Plumbing Leaks
Leaking plumbing, whether from pipes, faucets, or showerheads, can introduce significant amounts of moisture into bathroom walls. Even small, slow leaks can cause substantial damage over time, leading to mold growth, structural deterioration, and wood rot. Identifying and repairing leaks promptly is essential for preventing these problems.
Regularly inspect all visible plumbing fixtures for signs of leaks, such as drips, stains, or water damage. Pay particular attention to areas around faucets, showerheads, toilets, and under sinks. Check for water spots on ceilings below the bathroom, which could indicate a leak in the plumbing above. A simple way to check for toilet leaks is to add food coloring to the toilet tank. If the color appears in the bowl without flushing, it indicates a leak in the flapper valve.
If a leak is suspected but not readily visible, it may be necessary to investigate further. Check around pipes that run behind walls or under floors. Look for signs of moisture damage, such as discoloration, swelling, or mold growth. A moisture meter can be used to detect hidden moisture within walls or floors. If a significant leak is suspected, it is best to contact a professional plumber to diagnose and repair the problem.
Repairing plumbing leaks can range from simple DIY fixes to more complex procedures requiring professional assistance. Leaky faucets can often be repaired by replacing worn-out washers or O-rings. Leaky showerheads may require replacing the showerhead itself or tightening connections. Leaks in pipes may require patching, soldering, or replacing entire sections of pipe. When undertaking plumbing repairs, it is crucial to turn off the water supply to the affected area to prevent further leaks and potential water damage.
Preventative measures can also help to minimize the risk of plumbing leaks. Regularly inspect and maintain plumbing fixtures, tightening connections and replacing worn-out parts as needed. Avoid using harsh chemicals or drain cleaners that can corrode pipes and lead to leaks. Consider installing a water leak detection system that can automatically shut off the water supply in the event of a leak, minimizing potential damage.
Improving Insulation and Wall Materials
Inadequate insulation and the use of moisture-sensitive wall materials can contribute to moisture problems in bathrooms. Insulation helps to regulate temperature and prevent condensation, while moisture-resistant wall materials can withstand higher humidity levels without sustaining damage.
Proper insulation in bathroom walls and ceilings helps to prevent condensation by maintaining a consistent temperature. When warm, humid air comes into contact with cold surfaces, condensation forms. Insulation creates a barrier between the warm air and the cold surfaces, reducing the temperature difference and minimizing condensation. Existing insulation should be inspected for signs of damage, such as water stains, mold growth, or compression. Damaged insulation loses its effectiveness and should be replaced.
Adding insulation to existing walls can be challenging, but there are several options available. Blown-in insulation can be injected into wall cavities through small holes, filling the space and providing insulation. Rigid foam insulation can be installed on the exterior of the walls, providing an additional layer of insulation. When renovating a bathroom, consider insulating the walls and ceiling with fiberglass batts or spray foam insulation.
The choice of wall materials can also impact moisture levels in the bathroom. Traditional drywall is susceptible to moisture damage and can become a breeding ground for mold. Moisture-resistant drywall, also known as "green board" or "blue board," is specifically designed for use in high-humidity environments. It has a water-resistant coating that helps to prevent moisture from penetrating the drywall core.
Other moisture-resistant wall materials include cement board, tile, and waterproof wall panels. Cement board is a durable, water-resistant material that is often used as a substrate for tile. Tile is a non-porous material that is ideal for bathroom walls and floors. Waterproof wall panels are made from PVC or other waterproof materials and are designed to be installed directly over existing walls. These materials provide a barrier against moisture and can help to prevent mold growth and water damage.
Even with moisture-resistant materials, it is still important to properly seal and maintain them. Apply a high-quality sealant to all seams and joints to prevent water from penetrating behind the walls. Regularly clean and disinfect bathroom surfaces to remove mold and mildew. Proper maintenance can help to extend the life of wall materials and prevent moisture problems.
In addition to the strategies outlined above, several other practices can contribute to reducing moisture levels in bathrooms. Drying bath mats and towels after each use prevents moisture from lingering in the air. Wiping down shower walls and doors after showering removes excess water and prevents condensation. Keeping bathroom doors open when not in use allows air to circulate and helps to dry out the room.
By understanding the causes of moisture problems and implementing effective solutions, it is possible to create a healthy and comfortable bathroom environment. Consistent efforts to improve ventilation, address plumbing leaks, and use moisture-resistant materials will help to prevent moisture buildup and protect bathroom walls from damage.

Easy Ways To Prevent Water Stains On Bathroom Walls 7 Steps

How To Stop Damp In Bathroom Expert Guide From Timberwise

How To Get Water Stains Off Bathroom Walls Igloo Surfaces

Stop Bathroom Condensation Once And For All

Bathroom Walls Showing Signs Of Moisture Doityourself Com Community Forums

How To Prevent Bathroom Mold From Taking Over Allergy Air

Sticky Humidity On Bathroom Walls Hometalk

Stop Bathroom Condensation Once And For All

How To Remove Mold From Walls True Value

Sticky Humidity On Bathroom Walls Hometalk
Related Posts


