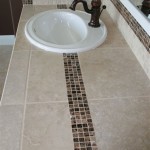
How to Remove Small Bathroom Floor Tiles
Replacing small bathroom floor tiles can be a daunting task, but with the right tools and techniques, it can be a manageable DIY project. Removing small bathroom floor tiles requires careful planning and execution to avoid damaging the underlying subfloor or surrounding surfaces. This article will guide you through the process of removing small bathroom floor tiles safely and efficiently.
1. Preparation and Safety Precautions
Prior to removing any tiles, it is crucial to prepare the area and ensure proper safety measures are in place. Start by clearing the bathroom floor of any furniture, fixtures, or belongings. Protect the surrounding areas from debris and dust using drop cloths or plastic sheeting. It is also recommended to wear appropriate safety gear, including safety glasses, gloves, and a dust mask.
Turn off the water supply to the bathroom to prevent any leaks or flooding while working. If the tiles are located near a plumbing fixture, ensure that the water pipes are properly secured to prevent them from moving during the removal process. Additionally, carefully examine the floor for any existing cracks or loose tiles that might pose a tripping hazard.
2. Removing Individual Tiles
The first step in removing small bathroom floor tiles involves carefully removing individual tiles without damaging the surrounding ones. This can be achieved using a hammer and a chisel, a tile removal tool, or a utility knife. When using a hammer and chisel, position the chisel blade against the grout line between the tile and the surrounding tiles. Gently tap the chisel with the hammer to break the grout bond. Once the grout is sufficiently loosened, carefully pry the tile up with the chisel.
A tile removal tool is specifically designed for this purpose, providing a more controlled and precise approach. Place the tool beneath the tile and gently lever it upward, working around the edges to loosen the tile's bond with the mortar. For smaller tiles, a utility knife can be used to score the grout lines, creating a separation point to pry up the tile. Once the tile is loosened, it can be carefully lifted away from the subfloor.
3. Removing Mortar and Grout
After removing the tiles, the remaining mortar and grout need to be meticulously removed from the subfloor before installing new tiles. A hammer and chisel, a grout removal tool, or a scraper can be used for this purpose. The goal is to create a smooth and even surface for the new tile installation. Be careful not to damage the subfloor while removing the mortar and grout.
A grout removal tool is designed to scrape off the grout without damaging the surrounding surfaces. For larger areas, a scraper can be used to remove the remaining mortar and grout. Once the subfloor is clean, it should be inspected for any imperfections or damage. Any cracks or loose boards should be repaired before proceeding with the installation of new tiles.

How To Remove Old Tiles A Step By Guide Walls And Floors

How To Remove Old Floor Tiles Bathroom B Q

Prep A Tile Floor Removal Bathrooms Remodel

How To Remove Tile Flooring Yourself With Tips And Tricks Removal Ceramic Floor

Laying Floor Tiles In A Small Bathroom Houseful Of Handmade

Can You Reuse Ceramic Tile

How To Upgrade Bathroom Tile Without Replacing

Laying Floor Tiles In A Small Bathroom Houseful Of Handmade
:max_bytes(150000):strip_icc()/beautiful-bathroom-wood-hexagon-floor-via-smallspaces.about.com-56f5b4273df78c78418a0e1b.jpg?strip=all "17 Ways To Beautify A Small Bathroom Without Remodeling")
17 Ways To Beautify A Small Bathroom Without Remodeling

Laying Floor Tiles In A Small Bathroom Houseful Of Handmade
Related Posts