How to Replace a Bathroom Light Fan Switch
Replacing a bathroom light fan switch is a common home improvement task that can be tackled by most homeowners with basic electrical knowledge. This guide will walk you through the process step-by-step, providing clear instructions and safety tips to ensure a successful and safe replacement.
1. Gather Supplies and Tools
Before starting the replacement, gather the necessary tools and supplies. You will need:
- A new light fan switch that matches the existing wiring configuration (single-pole, three-way, etc.).
- A voltage tester.
- A Phillips head screwdriver.
- Wire strippers.
- Electrical tape.
- A non-contact voltage detector (optional).
- A ladder (if necessary to access the switch).
It is essential to choose a switch that has the same number of wires and configuration as the old one. If you are unsure about the wiring, consult an electrician.
2. Disconnect Power
Safety is paramount when working with electricity. Before starting any work on the switch, always disconnect power to the circuit. Locate the circuit breaker that controls the bathroom light fan and turn it off. To confirm the power is off, use a voltage tester on the switch terminals. If the tester lights up, the power is still on, and you need to find the correct breaker.
3. Remove the Old Switch
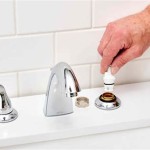
Once the power is disconnected, remove the old switch from the electrical box. Start by carefully removing the switch cover plate using the screwdriver. Then, locate the screws holding the switch to the electrical box and loosen them. Once the screws are loose, gently pull the switch out of the box, being mindful of the wiring.
Before removing the old switch completely, take note of the wire colors and their positions. This will help you reconnect the new switch correctly. Typically, the black wire is connected to the "hot" terminal, the white wire is connected to the "neutral" terminal, and the green or bare wire is connected to the "ground" terminal. However, wiring configurations can vary, so it is always best to double-check before disconnecting any wires.
4. Connect the New Switch
With the old switch removed, it's time to connect the new one. Carefully match the wire colors and positions of the old switch to the new one. Connect the black wire to the "hot" terminal, the white wire to the "neutral" terminal, and the green or bare wire to the "ground" terminal. Make sure the wire connections are secure and that the screws are tightened properly.
If you are unsure about the wiring configuration, consult an electrician. Miswiring can lead to electrical hazards and damage to your electrical system.
5. Test and Secure
After connecting the new switch, reconnect the power to the circuit. Check the switch operation by turning it on and off. Ensure that the light fan functions correctly. If everything works as expected, turn off the power and secure the switch to the electrical box using the screws you removed earlier.
Finally, reattach the cover plate and you have successfully replaced your bathroom light fan switch.
6. Additional Tips
Here are some additional tips for replacing a bathroom light fan switch:
- Before starting the replacement, take pictures of the old switch and its wiring configuration. This will help if you encounter any difficulties or forget the wiring positions.
- If you are using a non-contact voltage detector, always double-check with a voltage tester to ensure the power is completely off.
- If you are uncomfortable or unsure about any part of the process, consult an electrician.
- Always follow the manufacturer's instructions for the specific switch you are installing.

Replacing A Ceiling Fan Light With Regular Fixture Jlc

Bathroom Exhaust Fan With Humidity Sensor On One Switch Home Improvement Stack Exchange

Exhaust Fan Wiring Diagram Timer Switch

Installing A Bathroom Fan Timer Building Moxie

How To Put Bath Fan And Light On Separate Switches Instead Of One Switch

How To Fit A Bathroom Extractor Fan Using Light Switch Installation Xpelair Dx100

Exhaust Fan Wiring Diagram Single Switch

Extractor Fan Wiring Diywiki

2 Function Switch For Ceiling Fan And Light Devices Integrations Smartthings Community

How To Wire A Ceiling Fan Light Switch Quora
Related Posts