How to Replace a Bathroom Sink Vanity
Replacing a bathroom sink vanity is a relatively straightforward project that can significantly enhance the look and functionality of your bathroom. Whether you're looking to update the style, improve storage space, or simply replace a worn-out vanity, this guide will walk you through the process step-by-step.
Step 1: Planning and Preparation
Before embarking on the replacement process, careful planning is crucial. Begin by selecting a new vanity that complements your bathroom's style and measurements. Consider the size and shape of your bathroom, the available space, and the desired features, such as storage drawers, cabinets, or open shelves. Once you've chosen your vanity, gather the necessary tools, including:
- Screwdriver
- Wrench
- Level
- Tape measure
- Utility knife
- Pliers
- Caulk gun
- Drill
- Safety glasses
- Gloves
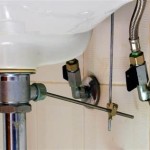
Next, prepare the area by clearing out any items from around the existing vanity. Turn off the water supply to the sink by locating the shut-off valves under the sink and turning them clockwise. Disconnect the drainpipe and the water supply lines. To prevent water from leaking during the removal process, place a bucket or towel beneath the sink.
Step 2: Removing the Old Vanity
With the water supply off and the drainpipe disconnected, you can begin removing the old vanity. Carefully detach the faucet from the countertop using a wrench. If necessary, use a utility knife to cut away the caulk sealing the vanity to the wall. Remove any screws or brackets holding the vanity in place. Finally, lift the vanity away from the wall, being mindful of any weight distribution to avoid dropping it.
Step 3: Installing the New Vanity
Once the old vanity is removed, it's time to install the new one. Place the new vanity where you want it, ensuring it is level using a level. Mark the wall where the vanity needs to be secured. Drill pilot holes into the wall at the marked locations, and then insert the provided screws to attach the vanity to the wall. If necessary, use shims to adjust the level of the vanity during installation.
Connect the new faucet to the vanity countertop, ensuring the connections are tight. Attach the drainpipe to the vanity's drain outlet and connect the water supply lines to the faucet. Make sure all connections are secure and free of leaks before turning the water supply back on.
Step 4: Finishing Touches
After installing the new vanity, it's important to seal it properly to prevent water damage. Apply a bead of caulk around the edges of the vanity where it meets the wall, and smooth it out using a damp finger. Once the caulk has dried, you can install the vanity's hardware and accessories, such as handles, knobs, and mirrors. Finally, clean up any debris and enjoy your newly installed bathroom sink vanity.
Remember to consult your vanity's installation manual for any specific instructions or guidance. If you're not comfortable performing this project yourself, it's always a good idea to consult with a professional contractor to ensure a safe and quality installation.

How To Install A Bathroom Vanity

How To Install A Bathroom Vanity And Sink


Replace Vanity Top And Faucet Diy Network

How To Remove A Bathroom Vanity Budget Dumpster


How To Remove A Bathroom Vanity Remodel

How To Install Or Remove A Bathroom Vanity Homeserve Usa

Replace Vanity Top And Faucet Diy Network
:strip_icc()/102130240-57841f265ac34fed91936f22e7dd9edb.jpg?strip=all)
How To Install A Bathroom Vanity Sink In Few Hours
Related Posts


