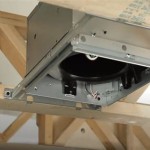
How To Replace A Bathroom Ventilation Fan
A properly functioning bathroom ventilation fan is crucial for removing excess moisture and preventing mold and mildew growth. Over time, these fans can become noisy, inefficient, or simply stop working. Replacing a bathroom ventilation fan is a manageable DIY project that can significantly improve indoor air quality and extend the life of bathroom fixtures. This article provides a step-by-step guide to replacing a bathroom ventilation fan.
Safety Precautions
Working with electricity always carries risks. Prioritizing safety is paramount before beginning any electrical work. *
Turn off the power:
Locate the circuit breaker that controls the bathroom fan and switch it off. Double-check that the power is off by flipping the bathroom light switch (if connected to the same circuit) and testing the fan itself. *Use a voltage tester:
Even after switching off the breaker, use a non-contact voltage tester to confirm that there's no power running to the fan wires. *Dry conditions:
Ensure hands and the work area are dry to minimize the risk of electric shock.Gathering Necessary Tools and Materials
Having the right tools and materials readily available will streamline the replacement process. *
New bathroom ventilation fan:
Choose a fan with a CFM (cubic feet per minute) rating appropriate for the bathroom size. *Screwdrivers:
Phillips and flathead screwdrivers are likely needed. *Voltage tester:
Essential for ensuring power is off. *Wire strippers/cutters:
For preparing the wiring connections. *Electrical tape:
Used for securing wire connections. *Caulk/sealant:
To seal the housing against moisture. *Safety glasses:
To protect eyes from debris. *Dust mask:
For working in dusty conditions. *Ladder or step stool:
For safe access to the ceiling.Removing the Old Ventilation Fan
Careful removal of the old fan is essential to avoid damaging the surrounding ceiling or wiring. *
Remove the grille:
Most grilles are held in place with spring clips or screws. Gently pry or unscrew to remove the grille. *Disconnect the wiring:
Carefully disconnect the wires from the old fan unit. Take note of the wiring configuration (typically black to black, white to white, and ground to ground) before disconnecting. *Detach the housing:
The housing is typically secured to the ceiling joists with screws. Unscrew the housing and carefully lower it down.Installing the New Ventilation Fan
Installing the new fan requires careful attention to wiring and proper securing of the housing. *
Connect the wiring:
Connect the wires of the new fan to the existing wiring, matching the colors as noted during the removal process. Use wire nuts to secure the connections and wrap them with electrical tape. *Secure the housing:
Position the new fan housing in the ceiling opening and secure it to the joists with screws. *Attach the ductwork:
If necessary, connect the ductwork to the new fan housing using appropriate clamps or tape. *Attach the grille:
Snap or screw the new grille into place.Testing the New Ventilation Fan
After installation, it’s crucial to verify that the new fan is operating correctly. *
Restore power:
Turn the circuit breaker back on. *Test fan operation:
Turn on the fan switch to check if it's running smoothly and quietly.Sealing and Finishing
Proper sealing prevents air leaks and moisture issues. *
Caulk around the housing:
Apply a bead of caulk around the perimeter of the housing where it meets the ceiling to seal any gaps and prevent air leakage. *Clean up:
Remove any debris and dust from the work area.Troubleshooting Common Issues
Occasionally, problems may arise during or after installation. *
Fan not running:
Double-check the circuit breaker and wiring connections. Ensure the switch is in the "on" position. *Excessive noise:
Tighten any loose screws or check for obstructions in the fan blades or housing. *Vibration:
Ensure the housing is securely attached to the ceiling joists.Choosing the Right Ventilation Fan
Selecting the correct ventilation fan is crucial for effective moisture removal. *
CFM rating:
Determine the appropriate CFM rating based on the bathroom size. Consult manufacturer guidelines for recommended CFM based on square footage. *Sones rating:
The sones rating indicates the fan's noise level. Lower sones ratings signify quieter operation. *Features:
Consider features like humidity sensors, timers, and built-in lights.Maintaining Your Bathroom Ventilation Fan
Regular maintenance ensures the longevity and effectiveness of the ventilation fan. *
Clean the grille:
Regularly remove the grille and clean it with soapy water to remove dust and debris. *Vacuum the housing:
Periodically vacuum the fan housing and motor to remove accumulated dust. *Lubricate the motor (if applicable):
Consult the manufacturer's instructions for lubrication recommendations.
How To Replace A Bathroom Fan With Pictures Wikihow

How To Change Bathroom Exhaust Fan Easy

How To Replace A Bathroom Fan With Pictures Wikihow

How To Replace And Install A Bathroom Exhaust Fan From Start Finish For Beginners Easy Diy
:max_bytes(150000):strip_icc()/how-to-install-a-bathroom-exhaust-fan-4147975-hero-2d6143520dfc425ba6b0142bf78f0549.jpg?strip=all)
How To Install A Bathroom Exhaust Fan
/how-to-install-a-bathroom-exhaust-fan-4147975-07-6bc075b510be4412845c4704ad185682.jpg?strip=all)
How To Install A Bathroom Exhaust Fan

How To Install A Bathroom Fan Step By Guide Bob Vila

How To Remove Bathroom Exhaust Fans 8 Step Guide Home Inspector Secrets

How To Replace A Bathroom Exhaust Fan Without Attic Access 12 Step Guide Home Inspector Secrets
:max_bytes(150000):strip_icc()/BathroomFan-95d466009a5b4de9a79ae3e7d7b1aa75.jpg?strip=all)
How To Replace A Bathroom Fan Step By Guide
Related Posts


