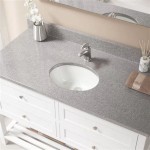
How to Replace a Countertop Bathroom Sink
Replacing a countertop bathroom sink is a common home improvement project that can refresh your bathroom and enhance its functionality. While it may seem daunting, the task is manageable for those with basic DIY skills and the right tools. This article will guide you through the process step-by-step, outlining the necessary materials and procedures to ensure a successful installation.
1. Gather Your Tools and Materials
Before embarking on the replacement process, it is crucial to ensure you have the necessary tools and materials at hand. This will streamline the project and minimize interruptions. The following list outlines essential items:
- New countertop bathroom sink
- Sink drain assembly (if not included with the sink)
- Pliers
- Adjustable wrench
- Channel-lock pliers
- Screwdriver
- Utility knife
- Plumber's putty
- Silicone caulk
- Caulk gun
- Level
- Measuring tape
- Safety glasses
- Work gloves
- Drop cloth
- Bucket
- Cleaning supplies
It is always recommended to double-check the specifications of your new sink and its included components to ensure compatibility with your existing plumbing and counter.
2. Disconnect the Water Supply and Remove the Existing Sink
The first step is to safely disconnect the water supply and remove the old sink. This involves turning off the water shut-off valves for the sink, typically located beneath the counter or within the bathroom. Once the valves are closed, test the faucet to confirm no water is flowing. Next, use pliers or a wrench to disconnect the supply lines from the faucet.
Once the water supply is disconnected, you can begin removing the old sink. If the old sink is secured with clips or screws, use a screwdriver to loosen and remove them. For sinks with a mounting ring, carefully pry it away from the countertop using a putty knife or similar tool. Carefully remove the drain assembly and detach the pop-up stopper. If the old sink utilizes a strainer, remove it as well.
Before discarding the old sink, take note of any potential mounting methods or gasket designs that could be relevant when installing the new sink. These details can provide valuable insight into the installation process.
3. Prepare the Countertop for the New Sink
Once the old sink is removed, the countertop needs preparation to accommodate the new fixture. Carefully inspect the countertop surface for any residue or debris from the old installation. Clean the area thoroughly with a mild cleaner and a damp cloth. Pay close attention to edges and corners where grime or sealant residue may have accumulated.
If the old sink utilized a mounting ring, ensure the countertop cutout is properly sized for the new sink. If necessary, adjust the opening using a jigsaw or other suitable tool. Be sure to wear appropriate safety glasses and gloves during this step.
4. Install the New Sink
With the countertop prepared, you can begin installing the new sink. Start by placing the sink in the countertop cutout, ensuring it aligns flush with the surface. If the sink model includes a mounting ring, install it according to the manufacturer's instructions.
If the sink requires mounting with screws or clips, carefully align and secure them. Tighten the screws or clips evenly to prevent warping or damage to the countertop or sink.
5. Connect the Plumbing and Test for Leaks
After securing the sink, connect the drain assembly and pop-up stopper. Apply plumber's putty to the base of the drain assembly to ensure a secure and watertight seal. Hand-tighten the drain assembly and attach the pop-up stopper.
Next, reconnect the water supply lines to the faucet. Ensure the connections are secure and leak-free using an adjustable wrench.
6. Seal and Finish
Once the plumbing is connected, apply a bead of silicone caulk around the perimeter of the sink to ensure a watertight seal between the sink and countertop. Use a caulk gun to apply the silicone sealant, smoothing it out with a damp finger or caulk tool. Allow the sealant to dry completely according to the manufacturer's instructions before using the sink.
After the sealant has dried, clean the countertop and sink thoroughly to remove any excess sealant or residue.
Replacing a countertop bathroom sink is a DIY project that can enhance your bathroom's aesthetics and functionality. With the right tools, materials, and careful execution, you can easily complete this task. Remember to prioritize safety by wearing appropriate protection and following the outlined instructions for a successful installation.

Replace Vanity Top And Faucet Diy Network

How To Replace A Bathroom Countertop Homeadvisor

How To Remove Replace A Vanity Top Easy Bathroom Sink Remodel

Replace Granite Countertops Transform Your Bathroom S Look

How To Replace A Vanity Top And Save Craving Some Creativity

How To Remove Replace A Vanity Top Easy Bathroom Sink Remodel

How To Remove A Countertop From Vanity Decor Adventures

Diy Replace Vanity Top

How To Install A Bathroom Vanity

Diy Vanity Tops For Your Bathroom
Related Posts


