How to Replace a Panasonic Bathroom Fan
A Panasonic bathroom fan is a crucial component in maintaining a healthy and comfortable bathroom environment. It helps to ventilate moisture, odors, and pollutants, preventing mold growth and creating a more pleasant space. Over time, however, bathroom fans can become noisy, inefficient, or even malfunction. When this occurs, replacing it becomes necessary. This guide provides a step-by-step process for replacing a Panasonic bathroom fan, ensuring the process is smooth and successful.
Step 1: Disconnect Power and Prepare the Area
The first step in replacing a Panasonic bathroom fan is to disconnect the power supply. This is crucial for safety and prevents any potential electrical hazards during the project. Locate the circuit breaker controlling the fan's power and switch it off. Confirm the power is disconnected by using a voltage tester to ensure the circuit is truly de-energized.
Once the power is off, prepare the work area. This involves removing any obstructions such as towel racks, shelves, or decor items that might hinder access to the fan. Clear the floor around the fan to prevent accidental damage or slipping.
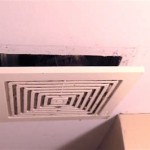
Step 2: Remove the Old Fan
With the power safely disconnected, the next step is to remove the old fan. Begin by removing the cover plate. This usually involves unscrewing a few screws holding it in place. Once the cover is removed, you'll have access to the fan itself.
The fan is typically secured to the ceiling with screws or clips. Examine the fan housing to identify the attachment methods. Carefully detach the fan from the ceiling using the appropriate tools. Once the fan is free from the ceiling, disconnect the electrical wiring. This involves carefully separating the wires connected to the fan from the wires in the ceiling. Note the wire connections to ensure proper reconnection during installation.
Step 3: Install the New Fan
With the old fan removed, it's time to install the new Panasonic fan. Begin by securing the new fan to the ceiling using the same attachment methods as the old fan. Ensure the fan is properly aligned and securely fastened to the ceiling.
Next, reconnect the electrical wiring. Carefully match the wires from the new fan to the corresponding wires in the ceiling, ensuring the connections are secure and properly insulated. If necessary, use wire connectors to join the wires.
Step 4: Secure and Test the New Fan
Once the wiring is complete, replace the cover plate. Ensure the screws are securely fastened to hold the cover plate in place. Finally, turn the power back on at the circuit breaker.
After restoring power, test the new fan by turning it on and checking its functionality. Ensure the fan operates smoothly, without any unusual noises or vibrations. If there are any issues, review the connections or consult the installation instructions.
Step 5: Clean Up and Dispose of the Old Fan
After successfully installing the new fan, clean up the work area. Dispose of the old fan responsibly, following local recycling guidelines.
Replacing a Panasonic bathroom fan can be a straightforward process with proper preparation and careful execution. By following these steps, you can ensure a successful installation, restoring proper ventilation and improving the comfort and hygiene of your bathroom.

How To Install Panasonic Whisper Bathroom Fan

Panasonic Retrofit Exhaust Fan Install Guide

Panasonic Whisperlight Bathroom Fan How To Remove Lightbulb

Diy Bathroom Exhaust Fan Install Panasonic Whisper Fv 0811rf1

Installation Of Panasonic Whisper Choice Pick A Flow Ceiling Bathroom Exhaust Fan Fv 0811rq1

Panasonic Whisperfit Dc Pick A Flow 50 80 110 Cfm Energy Star Quiet Ceiling Bathroom Exhaust Fan W Flex Z Fast Install Bracket Fv 0511vf1 The Home Depot

Panasonic Whisperceiling Dc Fan With Led Lights Pick A Flow Sd Selector 50 80 Or 110 Cfm And Flex Z Fast Install Bracket Fv 0511vql1 The Home Depot

Replacement Light For Panasonic Bath Fan Electrician Talk

Bath Fans For A Better Remodel Panasonic North America United States

Panasonic Retrofit Exhaust Fan Install Guide
Related Posts