How to Replace a Washer in Single Handle Bathroom Faucets
Single handle bathroom faucets, with their sleek design and ease of use, are popular fixtures in modern bathrooms. However, like any mechanical device, they can experience wear and tear. One common issue is a leaky faucet, often caused by a worn-out washer. Replacing the washer is a simple and affordable way to restore your faucet’s functionality.
This article provides a step-by-step guide for replacing the washer in a single handle bathroom faucet. Before starting the repair, it's important to identify the faucet’s type and gather the necessary tools. Single handle faucets come in various configurations, each with its unique internal mechanism. Common types include cartridge faucets, ball faucets, and ceramic disc faucets. Determining the type of faucet is crucial to accurately locate and replace the washer. Identifying the appropriate washer for your particular faucet is also important. While most washers are standard in size, different manufacturers may use slightly varying types.
Preparing for the Replacement
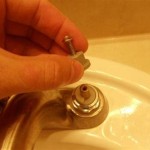
Before disassembling the faucet, it’s essential to shut off the water supply. Locate the water shut-off valve for the bathroom and turn it clockwise to close the valve. To prevent water damage, place a towel or absorbent material beneath the faucet to collect any potential drips. Next, locate the handle attachment screw. It is typically located on the handle's side or underside. Use a small screwdriver to loosen and remove the screw. Once the screw is out, gently pull the handle off the faucet stem. Depending on the faucet model, you may need to use a wrench or pliers to remove the handle.
Locating and Replacing the Washer
With the handle removed, the internal components of the faucet are visible. The washer is typically located at the bottom of the stem, on the end that connects to the spout. In cartridge faucets, the washer may be part of the cartridge assembly. In ball faucets, the washer is usually located in the ball valve assembly. In ceramic disc faucets, the washer is often integrated into the ceramic disc. Depending on the faucet type, you may need to remove additional components to access the washer. For cartridge faucets, the cartridge itself needs to be removed. For ball faucets, the ball valve assembly needs to be disassembled. For ceramic disc faucets, the ceramic disc may need to be unscrewed.
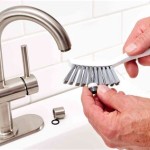
Once you've located the washer, use a small screwdriver or pliers to carefully remove it from the stem. Inspect the old washer for signs of wear or damage. If the washer is cracked, brittle, or worn thin, it's time for a replacement. Compare the old washer with the new one to ensure they are compatible. To install the new washer, simply place it onto the stem, aligning it with the stem's grooves. If there is a spring in the washer assembly, ensure it is properly positioned.
Reassembling the Faucet
After installing the new washer, it's time to reassemble the faucet. Reverse the disassembly process to reassemble the faucet. Start by reinstalling the stem, ensuring it is securely attached to the spout. For cartridge faucets, reinsert the cartridge assembly back into the faucet body. For ball faucets, reassemble the ball valve assembly. For ceramic disc faucets, reattach the ceramic disc. Carefully place the handle back onto the stem and tighten the handle attachment screw. Once the faucet is reassembled, turn the water supply back on. Check for any leaks at the handle, stem, or spout. If there are any leaks, carefully re-tighten the handle screw or recheck the washer installation.
Additional Tips
While replacing the washer is a straightforward repair, here are a few additional tips to ensure a successful outcome. When removing the old washer, be careful not to lose any small parts. If the faucet stem is corroded or damaged, consider replacing the entire stem instead of just the washer. After reassembling the faucet, run the water for several minutes to flush out any debris. If you are unsure about any part of the repair process, consult a professional plumber.

How To Replace A Washer In Leaky Faucet For Dummies

How To Fix A Leaky Faucet True Value

Bathroom My Single Handle Faucet Is Leaking Or Dripping

How To Fix A Leaky Single Handle Tub Shower Faucet Danco

How To Fix A Leaky Bathroom Sink Faucet

How To Fix A Leaky Faucet Guides For Every Design And Style

Is Your Ceramic Disc Faucet Leaking Here S How To Clean Fix It

How To Change A Faucet Washer Plumbing By Jake

How To Repair A Single Handle Kitchen Faucet Diy Family Handyman

How To Fix A Leaking Bathtub Faucet Diy Family Handyman
Related Posts


