How to Replace a Bathroom Ceiling Light Fan
Replacing a bathroom ceiling light fan is a relatively simple task that homeowners can undertake with the right tools and knowledge. This guide will provide a step-by-step process, explaining the necessary precautions and safety measures to ensure a successful and safe replacement.
Before beginning any electrical work, it is essential to ensure the power to the fixture is disconnected. This can be done by turning off the corresponding circuit breaker in the electrical panel. Always double-check that the power is off by using a non-contact voltage tester before proceeding.
Safety Precautions
Prior to starting any electrical work, it is crucial to prioritize safety:
1.
Turn off the power:
Always turn off the circuit breaker for the bathroom ceiling light fan before starting any work. Double-check that the power is off using a non-contact voltage tester.2.
Use appropriate tools:
Use insulated screwdrivers and pliers to handle electrical components.3.
Wear safety glasses:
Protect your eyes from debris.4.
Work with a helper:
It's recommended to have a helper to hold the fixture while you work.5.
Be cautious of water:
Avoid contact with water while working on electrical components.Steps to Replace the Fan
Once you have ensured the power is off and taken the necessary safety precautions, you can proceed with the replacement process:
1.
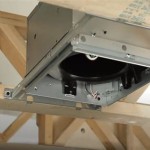
Remove the old fan.
Unscrew the mounting screws that attach the fixture to the electrical box. Carefully disconnect the wires from the fan. If there are any screws holding the fan blades in place, remove them and detach the blades.2.
Install the new fan.
Gently lift the old fan out of the ceiling and set it aside. Align the new fan with the electrical box and secure it with the mounting screws.3.
Connect the wires.
Connect the wires from the new fan to the wires in the electrical box. Make sure you connect the correct wires together. The black wire is typically for power, the white wire is for neutral, and the green or bare wire is for ground.4.
Reinstall the blades and light.
Once the wires are connected, ensure the connection is secure. Reinstall the fan blades, if applicable, and reinstall the light fixture.5.
Test the fan and light.
Turn the power back on at the circuit breaker and test the fan and light to ensure they are working properly.Considerations for New Fan Selection
When choosing a new fan, consider the following factors:
1.
Size:
Choose a fan that is appropriate for the size of the room.2.
Features:
Consider features such as remote control, light options, and different fan speeds.3.
Style:
Select a fan that complements the bathroom's decor.4.
Energy efficiency:
Look for fans with an energy-efficient rating.By following these steps and prioritizing safety, you can successfully replace a bathroom ceiling light fan. If you are uncomfortable with any aspect of the process, it is always best to consult a qualified electrician.
Replacing A Ceiling Fan Light With Regular Fixture Jlc

How To Clean Replace Light Broan Model 678 Exhaust Fan

Broan Nutone Bath Fan Model 765h80l Disassembly Repair Help

How To Replace Or Install An Easy Bath Fan The Home Depot

How To Install A Bathroom Fan With Bluetooth Speakers Fixthisbuildthat

How To Open This Bathroom Exhaust Fan Replace Light Bulb Doityourself Com Community Forums

How To Replace Or Repair A Bathroom Fan

How To Clean Replace Light Broan Model 678 Exhaust Fan

Update An Existing Bathroom Exhaust Fan Cover Remodelaholic

How To Replace Your Bathroom Exhaust Fan Light Bulb Step By Homelyville
Related Posts


