How to Replace the Bottom of a Bathroom Vanity
A bathroom vanity can be a focal point in the room, adding both style and functionality. But over time, the bottom of the vanity can sustain damage, whether from water exposure, wear and tear, or even a simple accident. Fortunately, replacing the bottom of a vanity can be a relatively straightforward DIY project. This article will guide you through the process, step by step.
1. Gather the Necessary Materials and Tools
Before starting any project, it's essential to gather the necessary tools and materials. For this project, you will need:
- New vanity bottom (ensure it matches the existing vanity's dimensions and style)
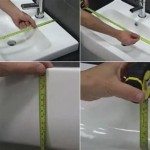
- Measuring tape
- Level
- Circular saw or jigsaw
- Screwdriver or drill
- Wood glue
- Clamps
- Wood filler
- Sandpaper
- Paint or stain (matching the existing vanity)
- Paintbrush or roller
- Safety glasses
- Work gloves
- Dust mask
Ensure you have all the necessary materials before you begin, as this will save you time and frustration in the long run.
2. Remove the Existing Bottom
The first step is to remove the existing vanity bottom. This typically involves removing any screws, bolts, or clips that hold it in place. If the bottom is attached with adhesive, you may need a putty knife or scraper to separate it from the vanity. Be careful not to damage the surrounding structure while removing the bottom. It's recommended to have a friend or assistant help you with this step, especially if the vanity is large or heavy.
3. Prepare the New Vanity Bottom
Once the old bottom is removed, you can prepare the new one. If necessary, you can use a circular saw or jigsaw to trim the new bottom to the exact size. Be sure to use a level to ensure the cut is straight. If you need to make any adjustments to the new bottom, use wood filler to fill in any gaps or cracks. Allow the filler to dry completely before sanding it smooth.
4. Secure the New Vanity Bottom
With the new bottom prepared, you can now secure it to the vanity. Use wood glue to bond the new bottom to the existing structure. Be sure to apply a generous amount of glue to ensure a strong bond. Once the glue is applied, use clamps to hold the new bottom in place until the glue dries. Make sure the clamps are positioned evenly to prevent uneven pressure and warping of the new bottom.
5. Final Touches
After the glue has dried, you can finish the project by sanding the seams and any imperfections smooth. If you're painting the vanity, apply a primer and then the paint. If you're staining, apply a sealant to protect the wood.
6. Safety First
When working with tools and materials, safety should always be top of mind. Wear safety glasses to protect your eyes from flying debris. Wear work gloves to protect your hands from cuts and splinters. And use a dust mask to prevent inhaling sawdust or other airborne particles. Be sure to follow the manufacturer's instructions for the use of any tools or materials.
Replacing the bottom of your bathroom vanity does not have to be a daunting task. By following these steps, you can confidently complete this project and give your bathroom a fresh, updated look. Remember to consult with professionals if you encounter any major challenges.

Rotted Sink Cabinet Floor How To Fix

How To Remove A Bathroom Vanity Budget Dumpster

How To Install A Bathroom Vanity And Sink

How To Install Or Remove A Bathroom Vanity Homeserve Usa

How To Install Bathroom Sink Drain Queen Bee Of Honey Dos

How To Install A Bathroom Vanity

Tutorial How To Install A Bathroom Vanity The Diy Playbook

Repairing A Water Damaged Bathroom Vanity

4 Ways To Fix A Gap Between Vanity And Wall

How To Install A Bathroom Vanity Houseful Of Handmade
Related Posts