How to Replace a Cartridge in a Grohe Bathroom Faucet
Grohe bathroom faucets are known for their quality and durability. However, like all faucets, they can eventually experience issues, often stemming from a worn-out cartridge. Replacing the cartridge is a relatively straightforward process that can restore your faucet to proper working order. This guide provides step-by-step instructions for replacing a Grohe bathroom faucet cartridge.
1. Gather Necessary Tools and Materials
Before beginning the replacement process, gather the necessary tools and materials. This will streamline the process and prevent interruptions. Required items typically include:
- Allen wrench (size varies depending on the faucet model)
- Flathead screwdriver
- Adjustable wrench
- Channel-lock pliers
- Replacement Grohe cartridge (ensure compatibility with your faucet model)
- Cloth or towel
- Bucket or container
- Silicone grease (optional but recommended)
2. Shut Off the Water Supply
Turning off the water supply is crucial to prevent leaks and potential water damage. Locate the shut-off valves under the sink for both hot and cold water lines. Turn them clockwise until they are completely closed. Turn on the faucet to release any remaining water pressure in the lines.
3. Remove the Faucet Handle
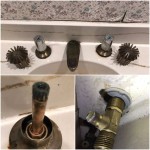
Most Grohe faucet handles are secured with a small set screw, often hidden beneath a decorative cap. Carefully pry off the cap using a flathead screwdriver to reveal the set screw. Use the appropriate size Allen wrench to loosen and remove the set screw. Once the set screw is removed, the handle can be pulled straight off the faucet body.
4. Remove the Escutcheon and Retaining Clip
The escutcheon is the decorative plate surrounding the faucet handle. It may be secured with screws or simply snap-fit onto the faucet body. Remove the escutcheon to access the cartridge retaining clip. The retaining clip is a small metal or plastic piece that holds the cartridge in place. Use a flathead screwdriver or needle-nose pliers to carefully remove the retaining clip.
5. Extract the Old Cartridge
With the retaining clip removed, the cartridge can now be extracted. Some cartridges can be pulled straight out, while others may require gentle twisting or the use of pliers. If the cartridge is difficult to remove, using channel-lock pliers can provide additional grip. Protect the finish of the faucet body by wrapping a cloth around the cartridge before applying pressure with the pliers. Be careful not to damage the faucet body during removal.
6. Install the New Cartridge
Before installing the new cartridge, compare it to the old one to ensure compatibility. Apply a small amount of silicone grease to the O-rings of the new cartridge. This will help ensure a proper seal and smooth operation. Insert the new cartridge into the faucet body, ensuring it is aligned correctly. Push the cartridge firmly into place until it is fully seated. Reinstall the retaining clip, ensuring it snaps securely into position.
7. Reassemble the Faucet
Once the new cartridge is securely in place, reassemble the faucet in the reverse order of disassembly. Replace the escutcheon, ensuring it is properly aligned and secured. Reinstall the faucet handle and secure it with the set screw. Replace the decorative cap over the set screw. Slowly turn the water supply back on, checking for any leaks around the faucet base and handle. If leaks occur, tighten connections as needed or recheck the cartridge installation to ensure a proper seal.
Regular maintenance and timely replacement of worn-out components can significantly extend the lifespan of your Grohe bathroom faucet. While this guide offers comprehensive instructions, consulting the specific instructions provided with your faucet model and replacement cartridge is always recommended for optimal results.

Change A Grohe Basin Mixer Cartridge

Installation Guide Change A Basin Mixer Cartridge Grohe

Installation Guide Change A Basin Mixer Cartridge Grohe

How To Take Apart A Grohe Bathroom Faucet Mr Kitchen Faucets

Disassembling Grohe Ohm Cartridge Basin Mixer

Grohe Concetto Cartridge Change Out

Parts For Grohe Seabury Series Vintage Designer Bath Fixtures

Grohe 45883000 Faucet Cartridge

Grohe Concetto 8 In Widespread 2 Handle Mid Arc Bathroom Faucet Starlight Chrome 20572001 The Home Depot

Installation Guide Change A Basin Mixer Cartridge Grohe
Related Posts


