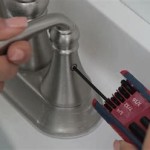
How To Replace a Dripping Bathroom Faucet
A persistently dripping bathroom faucet is more than just an annoyance; it's a drain on resources and a potential source of water damage. Replacing a dripping faucet is a common home maintenance task that, with the right tools and knowledge, can be accomplished by most homeowners. This article provides a comprehensive guide to replacing a bathroom faucet, ensuring a successful and leak-free installation.
Before commencing the replacement, it is crucial to identify the type of faucet currently installed. Bathroom faucets generally fall into several categories: centerset, widespread, single-hole, and wall-mounted. Centerset faucets are typically found on sinks with three holes, spaced four inches apart. Widespread faucets also fit three-hole sinks, but the holes are spaced further apart, often eight inches or more. Single-hole faucets are designed for sinks with only one hole, while wall-mounted faucets are installed directly onto the wall, above the sink.
Understanding the faucet type is essential for selecting an appropriate replacement. It is also important to consider the style and finish of the new faucet to ensure it complements the existing bathroom decor. With the correct faucet selected, the following steps detail the process of removing the old faucet and installing the new one.
1. Preparation: Gathering Tools and Shutting Off the Water Supply
Prior to any physical intervention, preparation is paramount. This involves gathering the necessary tools and, most importantly, shutting off the water supply to the faucet. Neglecting to shut off the water supply will result in a significant water leak and potential damage to the bathroom.
The following tools are typically required for faucet replacement:
*Adjustable wrench: Used for loosening and tightening nuts and bolts.
*Basin wrench: Designed specifically for accessing hard-to-reach nuts under the sink.
*Plumber's tape (Teflon tape): Used to seal threaded connections and prevent leaks.
*Penetrating oil (optional): Can help loosen corroded or stuck nuts.
*Screwdrivers (Phillips and flathead): Needed to remove screws securing the faucet.
*Bucket: To catch any residual water in the pipes.
*Clean rags or towels: For wiping up spills and cleaning surfaces.
*Safety glasses: To protect the eyes from debris.
*Gloves: To protect the hands.
Once the tools are assembled, locate the shut-off valves for the hot and cold water lines supplying the faucet. These valves are typically located under the sink, connected to the supply tubes leading to the faucet. Turn both valves clockwise until they are completely closed. To verify that the water is completely shut off, turn on the faucet. If only a trickle of water comes out, the valves are likely closed. If water continues to flow freely, the shut-off valves may be faulty and need to be addressed before proceeding.
If the shut-off valves are not working, it may be necessary to shut off the main water supply to the house. This is usually located in the basement, garage, or near the water meter. Once the main water supply is shut off, all faucets in the house will be without water. After turning off the water, open the faucet to relieve any residual pressure in the lines. Place a bucket under the sink to catch any remaining water.
2. Removing the Old Faucet
With the water supply safely shut off and the work area prepared, the next step involves disconnecting the water supply lines from the old faucet. This can be a potentially messy task, so it is essential to have a bucket and rags readily available.
Begin by disconnecting the water supply tubes from the faucet tailpieces. These tubes are usually connected with compression fittings or flexible supply lines. Use an adjustable wrench to loosen the nuts connecting the tubes to the faucet. If the connections are corroded or difficult to loosen, apply penetrating oil and allow it to sit for a few minutes before attempting to turn the nuts. Carefully disconnect the tubes, allowing any remaining water to drain into the bucket.
Once the water supply lines are disconnected, the next step is to loosen the mounting hardware that secures the faucet to the sink. This hardware typically consists of nuts and washers located underneath the sink. Accessing these nuts can be challenging, especially in tight spaces. A basin wrench is specifically designed for this purpose, allowing you to reach and turn the nuts from an awkward angle. Loosen the nuts and remove the washers. If the nuts are heavily corroded, penetrating oil can again be helpful.
With the mounting hardware removed, the old faucet should now be free to lift out of the sink. Carefully lift the faucet and any associated escutcheons or base plates. Be mindful of any remaining connections or hoses that may still be attached. If the faucet is stuck, gently rock it back and forth to loosen it. Once the faucet is removed, clean the sink surface thoroughly to remove any old caulk, sealant, or debris. A putty knife or scraper can be used to remove stubborn residue.
3. Installing the New Faucet
With the old faucet removed and the sink surface cleaned, the installation of the new faucet can proceed. Before beginning, carefully read the manufacturer's instructions that came with the new faucet. These instructions will provide specific guidance for your particular model. The general process, however, typically involves the following steps.
Begin by applying a bead of plumber's putty or silicone sealant around the base of the new faucet or escutcheon plate, depending on the manufacturer's instructions. This will create a watertight seal between the faucet and the sink. Insert the faucet into the holes in the sink, ensuring that it is properly aligned and seated. From underneath the sink, attach the mounting hardware, including washers and nuts, to secure the faucet in place. Tighten the nuts evenly, but avoid over-tightening, which could damage the sink or faucet.
Next, connect the water supply lines to the faucet tailpieces. If the new faucet came with new supply lines, use them. If not, inspect the existing supply lines for any signs of wear or damage. If necessary, replace them with new ones of the correct length and diameter. Wrap plumber's tape (Teflon tape) around the threads of the faucet tailpieces before connecting the supply lines. This will help to create a watertight seal. Hand-tighten the supply line nuts, and then use an adjustable wrench to tighten them further, but be careful not to over-tighten. The goal is to achieve a secure connection without damaging the threads.
If the faucet includes a drain assembly, install it according to the manufacturer's instructions. This typically involves inserting the drain body into the sink drain opening, attaching the drain flange from above, and securing them together with a nut and washer from below. Connect the drain linkage to the faucet handle that controls the drain stopper. Adjust the linkage until the stopper opens and closes smoothly. Finally, connect the drain tailpiece to the P-trap, ensuring that all connections are tight and leak-free.
4. Testing for Leaks and Final Adjustments
After completing the installation, the final step is to test for leaks and make any necessary adjustments. Slowly turn on the water supply valves under the sink, one at a time. Carefully inspect all connections for any signs of leaks. Pay particular attention to the supply line connections, the faucet base, and the drain assembly.
If any leaks are detected, immediately turn off the water supply and tighten the connections further. If the leak persists, disassemble the connection, inspect the threads for damage, and reapply plumber's tape. Ensure that all washers and seals are properly seated. Repeat the testing process until all leaks are eliminated.
Once you are confident that there are no leaks, run the faucet for a few minutes to flush out any debris or sediment that may have entered the pipes during the installation process. Check the water temperature to ensure that the hot and cold water lines are connected correctly. If the water is reversed, simply switch the supply lines under the sink.
Finally, inspect the faucet for proper operation. Check that the handle moves smoothly, that the water flow is consistent, and that the drain stopper opens and closes properly. Make any necessary adjustments to the drain linkage or handle position. Clean the sink and surrounding area to remove any remaining debris or water spots.
How To Fix A Bathroom Faucet 14 Steps
How To Fix A Bathroom Faucet 14 Steps
How To Fix A Leaking Bathtub Faucet Diy Family Handyman
Diy How To Replace And Install A Bathroom Sink Faucet
How To Fix A Leaky Faucet True Value
How To Fix A Dripping Moen Faucet Howtolou Com
Simple Ways To Fix A Leaky Delta Bathroom Sink Faucet
How To Fix A Leaking Bathroom Faucet Quit That Drip
How To Fix A Leaky Single Handle Sink Faucet
5 Reasons Your Faucet Is Dripping Water How To Fix It
Related Posts


