How to Replace an Oval Bathroom Sink Drain
Replacing an oval bathroom sink drain, while seemingly daunting, is a manageable task for the average homeowner. This article provides a detailed guide on how to successfully replace an oval bathroom sink drain, covering the necessary tools, step-by-step instructions, and important considerations for achieving a leak-free installation.
Before beginning any plumbing project, it is crucial to understand the importance of safety. Shutting off the water supply is the first and most important step in preventing potential water damage. Gathering all required tools beforehand is essential for a smooth and efficient replacement process. Proper preparation significantly reduces the chances of errors and unnecessary delays.
Preparing for the Replacement
The initial phase involves gathering the appropriate tools and materials. The following items are typically required:
*Adjustable Wrench: Essential for loosening and tightening nuts on the drain assembly.
*Basin Wrench (Sink Wrench): Specifically designed for accessing hard-to-reach nuts under the sink, particularly the large nut securing the drain body.
*Channel-Lock Pliers: Useful for gripping and turning when an adjustable wrench is insufficient.
*Putty Knife or Scraper: Needed to remove old plumber's putty or sealant.
*Plumber's Putty or Silicone Sealant: Used to create a watertight seal between the drain flange and the sink.
*New Oval Bathroom Sink Drain Assembly: Ensure the replacement drain is compatible with the sink's dimensions and existing plumbing.
*Bucket or Container: To catch any residual water during disassembly.
*Clean Rags or Towels: For cleaning and wiping up spills.
*Safety Glasses: To protect eyes from debris.
*Gloves: To protect hands from dirt and chemicals.
*Penetrating Oil (Optional): To help loosen stubborn nuts.
*Small Screwdriver (Optional): May be needed to remove the stopper linkage.
Once the tools are assembled, the next step is to shut off the water supply to the sink. Locate the shut-off valves under the sink, typically found on the supply lines connected to the faucet. Turn both the hot and cold water valves clockwise until they are fully closed. After shutting off the water, turn on the faucet briefly to relieve any remaining pressure in the lines. Place a bucket under the drain pipes to catch any water that may still be present in the P-trap or drain assembly.
Removing the Old Drain Assembly
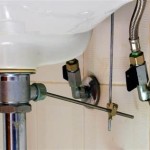
The removal process requires a methodical approach. Disconnecting the existing drain components carefully prevents damage to the plumbing and simplifies the reassembly process. The first step is to detach the P-trap. The P-trap is the curved section of pipe located directly beneath the sink drain. Loosen the slip nuts that connect the P-trap to the tailpiece (the vertical pipe extending from the drain) and the drain pipe leading to the wall. Once the slip nuts are loosened, carefully remove the P-trap, emptying any remaining water into the bucket.
Next, the drain stopper mechanism must be detached. The specific design of the stopper mechanism can vary between different drain assemblies. Common types include pop-up drains and lift-and-turn drains. Typically, there is a pivot rod connected to a clevis strap underneath the sink. This pivot rod controls the movement of the stopper. Disconnect the pivot rod from the clevis strap. There may be a retaining clip or screw that needs to be removed first. Carefully remove the stopper from the drain opening above.
With the P-trap and stopper mechanism removed, the primary drain body can now be addressed. This often involves a large nut securing the drain body to the underside of the sink. This nut can be quite difficult to loosen, especially if it has been in place for an extended period. Using a basin wrench is typically the best option for accessing this nut. Position the basin wrench around the nut, ensuring a secure grip. Apply steady pressure to loosen the nut. If the nut is particularly stubborn, applying penetrating oil may help. Allow the oil to soak for a few minutes before attempting to loosen the nut again.
Once the nut is loosened, carefully unscrew it completely and remove it. With the nut removed, the old drain body should now be free to be pushed upwards from underneath the sink. As the drain body is pushed upwards, carefully scrape away any old plumber's putty or sealant from around the drain flange (the upper part of the drain that sits flush against the sink). Use a putty knife or scraper to remove all traces of the old sealant. Clean the sink surface thoroughly to ensure a clean and smooth surface for the new plumber's putty or sealant.
Installing the New Drain Assembly
Before installing the new drain assembly, inspect it carefully for any defects or missing parts. Refer to the manufacturer's instructions for specific installation guidelines. The first step is to apply a generous ring of plumber's putty or silicone sealant around the underside of the drain flange. The putty or sealant should be thick enough to create a watertight seal when the drain is installed.
Insert the new drain body into the drain opening from above the sink. Center the drain flange in the opening and press down firmly to ensure good contact between the flange and the sink. Excess putty or sealant will squeeze out from under the flange. This is normal and indicates that a good seal is being formed.
From underneath the sink, slide the rubber or fiber washer (if included) onto the drain tailpiece, followed by the mounting nut. Tighten the mounting nut by hand initially. Then, use a basin wrench to fully tighten the nut. Be careful not to overtighten the nut, as this can crack the sink. The goal is to achieve a secure and watertight seal, not to apply excessive force.
After tightening the mounting nut, remove any excess plumber's putty or sealant from around the drain flange. Use a putty knife or scraper to carefully scrape away the excess, leaving a clean and smooth finish. Smooth the remaining putty or sealant with a finger to create a neat and professional appearance.
Reinstall the stopper mechanism. This will involve reconnecting the pivot rod to the clevis strap. Ensure that the stopper operates smoothly and opens and closes properly. Adjust the position of the clevis strap if necessary to achieve the desired stopper movement.
Finally, reconnect the P-trap to the drain tailpiece and the drain pipe leading to the wall. Tighten the slip nuts securely, but be careful not to overtighten them. Ensure that the P-trap is properly aligned to prevent leaks.
Verifying and Finalizing the Installation
Once the drain assembly is fully installed, it is crucial to test for leaks. Slowly turn on the water supply valves under the sink. Check all connections for any signs of water leakage. Pay particular attention to the drain flange, the mounting nut, and the slip nuts on the P-trap.
If any leaks are detected, immediately turn off the water supply and tighten the leaking connection. If the leak persists, disassemble the connection, inspect the components for damage, and reassemble with fresh plumber's putty or sealant if necessary.
After verifying that there are no leaks, allow the water to run for several minutes to ensure that the drain is functioning properly and that no hidden leaks are present. Check the P-trap for any signs of pooling water, which could indicate a slow leak. Observe the area around the sink and under the cabinet for any signs of moisture.
Once satisfied that the installation is leak-free and functioning correctly, clean up the work area and dispose of any old parts and materials properly. Double-check that all tools are accounted for and stored away. The replaced drain needs regular maintenance to prevent future problems.

Plumbing Advice How To Remove A Sink Drain Assembly

Remove Over Mount Porcelain Sink

How To Remove And Replace A Bathroom Sink Diy

Oval Bathroom Sink Basin Chrome Bowl Drain Overflow Installation

Oval Porcelain 22 White Top Mount Bath Sink W Overflow Drain

Oval Ceramic 19 1 4 White Undermount Bath Sink W Overflow Drain

Kraus Elavo 20 1 2 In Oval Porcelain Ceramic Drop Top Mount Bathroom Sink White With Overflow Drain Kct 100 The Home Depot

Luxoval Oval Standard Undercounter Bathroom Sink Gerber

Allen Roth White Drop In Oval Traditional Bathroom Sink 20 X 16 5 At Com

Kohler Bryant White Drop In Oval Transitional Bathroom Sink 20 125 X 16 5 The Sinks Department At Com
Related Posts


