How to Replace an Oval Bathroom Sink Faucet
Replacing an oval bathroom sink faucet can seem like a daunting task, but with the right tools, preparation, and a systematic approach, it is a manageable home improvement project. This article provides a comprehensive guide to replacing an oval bathroom sink faucet, ensuring a smooth and successful installation.
Before embarking on the project, it is crucial to select a replacement faucet that complements the style and dimensions of the oval sink. Measure the existing faucet's spread (the distance between the centers of the hot and cold water inlets) and select a replacement with a compatible spread. Common faucet types include single-hole, center-set, and widespread configurations. Consider the desired finish (chrome, brushed nickel, oil-rubbed bronze, etc.) and the faucet's overall design to ensure it harmonizes with the bathroom's aesthetic.
Gather all necessary tools and materials before beginning the faucet replacement. Having everything readily available will streamline the process and minimize potential disruptions. Here's a list of essential items:
- New faucet
- Basin wrench
- Adjustable wrench
- Plumber's tape
- Pliers
- Screwdriver (Phillips and flathead)
- Bucket
- Towels or rags
- Safety glasses
- Work gloves
- Penetrating oil (optional, for stubborn connections)
- Plumber's putty (optional, for certain faucet models)
Shut Off the Water Supply
The first and most critical step in replacing a faucet is to shut off the water supply to the sink. This prevents flooding and water damage during the removal and installation process. Locate the shut-off valves under the sink; there will be one for hot water and one for cold water. Turn both valves clockwise until they are completely closed. If the shut-off valves are corroded or difficult to turn, do not force them. Instead, locate the main water shut-off valve for the entire house and turn off the water supply from there. Inform all household members that the water will be temporarily unavailable.
Once the water is shut off, turn on the existing faucet to relieve any remaining pressure in the pipes. Place a bucket under the faucet to catch any residual water that may drain out. Keep towels or rags handy to wipe up any spills.
After ensuring the water supply is completely shut off and the pressure is released, disconnect the water supply lines from the existing faucet. Use an adjustable wrench to loosen the connections at the shut-off valves. Be prepared for a small amount of water to drain from the lines, even after the water is shut off. Use the bucket and towels to contain any spills.
If the water supply lines are old or corroded, consider replacing them with new, flexible supply lines. This is a good opportunity to ensure a secure and leak-free connection. Measure the length of the existing supply lines and purchase new lines of the same length. Flexible supply lines are easier to install and provide more flexibility when connecting the faucet.
Remove the Old Faucet
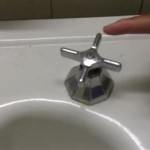
Removing the old faucet can be the most challenging part of the replacement process, especially if the faucet has been in place for many years. Corrosion and mineral buildup can make the connections difficult to loosen. A basin wrench is often required to access the nuts that secure the faucet to the sink from underneath.
A basin wrench is a specialized tool designed to reach into tight spaces and loosen or tighten nuts on plumbing fixtures. The wrench has a long handle with a pivoting jaw that grips the nut. Position the basin wrench on the nut and rotate the handle to loosen it. You may need to apply penetrating oil to the threads to help loosen stubborn nuts. Allow the penetrating oil to soak for several minutes before attempting to loosen the nut again.
In some cases, the nuts may be too corroded to loosen with a basin wrench. If this happens, you may need to use a small saw or cutting tool to carefully cut through the nuts. Be extremely careful not to damage the sink or the surrounding plumbing. Wear safety glasses to protect your eyes from debris.
Once the nuts are loosened, disconnect any other connections to the faucet, such as sprayer hoses or drain linkages. Carefully remove the old faucet from the sink. Clean the sink surface thoroughly to remove any old plumber's putty or debris. Use a scraper or putty knife to remove stubborn residue.
Inspect the sink's mounting surface for any damage or imperfections. If there are cracks or chips, they should be repaired before installing the new faucet. Minor imperfections can be filled with epoxy or sealant. Major damage may require professional repair or replacement of the sink.
Install the New Faucet
Before installing the new faucet, carefully read the manufacturer's instructions. Faucet models vary, and the installation procedures may differ. Familiarize yourself with the specific steps for your new faucet to ensure a proper installation.
Apply plumber's tape to the threads of the faucet's inlets to create a watertight seal. Wrap the tape clockwise around the threads, overlapping each layer. Two or three wraps of tape should be sufficient. Avoid using excessive tape, as this can make it difficult to tighten the connections.
If the faucet requires plumber's putty, apply a bead of putty around the base of the faucet where it will contact the sink. This will create a watertight seal and prevent water from seeping under the faucet. Roll the putty into a rope shape and press it firmly against the base of the faucet.
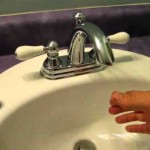
Carefully insert the new faucet into the sink's mounting holes. Ensure that the faucet is properly aligned and centered. From underneath the sink, attach the mounting hardware according to the manufacturer's instructions. This may involve tightening nuts, screws, or clips. Use the basin wrench to tighten the nuts securely, but avoid over-tightening, which can damage the sink or the faucet.
Connect the water supply lines to the faucet's inlets. Ensure that the hot and cold water lines are connected to the correct inlets. Tighten the connections securely with an adjustable wrench. Again, avoid over-tightening. If the faucet has a sprayer hose or drain linkage, connect these according to the manufacturer's instructions.
After connecting all the water supply and drain lines, turn the water supply back on slowly. Check for leaks around all the connections. If you find any leaks, tighten the connections slightly. If the leaks persist, disconnect the connections and reapply plumber's tape or plumber's putty, ensuring a proper seal.
Run the water for several minutes to flush out any debris or air from the pipes. Check the water flow and temperature to ensure that the hot and cold water are working properly. Inspect the drain for any leaks. Adjust the drain linkage if necessary to ensure that the drain stopper opens and closes properly.
Finally, clean the sink and faucet thoroughly. Remove any excess plumber's putty or sealant. Wipe down the faucet with a soft cloth to remove any fingerprints or smudges. Dispose of the old faucet and any used materials properly.

How To Install A Vessel Sink Faucet

How To Replace A Bathroom Faucet Tinged Blue

A Guide To Changing Kitchen And Bathroom Taps

Kraus Elavo 20 1 2 In Oval Porcelain Ceramic Drop Top Mount Bathroom Sink White With Overflow Drain Kct 100 The Home Depot

Kraus Elavo 22 In Oval Porcelain Ceramic Drop Top Mount Bathroom Sink White With Overflow Drain Kct 101 The Home Depot

Hand Crafted 21 Oval Ceramic Sink Sinks Gallery

Oval Cermaic 16 3 4 White Undermount Bath Sink W Overflow Drain

Glacier Bay 21 In Semi Oval Drop Bathroom Sink White 13 0015 4w Gb The Home Depot

Aquaterior Oval Bathroom Vessel Sink Tempered Glass Vanity Above Counter Top Mount Basin Com

Kohler Bryant White Drop In Oval Transitional Bathroom Sink 20 125 X 16 5 The Sinks Department At Com
Related Posts