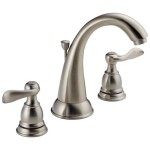
How to Replace a Water Shut-Off Valve Under a Bathroom Sink Drain
Replacing a water shut-off valve under a bathroom sink drain is a common plumbing task that homeowners may encounter. A faulty or leaking valve can lead to water damage and inconvenience. While it's always recommended to consult with a professional plumber, understanding the process and being equipped with the right knowledge and tools can allow individuals to undertake this repair safely and effectively.
This article provides step-by-step instructions on how to replace a water shut-off valve under a bathroom sink drain. It covers the necessary tools, safety precautions, and detailed procedures to ensure a successful replacement. The steps outlined are applicable to most standard bathroom sink configurations. However, variations may exist depending on the specific plumbing system and valve type. Therefore, careful observation and adaptation may be necessary.
Preparing for the Replacement
Before commencing any plumbing work, it is crucial to take adequate preparation steps. This involves gathering the necessary tools and materials, taking safety precautions, and isolating the water supply.
First, assemble the required tools and materials. Essential tools include: * Two adjustable wrenches: These will be used to loosen and tighten fittings. * A basin wrench: This tool is particularly useful for reaching tight spaces under the sink. * A pipe cutter (optional): This may be needed if the existing pipe is corroded or damaged and requires cutting. * A utility knife: For cutting away old sealant or caulk. * A bucket: To catch any residual water. * Towels or rags: For wiping up spills. * A new water shut-off valve: Ensure the new valve is the same size and type as the old one. Determine if it's a compression fitting, sweat-on fitting, or push-fit fitting. The type of replacement valve should match the existing pipe material (copper, PEX, etc.). * Plumber’s tape (Teflon tape): For sealing threaded connections. * Pipe joint compound (optional): For additional sealing, particularly on threaded joints. * Sandpaper or emery cloth: For cleaning copper pipes before soldering (if applicable for sweat-on fittings). * Safety glasses: To protect eyes from debris. * Work gloves: To protect hands.
Second, prioritize safety. The primary safety step is to shut off the main water supply to the house. This is typically located in the basement, utility room, or outside near the water meter. After shutting off the main water supply, open the lowest faucet in the house to relieve any remaining water pressure in the pipes. This will minimize water spillage when disconnecting the old valve. Place a bucket under the sink to catch any residual water that may be trapped in the pipes.
Third, inspect the existing plumbing configuration. Examine the type of pipes connected to the shut-off valve (copper, PEX, etc.) and the type of fittings used (compression, sweat, push-fit). This will determine the best method for disconnecting the old valve and connecting the new one. Take a picture of the existing connections before disassembly as a reference point during reassembly.
Removing the Old Shut-Off Valve
The removal process varies depending on the type of connection used to install the existing shut-off valve. Common types include compression fittings, sweat (soldered) fittings, and push-fit fittings.
For compression fittings, use two adjustable wrenches. Place one wrench on the valve body to hold it steady and the other wrench on the compression nut. Loosen the compression nut by turning it counterclockwise. Once the nut is loose, carefully pull the valve away from the pipe. Repeat this process for the other side of the valve. Be prepared for a small amount of water to spill out.
For sweat (soldered) fittings, this method often requires more skill and experience. It also requires appropriate torch and safety equipment. If unfamiliar with soldering, consult a qualified plumber. Begin by thoroughly drying the area around the valve and pipe. Use a propane torch to carefully heat the solder joint until it melts. Use pliers to gently pull the valve away from the pipe. This may require some force. If the solder does not melt easily, apply more heat gradually. Ensure the torch flame is directed away from flammable materials. After removing the valve, clean the ends of the copper pipes with sandpaper or emery cloth to remove any remaining solder. This will ensure a clean surface for soldering the new valve.
For push-fit fittings, these are generally easier to remove. Use a disconnect clip or tool specific to the brand of push-fit fitting. Place the disconnect clip around the pipe and push it against the release collar of the fitting. While holding the clip in place, pull the valve away from the pipe. The disconnect clip releases the grip of the internal teeth, allowing the valve to be removed. If a specific disconnect clip is not available, some push-fit fittings can be removed by pushing the valve further onto the pipe while simultaneously pulling on the release collar.
After removing the old valve, inspect the pipes for any damage or corrosion. If the pipes are corroded, they may need to be replaced. Minor imperfections can be cleaned with sandpaper or emery cloth. Ensure the pipe ends are clean and free of debris before installing the new valve.
Installing the New Shut-Off Valve
The installation of the new shut-off valve depends on the type of valve and the existing pipe material. Ensure the new valve is compatible with the existing plumbing system.
For compression fittings, begin by sliding the compression nut and then the compression ring (ferrule) onto the pipe. Make sure the compression ring is oriented correctly, with the tapered side facing the valve body. Insert the pipe into the valve body until it is fully seated. Slide the compression ring and nut towards the valve and tighten the nut by hand. Use two adjustable wrenches to tighten the nut further. Place one wrench on the valve body to hold it steady and the other wrench on the nut. Tighten the nut until it is snug, but avoid over-tightening, as this can damage the compression ring or the valve body. Repeat this process for the other side of the valve.
For sweat (soldered) fittings, ensure the copper pipes are clean and free of any oxidation. Apply a thin layer of flux to the outside of the pipe and the inside of the valve fitting. Slide the valve onto the pipe. Heat the fitting with a propane torch until the flux begins to bubble and melt. Touch the solder to the joint where the pipe and fitting meet. The solder should melt and be drawn into the joint by capillary action. Remove the torch and allow the joint to cool naturally. Avoid moving the joint while it is cooling. Repeat this process for the other side of the valve.
For push-fit fittings, ensure the pipe is clean and free of burrs. Mark the insertion depth on the pipe according to the manufacturer's instructions. Push the valve onto the pipe until it reaches the mark. The valve should click into place, indicating that it is securely connected. To ensure a secure connection, gently pull on the valve to verify that it does not come loose. Repeat this process for the other side of the valve.
Before tightening any connections, ensure that the valve is oriented correctly. The handle should be easily accessible and the valve should be aligned with the pipe. Once all connections are made, turn the water supply back on slowly. Inspect all joints for leaks. If a leak is detected, tighten the compression nut or reheat the solder joint as needed. If using push fit, remove the connection and re-insert to ensure a complete seal.
Post-Installation Check and Precautions
After installing the new shut-off valve, a thorough inspection is essential to ensure proper functionality and prevent leaks.
First, slowly turn the main water supply back on. Allow the water to flow through the pipes gradually to avoid any sudden pressure surges. Carefully inspect all connections for leaks. Pay close attention to the compression nuts, solder joints, or push-fit connections. If any leaks are detected, take immediate action to address them. For compression fittings, tighten the nut slightly. For solder joints, the joint may need to be reheated and resoldered. For push-fit connections, ensure the pipe is fully inserted and the connection is secure.
Second, operate the shut-off valve to ensure it functions correctly. Turn the valve on and off several times to verify that it shuts off the water flow completely. Check for any drips or leaks around the valve stem. If the valve is difficult to turn or if it leaks, it may be defective and need to be replaced.
Third, monitor the area around the new valve for several days after installation. Check for any signs of leaks or moisture. Even small leaks can cause significant water damage over time. If any leaks are detected, address them promptly to prevent further damage.
Following these steps will help ensure a successful replacement of a water shut-off valve under a bathroom sink drain. Remember to prioritize safety and consult with a qualified plumber if you are unsure about any aspect of the process.

How To Install Water Shut Off Valve For Sinks

How To Replace A Shut Off Valve Under Your Sink Twin Home Experts

How To Replace Shutoff Valve Under Bathroom Sink

Replace Bathroom Sink Shut Off Valve

Types Of Under Sink Shutoff Valves Kitchen Infinity

How To Replace A Shutoff Valve Diy Family Handyman

How To Install A Water Shut Off Valve 9 Minutes Home Repair Tutor

Install Shut Off Valve Under Sink Replace Faucet Mobile Home Repair

How To Repair A Leaking Sink Shut Off Valve Doityourself Com

How To Replace A Flowtite Push Pull Valve With Standard Shut Off For Dishwasher
Related Posts


