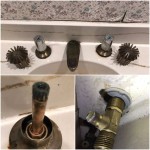
How to Take Out a Sink Drain in a Bathroom
Removing a sink drain in a bathroom is a common plumbing task that can be tackled by most homeowners with basic tools and some patience. This process is essential when you need to replace a damaged drain, clean out a stubborn clog, or access plumbing underneath the sink. This article will guide you through the steps to remove a bathroom sink drain safely and efficiently.
Step 1: Gather the Necessary Tools
Before you begin, gather the following tools to ensure a smooth and successful removal:
- Adjustable wrench
- Channel-lock pliers
- Flat-head screwdriver
- Phillips-head screwdriver
- Bucket or container
- Work gloves
- Optional: Drain snake or plumber's auger
Having these tools readily available will streamline the process and prevent any unnecessary delays.
Step 2: Prepare the Sink and Drain
Prepare the sink and drain area for disassembly by:
- Turning off the water supply to the sink. Locate the shut-off valve under the sink and turn it clockwise to stop the water flow.
- Empty the sink of any water. Use a sponge or towel to absorb any remaining water.
- Remove the overflow plate. This is a small cover located on the side of the sink that prevents water from overflowing. Use a flat-head screwdriver to pry it off.
- Place a bucket or container under the drain to catch any residual water or debris.
These preparatory steps will minimize potential water damage and create a safe workspace.
Step 3: Remove the Drain Assembly
Now, you can begin to remove the drain assembly. The specific components and their removal process may vary slightly depending on the type of drain, but the general steps are as follows:
- Remove the drain stopper: This is the part you use to plug the drain. Depending on its design, you may need to unscrew it, lift it out, or press a release button to disengage it.
- Remove the drain cover: This is the decorative piece that covers the drain assembly. It is usually held in place by a retaining clip or screws. Use your fingers or a flat-head screwdriver to gently lift it off.
- Loosen the tailpiece nut: This is the large nut connecting the tailpiece (the vertical pipe extending from the drain) to the drain body. Use your adjustable wrench to loosen it counterclockwise. You may need to hold the drain body steady with a channel-lock pliers to prevent it from spinning.
- Remove the tailpiece: Once the tailpiece nut is sufficiently loosened, carefully pull the tailpiece down. If it is stuck, you may need to use a drain snake or plumber's auger to dislodge any debris blocking its path.
- Remove the drain body: This is the main part of the drain assembly that sits on the sink. Depending on its design, it may be held in place by a retaining clip, screws, or a threaded ring. Use the appropriate tools to remove it.
As you remove each component, place it in the bucket to avoid losing any parts. Inspect each component for signs of damage, wear, or clogs.
Step 4: Clean or Replace the Drain Assembly
Once the drain assembly is removed, you can clean or replace it as needed. If you are cleaning the drain, follow these steps:
- Clean the drain body: Remove any visible debris from the drain body using a small brush or a wire brush.
- Clean the tailpiece: Clean the inside of the tailpiece with a drain snake or plumber's auger to remove any clogs.
- Rinse all components: Once cleaned, rinse all components with water to remove any remaining debris.
If the drain assembly is damaged or beyond cleaning, replace it with a new one. Ensure you have the correct size and type of replacement drain assembly for your sink.
Step 5: Reassemble the Drain Assembly
Once you have cleaned or replaced the drain assembly, reassemble it in reverse order. Follow these steps:
- Install the new drain body: Place the new drain body back onto the sink and secure it with the retaining clip, screws, or threaded ring, depending on its design.
- Install the tailpiece: Attach the tailpiece to the drain body and tighten the tailpiece nut securely with your adjustable wrench.
- Replace the drain cover: Once the tailpiece is secured, replace the drain cover and secure it with the retaining clip or screws.
- Replace the drain stopper: Put the drain stopper back in place and test it to ensure it closes properly.
- Replace the overflow plate: Install the overflow plate back on the side of the sink using a flat-head screwdriver.
Once the drain assembly is fully reassembled, turn the water supply back on and check for any leaks. If you notice any leaks, tighten the connections or replace any damaged components.

5 Natural Ways To Unclog A Bathroom Sink Hiller How

How To Remove A Bathroom Sink Stopper Take Out Pop Up Drain From

How To Replace A Rusty Sink Drain Howtolou Com

Sink Drain Replacement Bathroom

How To Replace A Bathroom Sink Drain

How To Unclog A Bathroom Sink Hana S Happy Home

How To Replace A Sink Stopper Quick And Simple Home Repair

How To Replace A Pop Up Sink Drain Remove The Old Bathroom Stopper Repair

How To Replace A Drain In The Bathroom Sink Right Way

How To Unclog A Sink The Right Way


