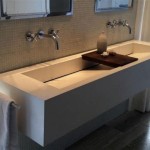
How to Tile a Bathroom Vanity
Tiling a bathroom vanity is a rewarding DIY project that can significantly enhance the aesthetic appeal and functionality of your bathroom. It involves covering the surface of the vanity with tiles, typically ceramic or porcelain, to create a durable and stylish finish. This guide will provide step-by-step instructions and essential tips to help you successfully tile your bathroom vanity.
1. Preparing the Surface
A well-prepared surface is crucial for successful tiling. Begin by removing any existing hardware, such as handles, knobs, and faucets. Then, clean the vanity surface thoroughly using a degreaser or a mild detergent and water. Ensure the surface is completely dry before proceeding.
If the vanity is made of wood, apply a primer to seal the surface and improve adhesion. For other materials, such as laminate or granite, consult with a professional to determine the appropriate preparation steps. If necessary, sand down any rough or uneven areas using sandpaper to create a smooth surface for tile installation.
Once the surface is prepared, mark the layout of the tiles. Consider the size of the tiles and the desired pattern to ensure an even and aesthetically pleasing design. Use a pencil and a level to mark the tile placement and any cuts that will be required.
2. Applying Mortar and Installing Tiles
After the layout is marked, it's time to apply mortar to the vanity surface. Use a notched trowel to spread the mortar evenly, creating grooves that will help the tiles adhere firmly. The size of the notches on the trowel should correspond to the size of the tiles.
Begin placing the tiles on the mortar, starting from a corner or a center point, and working your way outward. Press down firmly on each tile to ensure proper adhesion and a level surface. Use spacers to maintain consistent grout lines between the tiles.
For cutting tiles, consider using a wet saw or a tile cutter for precise and clean cuts. Always wear safety gear, such as goggles and gloves, when working with these tools.
3. Applying Grout and Finishing Touches
After the tiles are installed, allow the mortar to dry completely, as specified by the manufacturer. Once dry, apply grout to fill the spaces between the tiles. Use a grout float to spread the grout evenly and remove any excess.
Allow the grout to set for the required amount of time, and then clean the tiles using a damp sponge to remove any residue. For a polished finish, you can use a grout sealer to protect the grout from stains and water damage.
Reinstall the hardware, such as knobs, handles, and faucets, ensuring they are securely attached. Also, consider adding a backsplash to protect the wall behind the vanity from splashes and spills.

How To Install A Glass Tile Vanity Top Diy

Tiled Bathroom Vanity Remodel Finished Bathrooms

How To Paint Tile Countertops And Our Modern Bathroom Reveal Bright Green Door

Bathroom Design Getting Tile Around The Vanity Right

Tile Bathroom Countertops

Full Bathroom Remodel Part 7 Tile Counter With Sink

Ceramic Tile Bathroom Countertops

Bathroom Design Getting Tile Around The Vanity Right
:strip_icc()/102130266-3174ac7d31314c7abfc80a1b65a11dd6.jpg?strip=all "18 Luxurious Bathroom Countertop Ideas For All Budgets")
18 Luxurious Bathroom Countertop Ideas For All Budgets

Full Bathroom Remodel Part 7 Tile Counter With Sink
Related Posts