How to Vent a Bathroom Fan
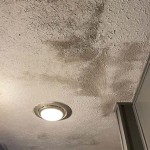
A properly vented bathroom fan plays a crucial role in maintaining a healthy and comfortable environment. By effectively removing moisture, odors, and pollutants, it helps prevent mold growth, mildew formation, and respiratory problems. This article will guide you through the process of venting a bathroom fan, ensuring proper installation and optimal performance.
Choosing the Right Fan
The first step is to select a fan that meets the specific requirements of your bathroom. Consider the following factors:
- Size: The fan's airflow capacity should be sufficient to handle the bathroom's volume. A general rule of thumb is to choose a fan with a cubic feet per minute (CFM) rating of 1 CFM per square foot of bathroom space.
- Noise Level: Opt for a fan with a low decibel rating, especially if the bathroom is located near bedrooms or other quiet areas.
- Features: Some fans offer additional features such as humidity sensors, timers, and lights, which can enhance functionality and convenience.
Once you've chosen a fan, determine the best venting location and path. Ideally, the vent should lead to the exterior of the house, directly outside. If this is not possible, consider using a longer duct run and a booster fan to ensure adequate airflow. However, avoid venting into attics, crawl spaces, or other enclosed areas.
Installation Steps
The installation process involves the following steps:
1. Preparation
Before starting the installation, ensure that the power is turned off to the bathroom circuit. Locate the existing vent opening in the ceiling or wall, and measure its dimensions. If necessary, use a hole saw to create a new opening that matches the size of the fan's housing.
2. Mounting the Fan
Position the fan housing over the vent opening and secure it to the ceiling or wall using screws or brackets. The fan should be flush with the surface and centered on the vent opening.
3. Connecting the Ductwork
Attach the ductwork to the fan's outlet, ensuring a tight fit. Use duct tape or clamps to secure the connections. If using flexible duct, make sure to avoid sharp bends or kinks that can restrict airflow.
4. Electrical Wiring
Carefully connect the fan's wiring to the existing electrical wiring in the bathroom. Refer to the fan's installation instructions for specific wiring diagrams and safety precautions. Make sure to use insulated wire connectors and secure all connections properly.
5. Testing and Finishing
Once the wiring is complete, turn the power back on and test the fan. Ensure that it operates smoothly and that there are no leaks or gaps in the ductwork. Finally, install the fan cover or grill and any decorative trims.
Maintenance and Troubleshooting
To ensure optimal performance, regular maintenance of the bathroom fan is crucial. Clean the fan blades and housing regularly with a damp cloth. If the fan is not working properly, check the following:
- Power Supply: Verify that the power is turned on and that the circuit breaker has not tripped.
- Fan Blades: Inspect the blades for any debris or obstructions that may be preventing them from rotating freely.
- Ductwork: Check the ductwork for blockages, leaks, or loose connections.
- Motor: If the motor is making unusual sounds or not running at all, it might need to be replaced.
By following these guidelines, you can effectively vent your bathroom fan and enjoy a healthier and more comfortable living environment. Remember that if you are unsure about any aspect of the installation or maintenance, it is always advisable to consult with a qualified electrician or HVAC technician.

Blog

Bathroom Exhaust Fans The Complete Guide By Fanco

Effective Ventilation

Bathroom Fan Venting Tips Gui

How To Use An In Line Exhaust Fan Vent Two Bathrooms Diy Family Handyman

Installing A Bathroom Fan Fine Homebuilding

Bathroom Exhaust Fans Building America Solution Center

Adding A Bathroom Fan Fine Homebuilding

Bathroom Vent Ducts Should Extend Out The Roof Gettum Associates Inc

Install A New Bathroom Vent Fan Light The San Fernando Valley Sun
Related Posts


