Installing a Bathroom Exhaust Fan Vent: A Comprehensive Guide
Proper ventilation is crucial in a bathroom environment. Without adequate airflow, excessive moisture can lead to mold and mildew growth, damage to building materials, and unpleasant odors. A bathroom exhaust fan vent serves as a vital component in mitigating these issues by removing moist air and directing it outside the building. This article provides a detailed guide to installing a bathroom exhaust fan vent, covering essential considerations, tools, and step-by-step instructions.
Planning and Preparation: Key Considerations Before Installation
Before embarking on the installation process, careful planning and preparation are essential. This ensures a smooth and efficient installation and minimizes the potential for errors or complications. Several key aspects should be considered during this phase, including fan selection, vent location, and ductwork planning.
Fan Selection: Choosing the right exhaust fan involves considering several factors. The size of the bathroom is a primary determinant. The Home Ventilating Institute (HVI) recommends a minimum of 1 CFM (cubic feet per minute) of airflow per square foot of bathroom space. For example, a 50-square-foot bathroom would require a fan with a CFM rating of at least 50. Additionally, consider the noise level of the fan, measured in sones. Lower sone ratings indicate quieter operation. Features such as humidity sensors, timers, and integrated lighting may also influence the selection process.
Vent Location: The location of the exhaust vent is critical for effective moisture removal. Ideally, the vent should be positioned near the shower or bathtub, where moisture concentration is highest. Placing the vent in the center of the bathroom can also be effective, but may require longer duct runs. Avoid placing the vent directly above a heat source, as this can interfere with its efficiency. Consider the structural elements of the ceiling and attic space when determining the vent's location. Ensuring adequate clearance for the fan housing and ductwork is crucial.
Ductwork Planning: The ductwork is responsible for transporting the moist air from the fan to the outside vent. Proper planning of the duct run is essential for optimal performance. Shorter, straighter duct runs are more efficient and reduce the risk of airflow restriction. Avoid sharp bends, which can impede airflow and increase noise. Rigid metal ductwork is generally preferred over flexible ductwork, as it offers less resistance to airflow. However, flexible ductwork can be useful for navigating tight spaces or making connections to the fan and vent. Ensure the ductwork is properly insulated to prevent condensation and energy loss, particularly in unconditioned attic spaces. The diameter of the ductwork should match the fan's outlet size to ensure optimal airflow. Common duct sizes include 4-inch and 6-inch diameters.
Required Tools and Materials: Before commencing the installation, gather all necessary tools and materials. This includes the exhaust fan, ductwork, vent cap, electrical wiring, and appropriate fasteners. Essential tools include a drill, screwdriver, wire stripper, wire connectors, measuring tape, pencil, utility knife, drywall saw, and safety glasses. Having all materials readily available will streamline the installation process and prevent delays.
Installation Process: A Step-by-Step Guide
The installation process involves several key steps, including cutting the ceiling opening, installing the fan housing, connecting the ductwork, wiring the fan, and installing the exterior vent cap. Each step requires careful attention to detail to ensure a safe and effective installation.
Cutting the Ceiling Opening: Using a stud finder, locate ceiling joists near the planned vent location. Mark the outline of the fan housing on the ceiling, ensuring it is centered between the joists. Use a drywall saw to carefully cut along the marked lines, creating an opening for the fan housing. Take precautions to avoid damaging any existing wiring or plumbing within the ceiling cavity. Wear safety glasses to protect your eyes from falling debris.
Installing the Fan Housing: Position the fan housing within the ceiling opening. Secure the housing to the adjacent ceiling joists using screws or nails. Ensure the housing is level and flush with the ceiling surface. Some fan housings may require additional support, such as mounting brackets or straps. Refer to the manufacturer's instructions for specific installation guidelines.
Connecting the Ductwork: Attach the ductwork to the fan housing outlet using metal foil tape and clamps. Ensure a secure and airtight connection to prevent air leakage. Run the ductwork to the planned location of the exterior vent cap. If necessary, use elbows or bends to navigate around obstacles. Secure the ductwork to framing members using straps or clamps to prevent sagging. Insulate the ductwork with fiberglass or foam insulation, especially in unconditioned spaces. Wrap the insulation securely around the ductwork and seal the seams with tape.
Wiring the Fan: Turn off the power to the bathroom circuit breaker before commencing any electrical work. Locate the electrical wiring in the ceiling cavity. Using wire strippers, strip the insulation from the ends of the wires. Connect the fan's wiring to the existing electrical wiring using wire connectors. Follow the manufacturer's wiring diagram to ensure proper connections. Typically, the fan will have black, white, and green wires. Connect the black wire to the hot wire, the white wire to the neutral wire, and the green wire to the ground wire. Secure the wire connectors with electrical tape. Carefully tuck the wiring back into the electrical box and reattach the box cover. Turn the power back on at the circuit breaker and test the fan to ensure it is functioning properly.
Installing the Exterior Vent Cap: Choose an appropriate location for the exterior vent cap, typically on the roof or sidewall of the building. Ensure the location is clear of obstructions, such as trees or power lines. Cut a hole through the exterior wall or roof to accommodate the vent cap. Apply sealant around the perimeter of the hole to prevent water intrusion. Insert the vent cap into the hole and secure it with screws or nails. Connect the ductwork to the vent cap, ensuring a secure and airtight connection. Install a backdraft damper in the ductwork near the vent cap to prevent outside air from entering the building when the fan is not in operation. This will improve energy efficiency and prevent drafts.
Troubleshooting Common Issues and Final Checks
After completing the installation, it is important to perform several checks to ensure the fan is functioning properly. Additionally, it is important to be aware of common issues that may arise and how to address them.
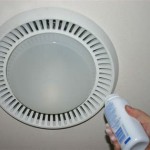
Airflow Verification: Verify that the fan is effectively removing air from the bathroom. Turn on the fan and hold a piece of tissue paper near the vent. The tissue paper should be drawn towards the vent, indicating sufficient airflow. Additionally, check the exterior vent cap to ensure air is being expelled from the ductwork. If the airflow is weak, inspect the ductwork for obstructions or leaks. Ensure the ductwork is properly sized and free of sharp bends.
Noise Level Assessment: Assess the noise level of the fan while it is operating. If the fan is excessively noisy, check for loose components or vibrations. Ensure the fan housing is securely mounted and that the ductwork is not rubbing against any structural elements. Consider replacing the fan with a quieter model if the noise level is unacceptable.
Leak Detection: Inspect the ceiling around the fan housing and the exterior vent cap for any signs of leaks. Water stains or dampness may indicate a leak. If leaks are present, repair the affected areas with sealant or patching compound. Ensure the vent cap is properly sealed to the exterior wall or roof.
Electrical Safety: Verify that all electrical connections are secure and properly insulated. Check for any exposed wires or loose connections. If any electrical issues are identified, immediately turn off the power to the circuit breaker and address the problem. Consult a qualified electrician if necessary.
By following these detailed instructions and taking appropriate precautions, individuals can successfully install a bathroom exhaust fan vent and ensure proper ventilation in their bathrooms. Regular maintenance, such as cleaning the fan blades and vent cover, will help to maintain optimal performance and prolong the life of the fan. Adhering to local building codes and regulations is also crucial throughout the installation process to ensure safety and compliance.

Installing A Bathroom Fan Fine Homebuilding

How To Install A Bathroom Fan Diy Family Handyman

Install A New Bathroom Vent Fan Light

How To Install A Bathroom Fan Step By Guide Bob Vila

How To Install A Bathroom Exhaust Fan Lowe S

Broan Nutone Invent Bath Fan Installation

How To Install A Bathroom Fan 7 Steps For An Easy Diy

How To Install A Bathroom Fan Replacement The Home Depot

Average Cost To Install A Bathroom Fan Forbes Home

Bathroom Exhaust Fans Building America Solution Center
Related Posts


