Mildew Off Bathroom Ceiling: A Comprehensive Guide
Bathrooms, by their very nature, are prone to moisture buildup. This inherent dampness, coupled with warmth and poor ventilation, creates an ideal breeding ground for mildew, a type of fungus characterized by its flat, often black or grey, growth on surfaces. One of the most common areas for mildew to establish itself is the bathroom ceiling.
Addressing mildew on the bathroom ceiling promptly and effectively is crucial for several reasons. Beyond the aesthetic concerns of unsightly stains, untreated mildew can pose health risks, particularly for individuals with allergies, asthma, or compromised immune systems. Furthermore, unchecked mildew growth can damage the ceiling material itself, leading to costly repairs in the long run. This article provides a detailed guide to removing mildew from bathroom ceilings, covering identification, preparation, cleaning, and prevention strategies.
Identifying Mildew vs. Mold
While the terms mildew and mold are often used interchangeably, they are distinct types of fungi with varying characteristics and remediation approaches. Accurately identifying the specific type of fungal growth present is essential for choosing the appropriate cleaning method.
Mildew typically appears as a flat, powdery or fuzzy coating on surfaces. It is often white, grey, or black and has a musty odor. Mold, on the other hand, tends to be thicker and can be green, brown, black, or even pink. Mold growth is often raised or textured and may have a stronger, more pungent smell. Mold can also penetrate deeper into materials than mildew.
In the context of bathroom ceilings, mildew is the more common culprit due to surface moisture. However, in cases of prolonged water leaks or significant humidity, mold can also develop. If there is any doubt about the type of fungal growth present or if the infestation is extensive, it is advisable to consult with a professional mold remediation service for proper identification and treatment.
Preparing for Mildew Removal
Before embarking on the mildew removal process, thorough preparation is essential to ensure safety, prevent further contamination, and facilitate effective cleaning. This involves gathering the necessary supplies, protecting oneself, and preparing the bathroom area.
First, assemble the required cleaning supplies. These typically include: *
Cleaning solution:
Options include diluted bleach solution (1 part bleach to 10 parts water), vinegar, baking soda paste, or commercially available mildew remover. When using any chemical solution, always follow the manufacturer's instructions carefully. *Spray bottle:
For even application of the cleaning solution. *Scrub brush or sponge:
Choose a non-abrasive brush or sponge to avoid damaging the ceiling surface. *Ladder or step stool:
To safely reach the ceiling. Ensure the ladder is stable and positioned on a level surface. *Protective gear:
This is crucial for personal safety and includes: *Gloves:
To protect skin from cleaning solutions and fungal spores. *Eye protection:
Goggles or safety glasses to prevent splashes from entering the eyes. *Mask or respirator:
To avoid inhaling fungal spores and chemical fumes. A N95 respirator is recommended for adequate protection. *Old cloths or paper towels:
For wiping away mildew and cleaning solution. *Plastic sheeting or drop cloths:
To protect the floor and other bathroom surfaces from drips and spills.Next, prepare the bathroom area. Cover the floor and any nearby fixtures with plastic sheeting or drop cloths to protect them from cleaning solutions and mildew spores. Ensure the bathroom is well-ventilated by opening windows or turning on the exhaust fan. Good ventilation helps to remove moisture and reduce the concentration of spores in the air.
Finally, consider testing the cleaning solution on an inconspicuous area of the ceiling before applying it to the entire affected area. This helps to ensure that the solution does not discolor or damage the ceiling material. Apply a small amount of the cleaning solution to a hidden spot and observe the results for a few minutes. If there is no adverse reaction, proceed with cleaning the rest of the mildewed area.
Cleaning Mildew from the Bathroom Ceiling
With the preparation complete, the actual mildew removal process can begin. The specific steps involved will depend on the chosen cleaning solution and the severity of the mildew infestation. However, the following general guidelines apply:
First, apply the chosen cleaning solution to the mildewed area. Use a spray bottle to evenly coat the affected surface. Avoid oversaturating the ceiling, as this can lead to drips and potential water damage. Allow the cleaning solution to dwell on the surface for the recommended time, typically 10-15 minutes. This allows the solution to penetrate the mildew and loosen its grip on the ceiling.
Next, scrub the mildewed area with a scrub brush or sponge. Use gentle, circular motions to lift the mildew from the surface. Avoid scrubbing too vigorously, as this can damage the ceiling material, especially if it is drywall or painted plaster. If the mildew is particularly stubborn, reapply the cleaning solution and allow it to dwell for a longer period before scrubbing again.
After scrubbing, thoroughly rinse the cleaned area with clean water. Use a clean sponge or cloth to wipe away any residual cleaning solution and mildew spores. Ensure that all traces of the cleaning solution are removed, as they can potentially damage the ceiling or leave behind a residue. If necessary, repeat the rinsing process to ensure a thorough cleaning.
Finally, dry the cleaned area completely. Use a clean, dry cloth or paper towels to absorb any excess water. If possible, leave the bathroom well-ventilated to allow the ceiling to air dry completely. This helps to prevent moisture from returning and encouraging new mildew growth. Consider using a dehumidifier to further reduce moisture levels in the bathroom.
For persistent or widespread mildew infestations, it may be necessary to repeat the cleaning process multiple times. If the mildew persists despite repeated cleaning attempts, consider consulting with a professional mold remediation service. They have specialized equipment and expertise to effectively remove stubborn mildew and address underlying moisture problems.
Preventing Future Mildew Growth
While removing existing mildew is important, preventing its recurrence is equally crucial. By implementing preventative measures, the likelihood of future mildew growth on the bathroom ceiling can be significantly reduced. The key to preventing mildew is controlling moisture levels and ensuring proper ventilation.
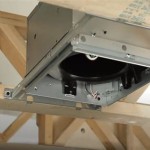
One of the most effective preventative measures is to improve ventilation in the bathroom. Run the exhaust fan during and after showers or baths to remove excess moisture from the air. If the bathroom does not have an exhaust fan, consider installing one. Ensure that the exhaust fan is properly sized for the bathroom and that it vents to the outside of the house, not into the attic or another enclosed space. If natural ventilation is possible, open windows while showering or bathing and for a period afterward to allow moisture to escape.
Another important step is to address any sources of leaks or moisture problems promptly. Repair leaky faucets, showerheads, or pipes immediately to prevent water from accumulating and creating a breeding ground for mildew. Check the shower or tub caulking regularly for cracks or damage and repair or replace it as needed. Ensure that the shower curtain or door seals tightly to prevent water from splashing onto the ceiling and walls.
Furthermore, consider using mildew-resistant paint in the bathroom. These paints contain additives that inhibit the growth of mildew. When repainting the bathroom ceiling, choose a mildew-resistant paint formulated for use in high-moisture environments. Properly prepare the surface before painting by cleaning it thoroughly and applying a primer to ensure good adhesion. Regularly clean the bathroom ceiling to remove dust, dirt, and soap scum that can provide a food source for mildew. Wipe down the ceiling with a damp cloth or sponge every few weeks to prevent buildup.
Finally, maintain low humidity levels in the bathroom. Use a dehumidifier to remove excess moisture from the air, especially during humid seasons. Ensure that towels and bath mats are hung up to dry properly after use. Avoid leaving wet items lying on the floor, as this can contribute to moisture buildup. By consistently implementing these preventative measures, one can effectively minimize the risk of future mildew growth on the bathroom ceiling and maintain a healthy, clean bathroom environment.

Bathroom Ceiling Mold Removal When To Clean Call Branch Environmental

Mold On Bathroom Ceiling How To Clean Off

Mold On Bathroom Ceiling How To Clean Off

How To Get Rid Of Mould From Your Ensuite Ceiling Independent Ie

Bathroom Mold How To Identify And Get Rid Of In Environix

What Is The Best Way To Remove Mold From Bathroom Ceiling

Ceiling Mold Growth Learn The Cause And How To Prevent It Environix

Mold On Bathroom Ceiling Wipe Out With Diy Remedies

Mold On Bathroom Ceiling How To Remove From

Cleaning Mold From Bathroom Ceilings Like A Pro Lovetoknow
Related Posts

