Moen Banbury Bathroom Faucet Installation Instructions
The Moen Banbury bathroom faucet is a popular choice for homeowners seeking a combination of classic design and reliable functionality. This article provides comprehensive installation instructions for the Moen Banbury bathroom faucet, covering essential steps from preparation to final inspection. Adhering to these instructions ensures a secure and leak-free installation, maximizing the faucet's lifespan and performance.
Before commencing any plumbing work, it is crucial to prioritize safety. Turn off the water supply to the existing faucet. Typically, shut-off valves are located beneath the sink. If individual valves are not present, the main water supply to the house needs to be shut off. Confirm water shut-off by turning on the existing faucet and observing a complete cessation of water flow. Gather the necessary tools and materials. These commonly include an adjustable wrench, basin wrench (also known as a faucet wrench), Phillips head screwdriver, flathead screwdriver, plumber's putty, Teflon tape, a bucket, and clean rags.
Carefully disconnect the old faucet from the water supply lines. Place a bucket beneath the connections to catch any residual water. Use the adjustable wrench to loosen the nuts connecting the supply lines to the faucet tailpieces. Once the nuts are loosened, detach the supply lines. Proceed to remove the hold-down nuts securing the old faucet to the sink. These nuts are often located in a tight space and may require the use of a basin wrench. With the hold-down nuts removed, the old faucet can be lifted from the sink. Clean the sink surface thoroughly to remove any old putty, sealant, or debris. A scraper or putty knife may be helpful in removing stubborn residue. Ensure the sink surface is clean and dry before proceeding with the new faucet installation.
Preparing for New Faucet Installation
The Moen Banbury faucet typically comes with the faucet body, a drain assembly, lift rod, water supply lines (sometimes included, otherwise purchased separately), and necessary mounting hardware. Unpack all components and carefully inspect them for any damage. Refer to the parts diagram included in the packaging to verify that all necessary components are present. Apply Teflon tape to the threads of the faucet tailpieces. Wrap the tape clockwise, ensuring the threads are adequately covered. The Teflon tape helps create a watertight seal and prevents leaks. If the faucet includes a base plate or escutcheon, position it on the sink before installing the faucet body.
Insert the faucet body through the mounting holes in the sink. Ensure the faucet is properly aligned and centered. From underneath the sink, attach the mounting hardware supplied with the faucet. This typically consists of washers and nuts. Tighten the nuts evenly to secure the faucet to the sink. Avoid overtightening, which can damage the sink or the faucet body. The faucet should be firmly mounted but not subjected to excessive stress. Check the faucet's alignment and ensure it sits flush against the sink surface. Make necessary adjustments before fully tightening the mounting hardware.
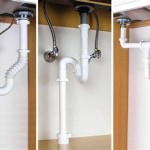
The drain assembly installation is a crucial step for proper functionality. Disassemble the drain assembly components, which typically include the drain body, rubber washers, plastic washers, and a lock nut. Apply a bead of plumber's putty around the underside of the drain flange. Press the drain flange into the sink drain opening, ensuring a watertight seal. From underneath the sink, install the rubber washer, plastic washer, and lock nut onto the drain body. Tighten the lock nut to secure the drain body to the sink. Remove any excess plumber's putty from around the drain flange. Connect the drain tailpiece to the drain body. The tailpiece is the vertical pipe that connects the drain assembly to the P-trap.
Install the P-trap to the drain tailpiece. The P-trap is a curved pipe that traps water and prevents sewer gases from entering the home. Ensure all connections are tight and leak-free. Connect the lift rod to the drain stopper. The lift rod is used to open and close the drain stopper. Follow the manufacturer's instructions for proper lift rod installation and adjustment. Test the drain stopper to ensure it opens and closes smoothly. Make any necessary adjustments to the lift rod linkage.
Connecting Water Supply Lines
Attach the water supply lines to the faucet tailpieces. Use an adjustable wrench to tighten the nuts connecting the supply lines to the tailpieces. Avoid overtightening, which can damage the supply lines or the faucet tailpieces. Connect the other ends of the supply lines to the shut-off valves. Again, use an adjustable wrench to tighten the connections. Before turning on the water supply, inspect all connections for proper alignment and tightness. Ensure there are no kinks or twists in the supply lines.
Slowly turn on the shut-off valves to restore water flow to the faucet. Check all connections for leaks. If leaks are detected, tighten the connections further. If leaks persist, disassemble the connection, inspect the components for damage, and reassemble with fresh Teflon tape. Allow water to flow through the faucet for a few minutes to flush out any debris or air bubbles. Check the water flow rate and temperature. Ensure the hot and cold water are functioning correctly. Inspect the drain assembly for leaks. If leaks are detected, tighten the connections or reapply plumber's putty to the drain flange.
Operate the faucet handle to ensure smooth and proper functionality. Check for any unusual noises or vibrations. Test the drain stopper to ensure it opens and closes smoothly and creates a watertight seal. Inspect the faucet for any cosmetic imperfections or damage. Clean the faucet and sink area with a mild detergent and water. Dry the faucet and sink thoroughly to prevent water spots. Make sure no tools are left in the work area and clear trash and debris.
Final Inspection and Operation
Conduct a final inspection of the entire installation to ensure all connections are secure and leak-free. Check the water flow and temperature again to confirm proper functionality. Operate the faucet handle several times to ensure smooth and consistent operation. Evaluate the overall appearance of the installation and ensure the faucet is properly aligned and centered. Clean the faucet and sink area one last time, removing any fingerprints or smudges.
Properly functioning water flow is crucial. Ensure both hot and cold water flow smoothly and with adequate pressure. If water pressure is low, check the shut-off valves to ensure they are fully open. Inspect the aerator for any debris or blockage. The aerator is a small screen located at the tip of the faucet spout. If the aerator is clogged, remove it and clean it with a small brush or toothpick. Reinstall the aerator and check the water flow again.
The drain should be tested thoroughly. Fill the sink with water and then release the drain stopper. Observe the water draining from the sink. The water should drain quickly and completely. If the water drains slowly, check the P-trap for any obstructions. Remove the P-trap and clean out any debris or blockage. Reinstall the P-trap and test the drain again. Ensure the drain stopper creates a watertight seal when closed. This prevents water from leaking from the sink when the stopper is engaged.
The Moen Banbury faucet is now installed and ready for use. Regular maintenance, such as cleaning the aerator and checking for leaks, will help extend the faucet's lifespan and ensure optimal performance. With proper installation and maintenance, the Moen Banbury faucet will provide years of reliable service.
Moen Ws84924 Banbury 1 2 Gpm Widespread Bathroom Faucet Build Com
Moen Banbury Ws84924srn Two Handle High Arc Bathroom Faucet Spot Resist 26508282694
Moen Banbury 4 In Centerset Double Handle Low Arc Bathroom Faucet Matte Black 84942bl The Home Depot
Moen Banbury 8 In Widespread Double Handle High Arc Bathroom Faucet With Drain Kit And Valve Included Matte Black 84947bl The Home Depot
Moen Banbury 8 In Widespread Double Handle High Arc Bathroom Faucet Spot Resist Brushed Nickel Valve Included 84947srn The Home Depot
Moen Banbury 4 In Centerset Double Handle Low Arc Bathroom Faucet Matte Black 84942bl The Home Depot
Moen Banbury 1 Handle Lever Centerset Bathroom Faucet Chrome Sun City Hardware
Moen Banbury 4 In Centerset Double Handle Low Arc Bathroom Faucet Chrome 84942 The Home Depot
Moen Banbury Two Handle High Arc Bathroom Faucet Hartville Hardware
Moen Banbury 8 Widespread 2 Handle Bathroom Faucet Brushed Nickel Genuine New 26508282694
Related Posts


