Removing a Bathroom Sink Strainer: A Step-by-Step Guide
Bathroom sink strainers are essential for preventing hair, debris, and other unwanted items from clogging the drain. However, they can also become clogged themselves, requiring removal for cleaning. This guide provides a comprehensive overview of how to safely and effectively remove a bathroom sink strainer.
Step 1: Gather the Necessary Tools
Before attempting to remove your sink strainer, gather the following tools to ensure a smooth and safe process:
- Channel-lock pliers: These pliers provide a secure grip on the strainer's nut.
- Adjustable wrench: This tool can be used in conjunction with the channel-lock pliers for added leverage.
- Rubber gloves: Protect your hands from potential dirt or grime during the process.
- Trash bag: Collect any debris or water during the removal process.
- Bucket or bowl: For catching water if the strainer is full.
Step 2: Prepare the Sink
To prevent unnecessary mess and water damage, take the following steps before removing the strainer:
- Turn off the water supply: Locate the shut-off valve for your bathroom sink and turn it off completely.
- Drain the sink: Empty the sink of any remaining water. If the strainer is full of water, use a bucket or bowl to carefully collect it.
- Remove the stopper: If your sink has a separate stopper, remove it before proceeding.
Step 3: Access the Strainer Nut
The strainer nut is typically located underneath the strainer itself. It can be concealed by a decorative cover, a ring-shaped fixture, or simply visible beneath the strainer. Follow these steps to access the nut:
- Locate the nut: Identify the strainer nut, usually made of metal and resembling a small ring. It might be visible or concealed beneath a decorative cover.
- Remove the cover (if applicable): If a cover is present, carefully unscrew it to reveal the nut.
- Clean around the nut: Remove any accumulated debris or grime around the nut to ensure a secure grip.
Step 4: Loosen and Remove the Strainer Nut
Once the nut is accessible, use the following steps to loosen and remove it:
- Grip the nut: Firmly grip the nut with the channel-lock pliers. Ensure the pliers are positioned securely to prevent slipping.
- Turn counterclockwise: Turn the nut counterclockwise to loosen it. You may need to apply some force, especially if the nut is tight.
- Use a wrench (optional): For added leverage, place an adjustable wrench on the opposite side of the nut and turn with the channel-lock pliers. Remember to hold both tools firmly.
- Remove the strainer: Once the nut is loosened completely, the strainer should easily lift out of the sink.
Step 5: Clean the Strainer and Drain
Now that the strainer is removed, you can clean it thoroughly and check the drain for any blockages:
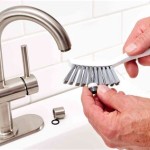
- Clean the strainer: Remove any debris from the strainer using a brush or a small tool. You can also soak it in soapy water to loosen stubborn dirt.
- Inspect the drain: Look into the drain opening for any visible clogs. Use a drain snake or a wire hanger to remove any debris.
Step 6: Reassemble the Sink Strainer
After cleaning the strainer and the drain, reverse the removal process to reassemble the strainer:
- Replace the strainer: Align the strainer with the drain opening and gently push it down until it sits securely.
- Tighten the nut: Reattach the nut to the strainer, turning it clockwise to secure it. Do not overtighten the nut as it can damage the strainer or the sink.
- Replace the cover (if applicable): If a cover was removed, reattach it by screwing it back onto the strainer.
- Turn on the water: Turn on the water supply and check for any leaks around the strainer or the drain.
By following these steps, you can effectively remove your bathroom sink strainer, clean it thoroughly, and ensure proper drainage. Remember to always prioritize safety and use the appropriate tools for the job.

How To Remove A Bathroom Sink Stopper Take Out Pop Up Drain From

How To Fix A Bathroom Sink Drain Stopper 4 Easy Solutions

How To Remove A Sink Stopper The Home Depot

How To Replace A Sink Stopper Quick And Simple Home Repair

How To Fix A Bathroom Sink Stopper Step By Guide London Post

How To Remove A Sink Stopper The Home Depot

9 Easy Steps To Remove A Bathroom Sink Stopper With Pictures

Quick Tip 26 Pop Up Stopper Sticks Misterfix It Com
How To Unclog A Bathroom Sink Larry Sons

How To Remove A Sink Stopper The Home Depot
Related Posts


