Removing Mold From Bathroom Walls and Ceiling
Mold growth in bathrooms is a common problem due to the consistently high humidity levels and poor ventilation often found in these spaces. Mold not only presents an unsightly appearance but can also pose health risks, particularly for individuals with allergies or respiratory sensitivities. Prompt and effective mold removal is crucial to maintain a healthy and safe bathroom environment. This article provides a comprehensive guide on how to identify, remove, and prevent mold growth on bathroom walls and ceilings.
Proper identification is the first step in addressing a mold problem. Mold can appear in various colors and textures, ranging from black, green, brown, or white, and may be fuzzy, slimy, or powdery in appearance. Common areas for mold growth include grout lines, caulk around tubs and showers, painted surfaces, and areas where condensation frequently occurs. Distinguishing mold from mildew is also important. Mildew typically appears as a surface discoloration and can often be removed with simple cleaning solutions, while mold penetrates deeper into surfaces and requires more aggressive treatment.
Before commencing any mold removal process, it is essential to prioritize safety. Mold spores can become airborne during cleaning, potentially causing respiratory irritation. Therefore, the following safety precautions are highly recommended:
- Wear Protective Gear: Always wear a mask (N95 or higher) to prevent inhalation of mold spores. Gloves are necessary to protect skin from direct contact with mold and cleaning solutions. Eye protection, such as goggles, is recommended to prevent eye irritation.
- Ensure Adequate Ventilation: Open windows and doors to provide maximum ventilation during the cleaning process. If natural ventilation is insufficient, use a fan to circulate air and direct it outdoors.
- Contain the Area: If the mold infestation is extensive, consider sealing off the affected area with plastic sheeting to prevent the spread of spores to other parts of the house. Seal the edges of the plastic sheeting with tape to create an airtight barrier.
Once safety precautions are in place, the actual mold removal process can begin. Several effective methods can be employed, depending on the severity of the mold growth and the type of surface affected. The following sections detail various mold removal techniques.
Cleaning Solutions for Mold Removal
Several cleaning solutions are effective for removing mold from bathroom walls and ceilings. The choice of solution often depends on the severity of the mold growth and the surface material being cleaned. It is always advisable to test the solution on a small, inconspicuous area first to ensure it does not damage the surface.
Bleach Solution: A solution of bleach and water is a common and effective mold remover. Mix one part bleach with ten parts water in a spray bottle. Spray the affected area thoroughly and let it sit for 10-15 minutes. Use a scrub brush or sponge to remove the mold, then rinse the area with clean water and dry it thoroughly. Bleach is particularly effective on non-porous surfaces like tiles and grout, but its use on painted surfaces may cause discoloration. It is crucial to ensure adequate ventilation when using bleach.
Vinegar: White vinegar is a natural and less toxic alternative to bleach. It is mildly acidic and can kill approximately 82% of mold species. Pour undiluted white vinegar into a spray bottle and spray it onto the moldy surface. Let it sit for an hour, then wipe the area clean with water and allow it to dry. The vinegar odor will dissipate over time. Vinegar is a good option for less severe mold infestations and is generally safe for most surfaces.
Baking Soda: Baking soda is another natural mold remover and is particularly effective at absorbing moisture and deodorizing. Mix baking soda with water to create a paste. Apply the paste to the moldy area and let it dry. Scrub the area with a brush, then rinse with water and dry thoroughly. Baking soda also helps prevent future mold growth due to its mild alkaline properties.
Hydrogen Peroxide: A 3% hydrogen peroxide solution is an effective mold killer and disinfectant. Pour it into a spray bottle and spray the affected area. Let it sit for 10-15 minutes, then scrub the area with a brush and wipe clean. Hydrogen peroxide is less likely to discolor surfaces compared to bleach, making it a suitable option for painted walls and ceilings.
Commercial Mold Removers: Numerous commercial mold removal products are available at hardware stores and home improvement centers. These products often contain stronger chemicals and may be more effective for severe mold infestations. Always follow the manufacturer's instructions carefully when using commercial mold removers, and ensure adequate ventilation.
Specific Area Treatment
Different areas in the bathroom require specific approaches to mold removal due to variations in materials and susceptibility to moisture. Understanding these nuances is essential for effective and lasting mold remediation.
Grout Lines: Grout lines are highly porous and prone to mold growth. A stiff-bristled brush and a bleach solution are often necessary to effectively remove mold from grout. Apply the bleach solution, let it sit for a few minutes, and then scrub the grout lines vigorously. Rinse with water and dry thoroughly. For stubborn mold stains, a grout stain remover may be required.
Caulk: Mold often grows on caulk around tubs and showers due to its constant exposure to moisture. If the mold is superficial, it can be cleaned using a bleach solution and a scrub brush. However, if the mold has penetrated deep into the caulk, it may be necessary to remove and replace the caulk entirely. Use a utility knife to carefully cut along the edges of the caulk, then peel it away. Clean the area thoroughly before applying new caulk. Ensure the area is completely dry before applying the new caulk to prevent future mold growth.
Painted Walls and Ceilings: Mold on painted surfaces can be cleaned using a mild detergent solution or a diluted bleach solution. Avoid using abrasive cleaners, as they can damage the paint. Gently scrub the affected area with a sponge or soft cloth, then rinse with clean water and dry thoroughly. If the mold stains are persistent, it may be necessary to repaint the affected area. Before repainting, apply a mold-resistant primer to prevent future mold growth.
Shower Curtains and Liners: Shower curtains and liners are often susceptible to mold growth due to their constant exposure to moisture. Fabric shower curtains can be washed in a washing machine with bleach. Vinyl or plastic shower liners can be cleaned with a bleach solution or replaced if heavily soiled. Consider using a quick-drying shower curtain to minimize moisture retention.
Preventing Future Mold Growth
Preventing mold growth is just as important as removing existing mold. By implementing proactive measures, one can significantly reduce the likelihood of future mold infestations in the bathroom.
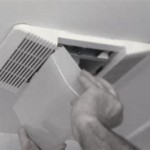
Improve Ventilation: Ensure adequate ventilation in the bathroom by opening windows and doors after showering or bathing. Install or use an exhaust fan to remove excess moisture. The exhaust fan should be used during and after showers and baths to effectively reduce humidity levels.
Control Humidity: Keep humidity levels in the bathroom below 50%. Use a dehumidifier to remove excess moisture from the air. Monitor humidity levels with a hygrometer. Address any leaks or water damage promptly to prevent moisture buildup.
Clean Regularly: Clean the bathroom regularly to remove soap scum and dirt, which can provide a food source for mold. Pay particular attention to grout lines, caulk, and areas prone to moisture. Use mold-resistant cleaning products to inhibit mold growth.
Dry Surfaces: Wipe down wet surfaces after showering or bathing, including walls, floors, and shower doors. Use a squeegee to remove excess water from shower walls and doors. Regularly wash or replace shower curtains and liners.
Use Mold-Resistant Products: When renovating or remodeling the bathroom, use mold-resistant building materials, such as mold-resistant drywall and grout. Apply mold-resistant paint to walls and ceilings. Consider installing a self-drying shower system to minimize moisture retention.
Address Leaks Promptly: Repair any leaks or water damage immediately to prevent moisture buildup. Check under sinks, around toilets, and in shower areas for signs of leaks. Ensure proper drainage in shower and tub areas.
Maintain Proper Airflow: Ensure proper airflow throughout the bathroom by keeping doors open when not in use. Avoid blocking vents or air intakes. Consider installing a passive ventilation system to promote continuous airflow.
By following these guidelines for mold removal and prevention, homeowners can maintain a healthy and mold-free bathroom environment. Regular cleaning, proper ventilation, and prompt attention to moisture problems are key to preventing future mold growth and ensuring a safe and comfortable bathroom space.

How To Permanently Remove Mold From Bathroom Ceiling With Vinegar

How To Get Rid Of Mold In Bathroom Ceiling Step By Guide Aloraircrawlspace

Bathroom Ceiling Mold Removal When To Clean Call Branch Environmental

Clean Mildew From Ceilings And Walls In 10 Minutes No Ladder Or Harsh Chemicals Required

How To Remove Mould From Ceilings Simply Spotless Cleaning

Mold On Bathroom Ceiling How To Remove From Ceilings

Detecting And Preventing Mold Growth On Your Bathroom Ceiling Trusscore

Mold On Bathroom Ceiling How To Remove From Ceilings

Cleaning Mold Off Bathroom Ceiling Top Rated Services In Boston Brabos

How Do You Get Rid Of Mould On Bathroom Walls Igloo Surfaces
Related Posts


