Repairing a Dripping Kohler Bathroom Faucet
A dripping bathroom faucet is a common nuisance that can waste water, damage your bathroom, and even cause frustration. While a Kohler bathroom faucet is generally known for its quality and durability, it can still experience leaks. Thankfully, most dripping faucet issues can be addressed with simple repairs. This guide will walk you through the steps of repairing a dripping Kohler bathroom faucet, helping you understand the causes of the leak and the tools and techniques required for a successful repair.
Identifying the Source of the Leak
Before attempting any repair, it's crucial to identify the source of the leak. This will help you understand the specific part that needs attention. Here are the common areas to inspect:
- Cartridge: The cartridge is the heart of the faucet, responsible for controlling water flow. If it's worn or damaged, it can cause leaks.
- O-rings: These small rubber rings create seals within the faucet, preventing water from escaping. Worn or damaged O-rings are a common cause of leaks.
- Aerator: The aerator is the small metal or plastic piece at the end of the faucet spout. While less common, a damaged or worn aerator can contribute to leaking.
- Valve Seat: The valve seat is located inside the faucet body and acts as a landing point for the valve stem. If the seat is damaged or worn, it can lead to leaks.
To identify the leak source, closely observe where the water is dripping. Pay attention to the drip rate, the position of the leak, and any other signs of water damage, such as discoloration or corrosion.
Tools and Materials Needed
Before you begin the repair process, ensure you have the following tools and materials on hand:
- Adjustable Wrench: For tightening and loosening faucet parts.
- Channel-Lock Pliers: For gripping and turning stubborn nuts and bolts.
- Screwdriver: For removing screws securing faucet parts.
- Replacement Cartridge: If the existing cartridge is worn or damaged.
- Replacement O-rings: If you find damaged O-rings during your inspection.
- Silicone Grease: For lubricating faucet parts and preventing future wear.
- Small Container: To catch any water that might leak during the repair.
- Towel(s): For cleaning up any spills and protecting the surrounding surfaces.
- Safety Glasses: To protect your eyes from any debris.
Repairing a Dripping Kohler Bathroom Faucet
Once you've identified the leak source and gathered the necessary tools, follow these steps to repair your Kohler bathroom faucet:
- Turn off the Water Supply: Locate the shut-off valve for your bathroom faucet. It's typically located beneath the sink. Turn the valve clockwise to shut off the water supply.
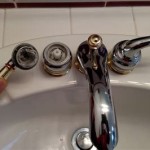
- Remove the Faucet Handle: Use a screwdriver to remove any screws holding the faucet handle in place. Carefully pull the handle off the faucet.
- Remove the Cartridge: Some Kohler faucet cartridges have a retaining clip. Use a screwdriver to remove this and then pull the cartridge out. If your faucet doesn't have a clip, you may need to use an adjustable wrench to loosen and remove the cartridge.
- Inspect and Replace O-rings: After removing the cartridge, examine the O-rings for any signs of wear, cracks, or damage. If they're worn, replace them with new ones. Ensure you use the correct size and type of O-rings.
- Inspect and Replace the Cartridge: If the O-rings are in good shape, inspect the cartridge for wear or damage. If the cartridge is worn, replace it with a new one.
- Clean and Lubricate: Use a damp cloth to clean any debris or calcium deposits from the faucet's internal parts. Apply a thin layer of silicone grease to the new O-rings and the cartridge's sealing surfaces before re-installing it.
- Re-install Parts: Carefully re-install the cartridge, making sure it's properly seated. Replace the faucet handle and tighten the screws securely.
- Turn on the Water Supply: Slowly turn the water supply back on and check for any leaks. If necessary, retighten any loose parts or re-install the cartridge.
If the dripping persists after replacing the cartridge and O-rings, it might be a more complex issue. Consult with a professional plumber for further diagnosis and repair.
Remember, regular maintenance is crucial for preventing future faucet issues. By following these steps and inspecting your Kohler bathroom faucet regularly, you can ensure its longevity and prevent costly repairs down the line.

How To Fix Leaky Bathroom Faucet Kohler Two Handle

Repair A Dripping Kohler Bathroom Faucet

Kohler Faucet Repair Valve Stem Replacement To Stop Dripping

How To Fix Leaky Bathroom Faucet Kohler Two Handle

Kohler Faucet Replace Spline Insert

How To Fix A Leaky Faucet The Home Depot

Have A Question About Kohler Forte 4 In Centerset 2 Handle Low Arc Water Saving Bathroom Faucet Polished Chrome With Sculpted Lever Handles Pg 1 The Home Depot

Kohler Faucet Leak Repair

Kohler Faucet Repair Valve Stem Replacement To Stop Dripping

Kohler Forte 8 In Widespread 2 Handle Low Arc Bathroom Faucet Vibrant Brushed Nickel With Sculpted Lever Handles K 10272 4 Bn The Home Depot
Related Posts
