Replacing a Bathroom Fan, Light, and Heater
A bathroom fan, light, and heater combination unit offers convenience and functionality, but over time, these components may require replacement. This article provides a comprehensive guide on replacing a bathroom fan, light, and heater unit, covering essential steps and considerations.
1. Power Disconnection and Preparation
Before attempting any electrical work, it is crucial to disconnect power to the unit. Locate the circuit breaker controlling the bathroom fan and switch it off. This step ensures safety and prevents electrical shock while working on the unit.
Next, prepare the workspace by removing any obstructions around the fan unit, such as towel racks or shelves. This allows for easier access and maneuverability during the installation process. Ensure adequate lighting for visibility and consider using a stepladder if necessary.
2. Removal of the Existing Unit
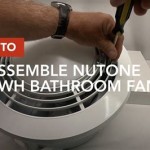
Once the power is off, carefully remove the existing fan unit. Start by detaching the cover plate and removing any screws holding the unit to the ceiling. If the unit is mounted on a ceiling joist, it may be necessary to support it during removal to prevent accidental damage.
Depending on the age and type of unit, there may be additional components to disconnect, such as wiring connections or mounting brackets. Pay attention to the wiring configuration and label any wires for easy reconnection later.
3. Installation of the New Unit
With the old unit removed, it's time to install the new one. Begin by attaching the mounting bracket of the new unit to the ceiling. Ensure the bracket is securely fastened to the joist for stability.
Next, carefully connect the wiring to the new unit. Ensure each wire is securely connected to the corresponding terminal on the unit. Match the wire colors to the corresponding terminals for proper functionality. Consult the manufacturer's instructions if any doubt exists regarding the wiring connections.
Finally, reassemble the unit components, including the cover plate and any decorative trim. Secure the unit to the mounting bracket with the provided screws.
4. Testing and Finishing Touches
After installing the new unit, it's essential to test its functionality. Turn the circuit breaker back on and check if the fan, light, and heater are working correctly. If any component malfunctions, review the wiring connections and consult the manufacturer's instructions.
Once the unit is operating properly, perform a final cleanup of the workspace. Remove any debris or tools used during the installation. Inspect the unit for any loose components or potential safety hazards and address them accordingly.
It is advisable to take note of the manufacturer's instructions and warranty information. The instructions provide detailed guidance on installation, operation, and maintenance of the new unit. The warranty information outlines the terms and conditions for repairs or replacements in case of defects or malfunctions.

How To Add Exhaust Fan Heater Light Fixture Combination

Replacing A Bathroom Fan Light And Heater Doityourself Com

Should I Install A Bathroom Heater Fan Light Combo

Broan Nutone Bath Fan Model 765h80l Disassembly Repair Help

How To Install Bathroom Heater Exhaust Fan Broan Nutone Bhf110

Install A New Bathroom Vent Fan Light

Bathroom Heater Light Fan Installation Information Purchase Ie

How To Replace Broan 765h80lb Heater And Fan Assembly

Bathroom Fan And Heater Exhaust Fans Parts At Com

How To Install A Bathroom Fan Diy Family Handyman
Related Posts


