Replacing a Moen Bathroom Faucet Aerator: A Comprehensive Guide
A bathroom faucet aerator plays a crucial role in regulating water flow, conserving water, and preventing splashing. Over time, aerators can become clogged with mineral deposits, debris, or sediment, leading to reduced water pressure, uneven flow, and decreased efficiency. Replacing a Moen bathroom faucet aerator is a relatively simple and inexpensive task that can significantly improve the performance of the faucet. This article provides a detailed guide on how to replace a Moen bathroom faucet aerator, covering the tools required, step-by-step instructions, and troubleshooting tips.
Understanding the Aerator's Function and Common Issues
The aerator, typically located at the tip of the faucet spout, serves several important functions. It mixes air with water, creating a softer and more consistent stream. This aeration reduces water consumption without sacrificing water pressure, leading to cost savings on water bills. Furthermore, the aerator's mesh screen filters out small particles that may be present in the water supply, preventing them from being dispensed. By controlling water flow, the aerator minimizes splashing, making the faucet more user-friendly.
Common problems associated with a malfunctioning aerator include:
- Reduced water pressure: Mineral buildup or debris accumulation can restrict water flow through the aerator.
- Uneven or sputtering water stream: A partially clogged aerator can cause erratic water flow.
- Splashing: A damaged or missing aerator can lead to excessive splashing.
- Whistling or noisy faucet: Mineral deposits can vibrate within the aerator, generating noise.
- Visible debris in the water: A damaged or deteriorated aerator screen may not effectively filter out particles.
Identifying these issues early can prompt timely replacement of the aerator, preventing further damage or inconvenience.
Gathering Necessary Tools and Materials
Before beginning the replacement process, it is essential to gather the necessary tools and materials. This ensures a smooth and efficient operation. The required items include:
- New Moen aerator: Select an aerator compatible with the specific Moen faucet model. Check the faucet's documentation or Moen's website for compatibility information.
- Aerator removal tool or adjustable wrench: An aerator removal tool is specifically designed to grip and unscrew the aerator without damaging it. An adjustable wrench can be used as an alternative, but care must be taken to avoid scratching the faucet finish.
- Soft cloth or towel: This protects the faucet finish from scratches during the removal and installation process.
- Small screwdriver or pick: This can be used to remove any debris or mineral buildup inside the faucet spout after the aerator is removed.
- Vinegar or descaling solution (optional): Soaking the old aerator in vinegar or a descaling solution can help loosen mineral deposits if it is difficult to remove.
- Plumber's tape (optional): Applying plumber's tape to the aerator threads can ensure a watertight seal.
Having these items readily available will streamline the replacement process and minimize potential delays.
Step-by-Step Instructions for Replacing the Aerator
The following detailed steps outline the process of replacing a Moen bathroom faucet aerator:
- Turn off the water supply: Locate the shut-off valves under the sink and turn them clockwise to completely shut off the water supply to the faucet. This prevents water from flowing during the replacement process, avoiding potential flooding or water damage.
- Protect the faucet finish: Wrap a soft cloth or towel around the faucet spout to protect it from scratches during the aerator removal process. This is especially important when using an adjustable wrench.
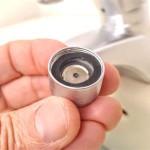
- Remove the old aerator: Insert the aerator removal tool into the aerator. If using an adjustable wrench, carefully adjust the wrench to fit around the aerator. Gently turn the aerator counterclockwise to loosen it. If the aerator is stuck, try soaking it in vinegar or a descaling solution for a few hours before attempting removal again.
- Clean the faucet spout: After removing the old aerator, inspect the inside of the faucet spout for any debris or mineral buildup. Use a small screwdriver or pick to carefully remove any obstructions. Flush the spout with water to ensure it is clean.
- Install the new aerator: Apply plumber's tape (optional) to the threads of the new aerator. This helps to create a watertight seal and prevent leaks. Insert the new aerator into the faucet spout and turn it clockwise until it is snug. Avoid overtightening, as this can damage the aerator or faucet spout.
- Test the faucet: Turn the water supply back on by turning the shut-off valves counterclockwise. Slowly turn on the faucet and check for leaks around the aerator. If leaks are present, tighten the aerator slightly or reapply plumber's tape.
By following these steps carefully, one can successfully replace a Moen bathroom faucet aerator and restore optimal faucet performance.
Troubleshooting Common Issues During Replacement
While replacing a Moen bathroom faucet aerator is generally straightforward, some common issues may arise. Understanding how to troubleshoot these problems can save time and frustration.
Aerator is stuck: If the aerator is difficult to remove, it is likely due to mineral buildup. Soaking the aerator in vinegar or a descaling solution for several hours can help loosen the deposits. Alternatively, applying heat gently with a hairdryer can also help to expand the metal and loosen the aerator. Be cautious not to overheat the faucet, as this could damage the finish.
Faucet drips after replacement: If the faucet drips after installing the new aerator, it could be due to improper sealing. Ensure that the aerator is tightened sufficiently, but not overtightened. Check that the O-ring or rubber gasket on the aerator is properly seated. Applying plumber's tape to the aerator threads can also help to create a tighter seal.
Incorrect aerator size: Using the wrong size aerator can prevent proper installation and functionality. Consult the faucet's documentation or Moen's website to determine the correct aerator size for the specific faucet model. Using an incompatible aerator can damage the faucet threads or prevent a proper seal.
Damaged faucet threads: If the faucet threads are damaged, the new aerator may not be able to screw in securely. In this case, the faucet may need to be repaired or replaced. Consider contacting a professional plumber for assistance.
Water pressure remains low: If water pressure remains low after replacing the aerator, the problem may lie elsewhere. Check the shut-off valves under the sink to ensure they are fully open. Inspect the water supply lines for kinks or obstructions. If the problem persists, there may be an issue with the plumbing system, requiring professional attention.
Maintaining the New Aerator for Longevity
To ensure the longevity and optimal performance of the new Moen bathroom faucet aerator, regular maintenance is recommended. This involves periodically cleaning the aerator to remove mineral deposits and debris. To clean the aerator, unscrew it from the faucet spout and rinse it under running water. Use a small brush or toothbrush to gently scrub away any visible buildup. For stubborn deposits, soak the aerator in vinegar or a descaling solution for a few hours before rinsing. Reinstall the aerator after cleaning.
The frequency of cleaning depends on the water quality in the area. If the water is hard or contains a high mineral content, more frequent cleaning may be necessary. Regularly inspecting the aerator for signs of damage or wear can also help to prevent problems before they escalate.
By implementing these maintenance practices, the lifespan of the Moen bathroom faucet aerator can be extended, ensuring continued optimal performance and water conservation.

Moen Eva 6410 Faucet Aerator Upgrade Replacement Repair 137401

Plumbing Removing Moen Kitchen Faucet Aerator Home Improvement Stack Exchange

How To Remove A Moen Genta Bathroom Faucet Aerator Clean For Better Water Flow And Pressure

Remove Aerator From Moen Faucet Non Threaded

How To Remove A Moen Kitchen Faucet Aerator

Danco Aerator Key

Moen Faucet Sprayer Aerator Removal Tool By Nick S Free Stl Model Printables Com

Danco 9d00011032 Aerator Removal Key

Neoperl 1 5 Gpm M21 In X Moen Water Saving Aerator With Key 37 0291 98 The Home Depot

How Do I Make A Faucet Pour Instead Of Spray Home Improvement Stack Exchange
Related Posts


