RV Bathroom Sink Leaking Underneath: Troubleshooting and Repair
A leaking bathroom sink in a recreational vehicle (RV) can quickly transition from a minor annoyance to a significant problem. Beyond the inconvenience of water stains and dampness, unchecked leaks can lead to mold growth, structural damage to the RV's subfloor and surrounding cabinetry, and wasted water from the RV's limited water supply. Identifying the source of the leak and implementing appropriate repairs promptly is crucial for maintaining the integrity and habitability of the RV. This article provides a comprehensive guide to troubleshooting and repairing an RV bathroom sink leak occurring underneath the sink.
The confined space and unique plumbing configurations often found in RV bathrooms can make diagnosing and addressing leaks more challenging than in a typical residential setting. Understanding the common causes of these leaks and knowing how to systematically investigate them can streamline the repair process and help prevent further damage. Before commencing any repairs, safety precautions are paramount. Always disconnect the RV from its water source and if applicable, turn off the RV's water pump. Gather necessary tools and equipment, including adjustable wrenches, a plumber's putty, Teflon tape, a basin wrench (if replacing the faucet), towels or a bucket to catch water, and a flashlight or headlamp for better visibility.
Key Point 1: Identifying Potential Leak Sources Underneath the RV Bathroom Sink
Pinpointing the exact location of the leak is the first critical step. Several components underneath the RV bathroom sink are potential sources of leaks. A systematic approach to inspecting each of these components will help efficiently isolate the problem area.
Drain Connections: Inspect the drainpipe connections, including the P-trap. The P-trap is the curved section of pipe designed to hold a small amount of water, preventing sewer gases from entering the RV. Check the threaded connections of the P-trap and the connections where the drainpipe joins the sink drain and the main drain line. Look for signs of water droplets, mineral deposits, or corrosion around these connections. Over time, the threaded connections can loosen due to vibrations and temperature fluctuations experienced during travel, leading to leaks. Similarly, the plastic drainpipes commonly used in RVs can become brittle and crack, especially at the joints.
Faucet Connections: Examine the hot and cold-water supply lines that connect to the faucet. These lines are often made of flexible plastic tubing or braided stainless-steel hoses. Check the connections at the faucet tailpieces (the threaded extensions coming from the faucet), as well as the connections at the shut-off valves (if installed) or the main water lines. Look for signs of leaks, such as water droplets or dampness. Ensure the supply lines are not kinked or damaged, as this can weaken the material and cause leaks. Also inspect the faucet body itself for any signs of cracks or leaks, particularly around the base where it mounts to the sink.
Sink Drain Assembly: The sink drain assembly, which connects the sink basin to the drainpipe, is another potential leak source. This assembly typically consists of a flange that sits inside the sink basin, a rubber or plastic gasket, and a threaded tailpiece that connects to the drainpipe. Over time, the gasket can deteriorate, or the threaded connections can loosen, causing leaks. Inspect the area around the drain flange inside the sink basin for signs of water seepage, and check the underside of the sink where the tailpiece connects to the drainpipe.
Supply Line Connections: Check the connections between the water supply lines and the shut-off valves (if installed). These connections often utilize compression fittings or threaded fittings. Look for any signs of water leakage, corrosion or mineral buildup. If the supply lines are made of flexible plastic tubing make sure there are no visible cracks or damage.
To aid in the identification process, dry the area underneath the sink thoroughly with a towel. Then, turn on the water supply slowly and carefully observe each connection point. This allows you to pinpoint the exact origin of the leak. Using a flashlight or headlamp will improve visibility in the often-dark and cramped space.
Key Point 2: Repairing Common RV Bathroom Sink Leak Sources
Once the source of the leak has been identified, the appropriate repair can be undertaken. The specific repair method will depend on the location and nature of the leak. Below are common repair methods for the previously mentioned leak sources.
Tightening Connections: If the leak is originating from a loose threaded connection, gently tightening the connection may resolve the issue. Use an adjustable wrench to tighten the connection, but be careful not to overtighten, as this can damage the plastic pipes or fittings. If the connection is excessively tight and still leaking, the threads may be damaged, requiring replacement of the fitting or pipe.
Replacing Washers and O-rings: Leaks from faucet connections or drain assemblies often result from worn or damaged washers and o-rings. Turn off the water supply and disconnect the leaking component. Remove the old washer or o-ring and replace it with a new one of the correct size and type. Apply a thin layer of plumber's grease to the new washer or o-ring to ensure a good seal and prevent future leaks. Reassemble the connection and test for leaks. Ensure the replacement washers and o-rings are designed for plumbing applications and are compatible with the materials of the pipes and fittings.
Using Plumber's Putty and Teflon Tape: For leaks around the sink drain assembly, plumber's putty and Teflon tape can be used to create a watertight seal. Remove the drain assembly and clean the surfaces where the putty and tape will be applied. Roll a rope of plumber's putty and apply it to the underside of the drain flange where it will contact the sink basin. Apply Teflon tape to the threads of the drain tailpiece before connecting it to the drainpipe. Tighten the connections securely and remove any excess putty. Teflon tape should be applied in the direction of the thread, ensuring it tightens as the fitting is screwed in.
Replacing Pipes and Fittings: If the leak is caused by a cracked or damaged pipe or fitting, the affected component must be replaced. Measure the length and diameter of the existing pipe and purchase a replacement of the same size and material. If using plastic pipes, use PVC cement to join the new pipe to the existing plumbing. Ensure the connections are clean and dry before applying the cement. Allow the cement to cure completely before turning on the water supply. When replacing fittings, ensure the new fitting is compatible with the existing pipes and connections. Using incompatible materials can lead to leaks and corrosion.
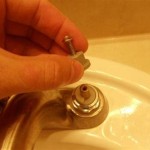
Faucet Replacement: If the faucet itself is leaking, particularly from the faucet body or spout, it may be necessary to replace the entire faucet. Turn off the water supply and disconnect the water lines from the faucet. Remove the mounting hardware that secures the faucet to the sink. Install the new faucet according to the manufacturer's instructions. Ensure all connections are tight and secure before turning on the water supply.
Key Point 3: Preventative Measures to Minimize Future Leaks
Implementing preventative measures can significantly reduce the likelihood of future RV bathroom sink leaks. Regular maintenance and inspections can identify potential problems before they escalate into major issues.
Regular Inspections: Periodically inspect all plumbing connections underneath the sink for signs of leaks, corrosion, or damage. Pay particular attention to connections that are difficult to access. Use a flashlight to illuminate these areas and a dry cloth to check for dampness. Early detection of minor leaks allows for timely repairs, preventing significant damage and water wastage.
Tightening Connections Periodically: Over time, vibrations from travel can loosen plumbing connections. Periodically tighten all threaded connections using an adjustable wrench. However, exercise caution not to overtighten, as this can damage the plastic pipes or fittings. A gentle, firm tightening is usually sufficient to maintain a secure connection.
Winterization: During periods of freezing temperatures, proper winterization is crucial to prevent pipes from freezing and bursting. Drain all water from the RV's plumbing system, including the bathroom sink. Add RV antifreeze to the plumbing system to protect against freezing. Follow the manufacturer's instructions for winterizing the RV. Neglecting to winterize can lead to extensive plumbing damage, including burst pipes, which can be costly and time-consuming to repair.
Using RV-Specific Plumbing Components: When replacing pipes or fittings, use RV-specific plumbing components whenever possible. These components are designed to withstand the vibrations and temperature fluctuations associated with RV travel. They are also typically made of materials that are resistant to corrosion and damage from RV antifreeze.
Utilizing Support Brackets: Install support brackets for long runs of plumbing pipes. These brackets can help to reduce stress on the connections and prevent them from loosening or breaking due to vibrations. Ensure the brackets are securely attached to the RV's frame or interior walls for maximum support.
Gentle Use of Faucet: Avoid applying excessive force when turning the faucet handles. Over time, this can damage the faucet mechanism and lead to leaks. Turning the handles gently will prolong the life of the faucet and prevent unnecessary strain on the plumbing system.
By addressing leaks promptly and implementing these preventative measures, RV owners can maintain a water-tight and functional bathroom sink, protecting their investment and ensuring comfortable travels.

Bad Smell Coming From Under The Rv Sink

Rv Kitchen Sink Leaking A Comprehensive Guide To Detection And Repair The Compact

Rv Kitchen Sink Leaking A Comprehensive Guide To Detection And Repair The Compact

Water Leak Under Bathroom Sink Forest River Forums

Rv Shower Has Water Leaking Out Underneath Busted
Water Leaking Under Bathroom Sink Cabinet Irv2 Forums

Replacing The Plastic Bathroom Rv Faucet And Checking For Water Leaks Under Sink Area Step By

Rv Kitchen Sink Leaking A Comprehensive Guide To Detection And Repair The Compact
Water Leak Under Bathroom Sink Forest River Forums
Water Leaking Under Bathroom Sink Cabinet Irv2 Forums
Related Posts
